We have 2 separate email accounts at UVM if you are on the medical faculty: (1) the College of Medicine aka med.uvm.edu and (2) the hospital aka uvmhealth.org. They don’t integrate. (There’s actually a 3rd one with the University aka uvm.edu without the med, but that easily forwards to the College of Medicine email.) Having two separate inboxes is kind of a pain but is somewhat manageable. Having two separate calendars is nonsense. I use my College of Medicine email as my primary and only calendar.
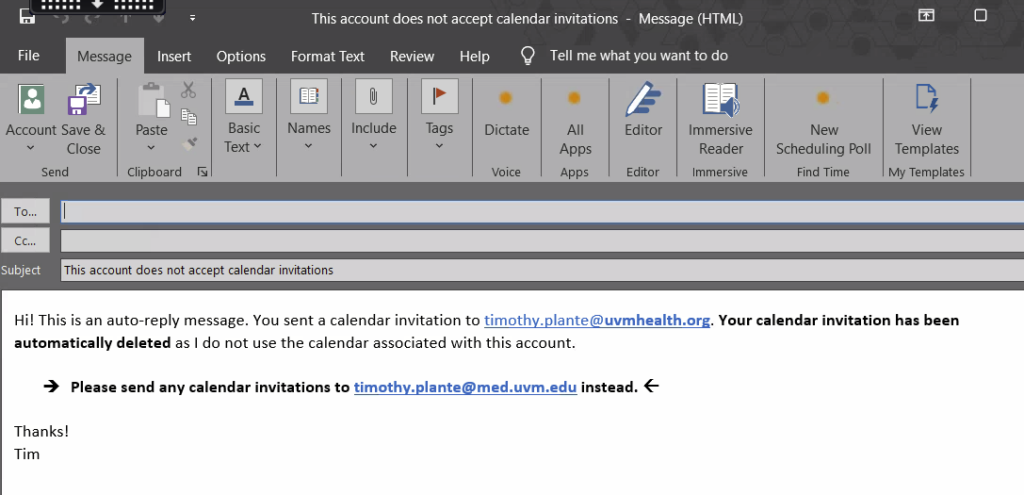
To keep my hospital calendar from being used accidentally by well-meaning people trying to send me calendar invites, I set up a rule in my hospital Outlook account that automatically sends a reply to all calendar invitations. This reply says that the invite was deleted and to send the invite to my College of Medicine account instead. Works like a charm.
Here’s how I did it.
Step 1: Open up the desktop version of Outlook for the calendar you don’t want to use
This won’t work with the internet browser version of Outlook. For med.uvm.edu, use your desktop version of Outlook, which you can install on any device.
For uvmhealth.org, accessing the Outlook desktop app is a bit more complicated. On campus, log into a hospital-owned desktop and open up Outlook. Off campus, log into the Citrix Workspace portal using your hospital credentials then open up the virtual desktop that’s under the “Desktops” tab.
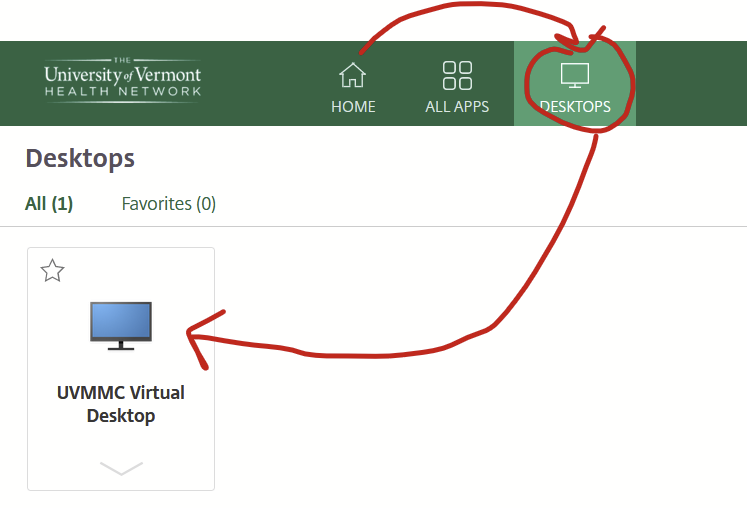
Wait for the virtual desktop to open then open up the desktop version of Outlook.
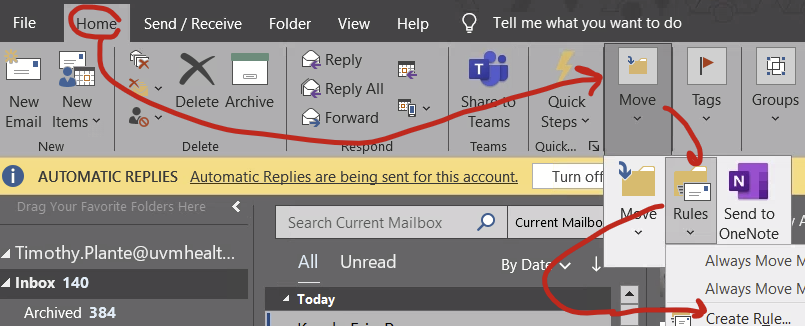
Step 2: Open up the “Rules” function
This is hidden under the Home –> Move –> Rules –> “Create rule…” if your window isn’t all the way expanded or Home –> Rules –> “Create rule…” if your window is really big.
Step 3: Make a rule
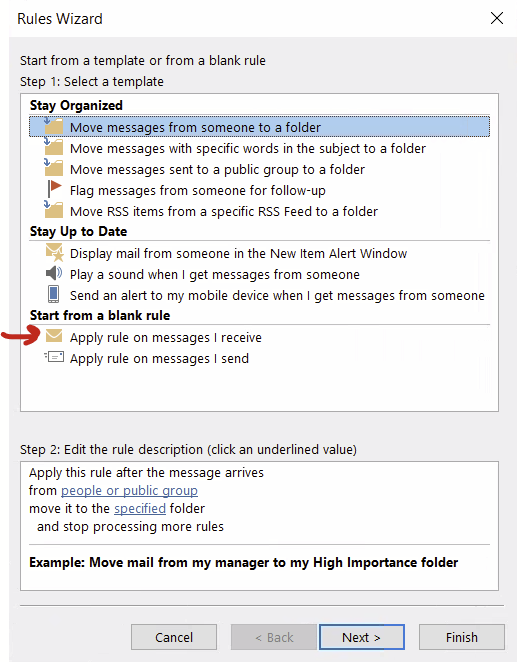
In the Rules and Alerts pop-up, select “new rule…”

On the Rules Wizard, select “Start from a blank rule… Apply rule on messages I receive” and click next.
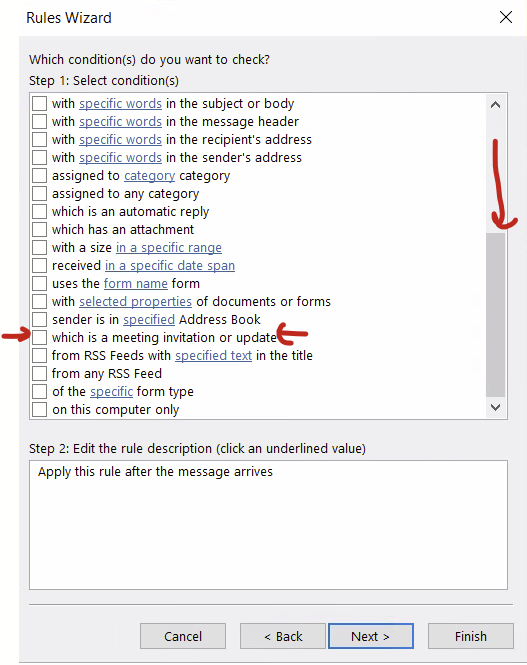
In your new rule, select for Select Conditions, scroll way down and select “Which is a meeting invitation or update” and click next
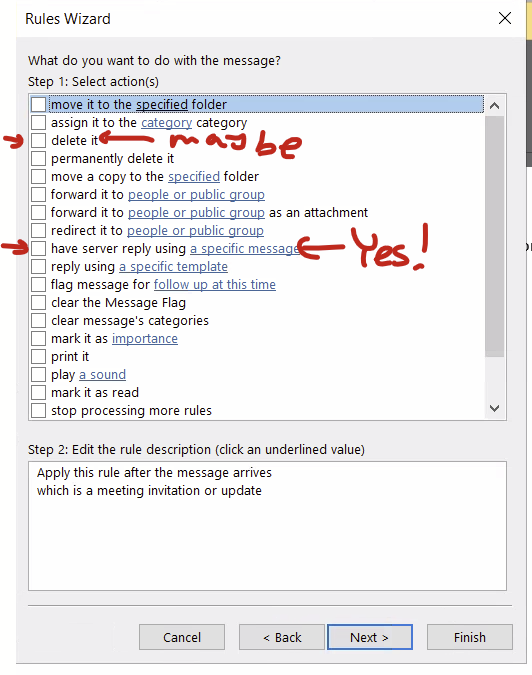
For Select actions, select “have server reply using a specific message” at the very least. You can also select “delete it” if you want to really delete it but you can also just pretend you are deleting it and folks will assume you really did delete it. It’s the same effect in my opinion.
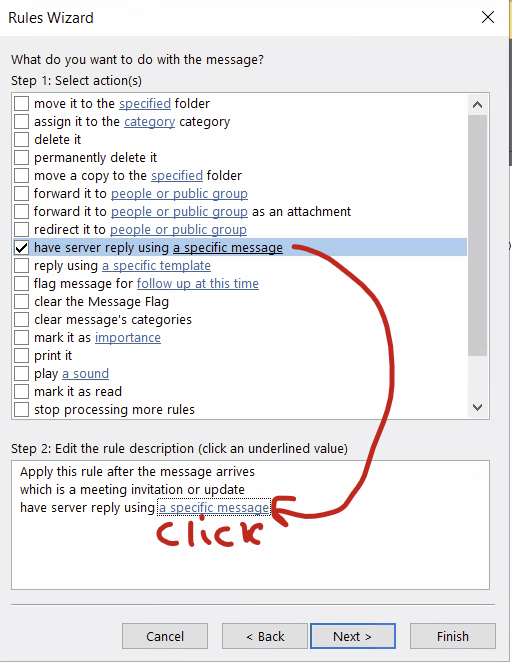
After checking at least the “have the server reply…” option, click at the link in the bottom half of the window to pop up the “specific message” to reply with.
This pops up a blank message that you can fill out. Make sure to fill out a very clear subject line as well as the actual message that will go back to the person who sent you the calendar invite. Hit “save and close” when done. Then click “next” on the Select Options menu.
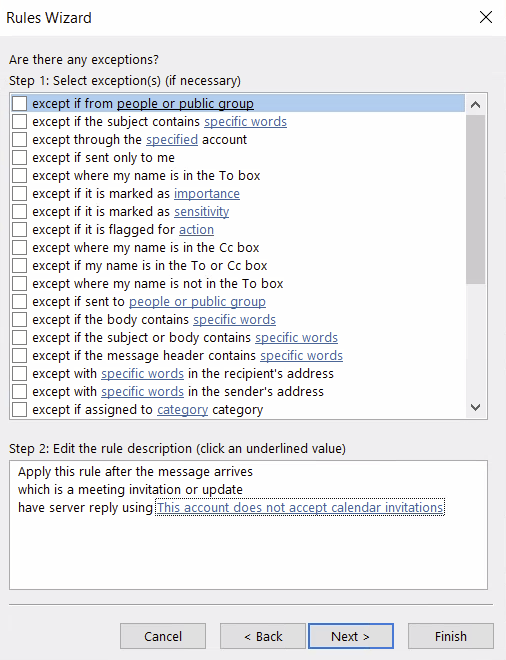
For Exceptions, I didn’t include any exceptions so this was blank and I clicked next.
Then turn the rule on and you should be good to go! Give it a test by sending a calendar invite from your other account.