
This guide provides background on planning for drains and drainage from produce wash and pack areas. Direct drains, floor and spot drains, and trench and gutter drains are discussed. A construction drawing for a trench drain is also provided.
PDF versions of this guide and the trench drain schematic are available for download.
Introduction
Drains provide an intentional path for wash water and other effluent to leave the produce wash and pack area. This is an important element of hygienic design – designing spaces to be cleanable and avoiding cross contamination.
Water leaving sinks, spray tables, wash lines, barrel or drum washers, dunk tanks, or dump tanks should be intentionally routed away from the area where produce is being handled to avoid potential cross-contamination. This is what drains are meant to do, but there are some details in their design, installation, and use that should be considered to make sure they work as intended.
The first detail to be considered is which type or types of drain to use.
Types of Drains
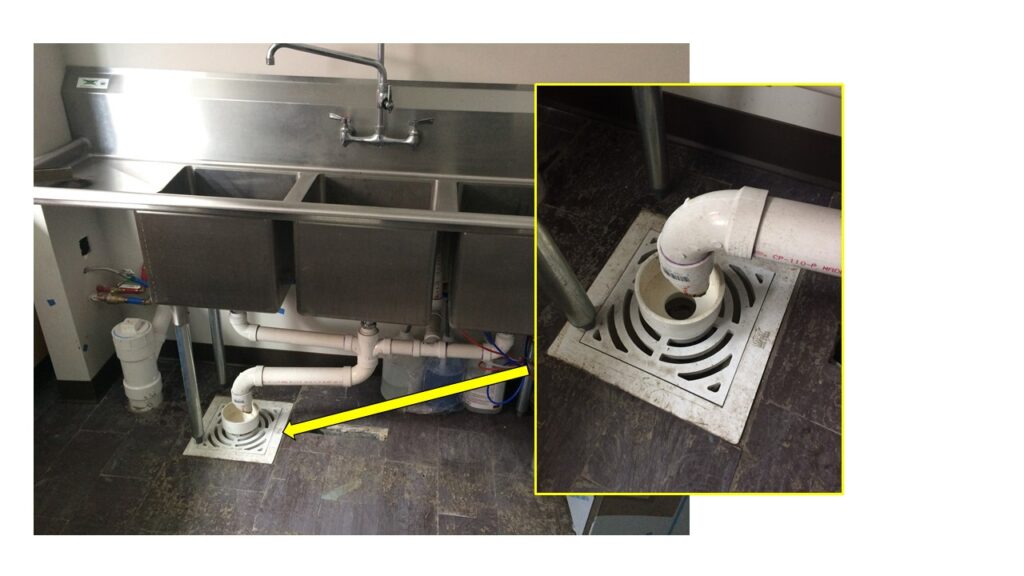
Direct Drains
Direct drains are common when sinks and tanks are used. These drains are often fabricated with hard plumbed piping but can also be made of flexible hose. Typically, direct drains are connected directly to an outlet of a sink, tank or catch pan under a wash line and provide drainage directly to an outlet such as a septic tank, catch basin or vegetative swale. A hand valve is often installed close to the outlet drain of the vessel to open or close the drain to either allow or prevent flow. Direct drains are well suited to lower flow rates and cleaner water with less debris. Plan on including clean out ports in your drain line.
Air Break and Back-Flow Prevention
An air break is often included in direct drains for two reasons. First, an air break can mitigate the impact of backflow resulting from an obstruction downstream. In the case of an obstruction or clogged drain resulting in a backup, the overflow will occur at the air break preventing contact of the effluent with the tank or other vessel above or upstream of the air break. Secondly, maintenance, cleaning, and inspection is eased when an air break is included. More information on backflow prevention, air breaks, and check valves is provided in the guide sheet, “Backflow Prevention for Produce Farms.”
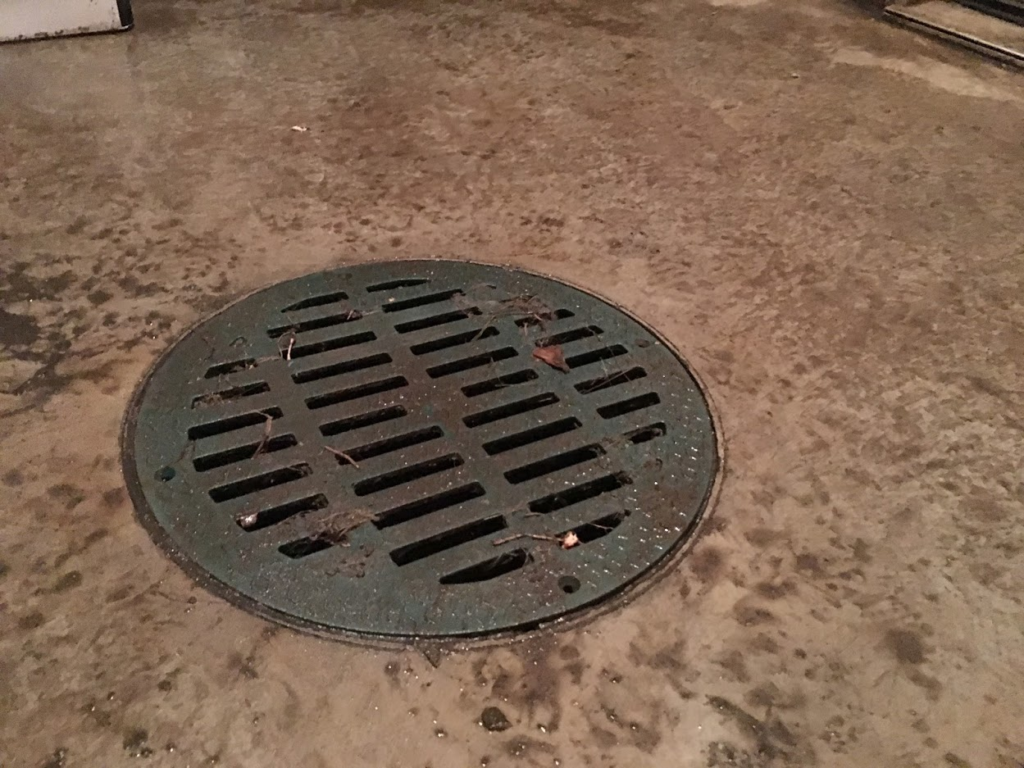
Spot or Floor Drains
Spot or Floor Drains are individual drains set in a poured concrete floor. What is seen once the floor is poured is just a circular opening which may be covered with a coarse grate or cap. The drain piping is embedded in the floor or run below the subfloor in a wood-framed construction. A general rule of thumb for determining the number of spot or floor drains is to provide one drain for every 600 square feet of floor area. But, also consider the specific planned use of the space and where equipment, tanks, and sinks may be located. If they are all pushed toward the perimeter of the building, it may make sense to have more drains there to provide for dedicated draining and equipment layout flexibility.

Spot drains are generally used when the outlet water flow is limited to a single area and of moderate volume. These drains can typically accommodate some sediment and small pieces of debris. But, it is still important to plan on cleanout ports in the drain.
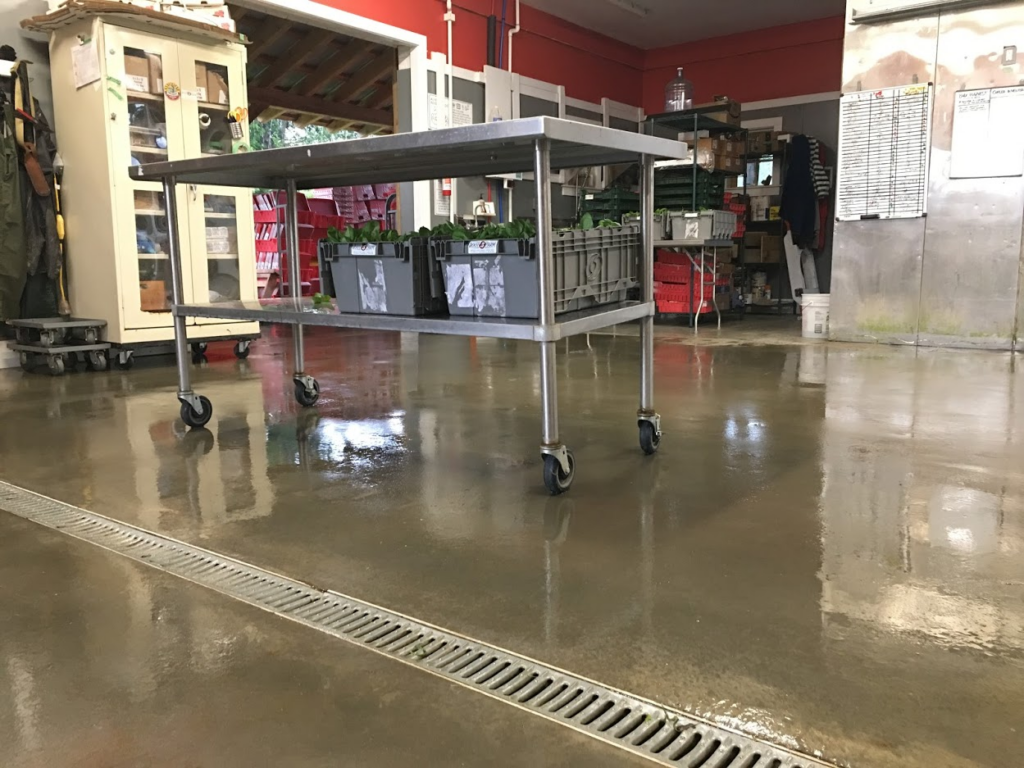
Trench Drains
A Trench drain is a high volume floor drain option that is flush with the floor surface at the top of the drain. They are also sometimes called linear, channel, or gutter drains. Seen from the side, they generally have a “U” shaped cross-section which deepens toward the outlet allowing the top to stay level with the floor while also providing a slope in the drain to carry wastewater away.
There are two approaches to building a trench drain:
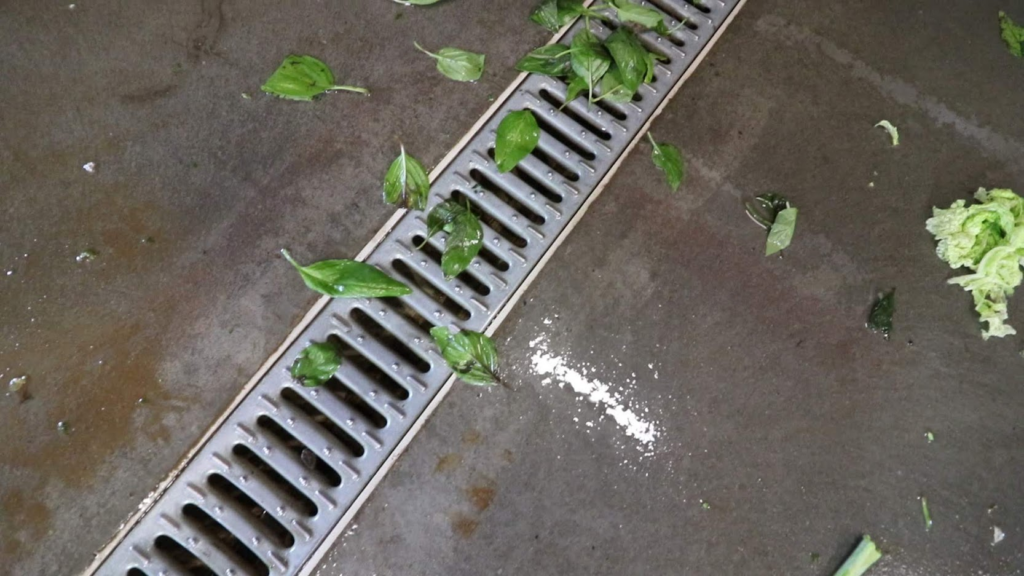
- Preformed Plastic – A preformed plastic drain can be installed prior to the pouring of concrete. These are about the same size as a rain gutter (3-6” wide) and are topped with a durable plastic top grating. These work well for garage applications, but may clog easily in vegetable wash/pack areas and can be difficult to clean since they are narrow.
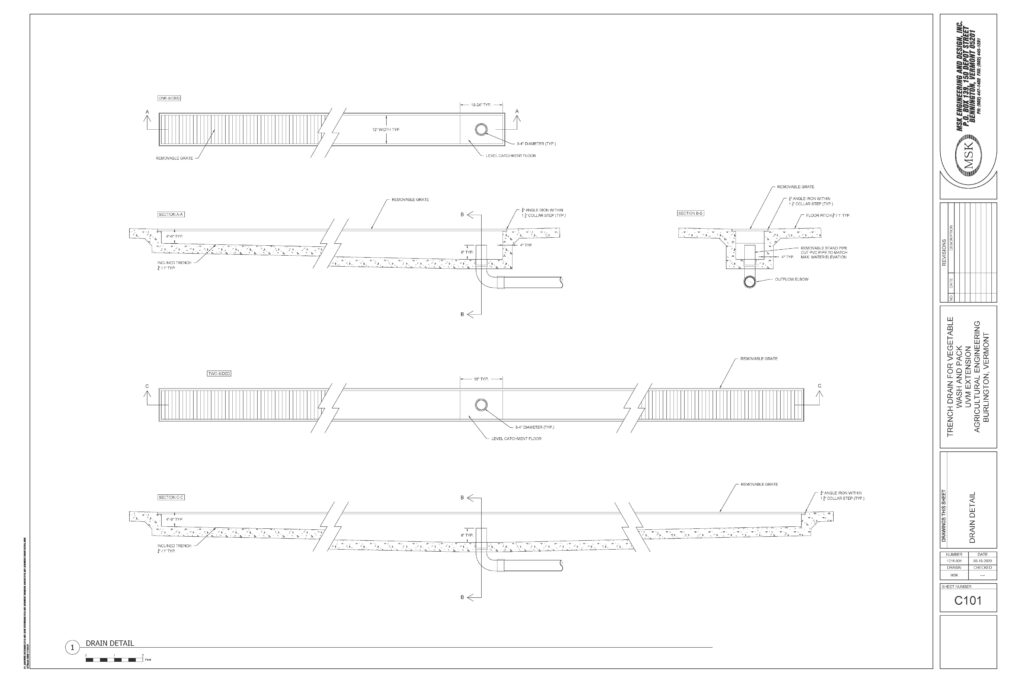
- Formed Concrete – A trench is formed as part of the initial pour of a concrete floor. Forming and pouring a custom trench allows the width to be selected based on how you plan to clean it out. If you plan to use a shovel for removing collected sediment, make sure the trench is wide enough to do this (i.e. typically 12” wide). Forms are used to deepen one section of the floor and provide the necessary pitch in the trench to promote drainage. These are similar to the gutters used in tie-stall dairy barns. A steel grate is placed on top of the trench providing a flush surface for walking, product movement, and vehicle movement. A construction drawing for this type of drain is provided on the last page of this document.
Trench Drain Outlets
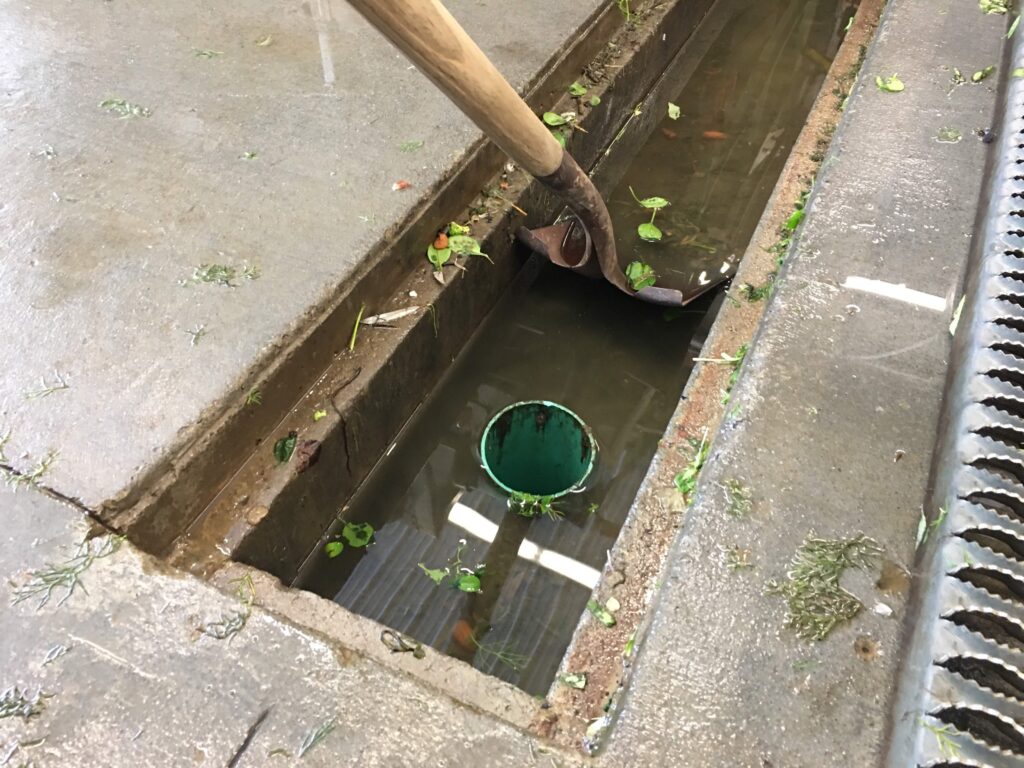
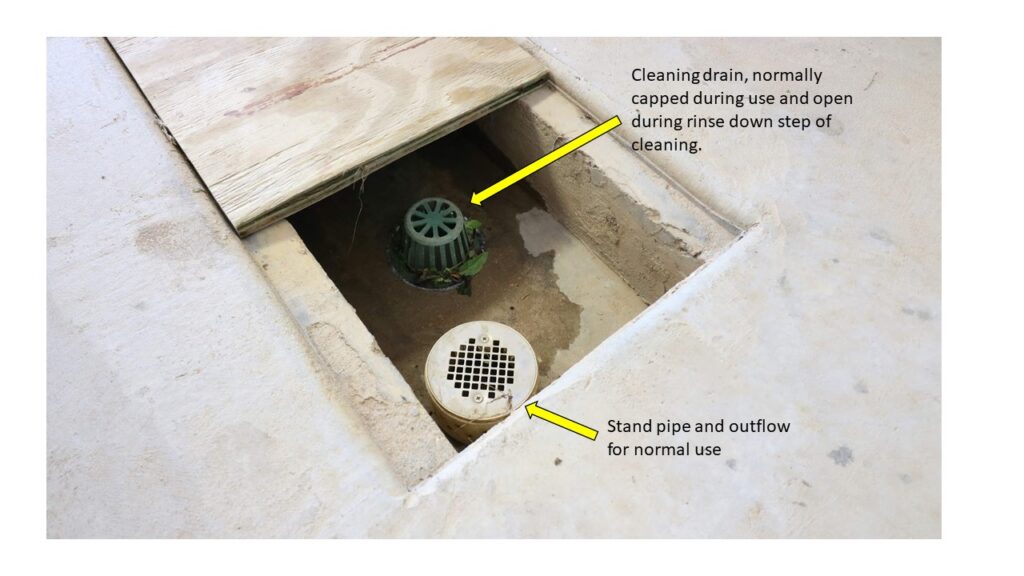
Plan for at least a 4” diameter vertical outlet with a female fitting set flush with the top of the poured concrete floor of the trench at the outlet. A simple 12”-24” length of 4” pipe can be inserted in the female fitting to result in a stand pipe when in use. This will prevent flow of sediment laden water directly out the drain. The more clear water at the top of the standpipe can flow out. The level of the outflow will depend on the height of the pipe insert. Sometimes a coarse grate or inlet screen is installed to prevent large pieces of debris from flowing out the drain. The standpipe can also be drilled to provide a coarse filtration.
There are several trench drain systems available on the market, including:
- Zurn Linear Trench Drains: https://www.zurn.com/products/trench-drainage/linear-trench-drain
- NDS Drainage: https://www.ndspro.com/products/drainage.html
- JR Smith Trench Drain System: http://www.jrsmith.com/trench-drain-systems
There are also distributors who can help you understand product availability and selection and probably some design work. FW Webb (https://www.fwwebb.com/) is a common plumbing supply distributor in New England and they distribute these systems as well.
Drain Covers
If you choose to build in a trench drain as opposed to using a pre-cast or formed system, there are a few options for custom drain grates and covers. Fiberglass grating is commonly used in industrial applications for mezzanines, floors, stairs or drainage areas. These can be cut to fit with typical woodworking tools like a recriminating saw.
If you expect to experience regular heavy traffic over your drain, a galvanized steel grate may be a wise decision.
Discharge
Discharge of vegetable wash water is regulated differently in each state. Be sure to check with your local and state regulatory authorities to ensure your plan is appropriate. Consider the area around your wash and pack shed and think about where it would be appropriate to discharge wash water. Direct discharge away from food crop production areas, avoid areas with regular crew or vehicle traffic, and do not discharge directly into any bodies of water. We have compiled guidance for Vermont growers based on discussions with local regulatory agencies.
Finally, consider your maintenance, cleaning and inspection plan.
Maintenance, Cleaning and Inspection
Floor drainage, with proper pitch can be mostly maintenance free, however some cleaning, and inspection is required especially with a heavy soil load.
Note the rate at which your drains empty. If you start to notice a slow drain or abnormal gurgling it may indicate a partially clogged drain. Addresses clogged drains early can prevent an untimely backflow. As noted above, consider including cleanout ports which will make the inevitable clogged drains easier to deal with.
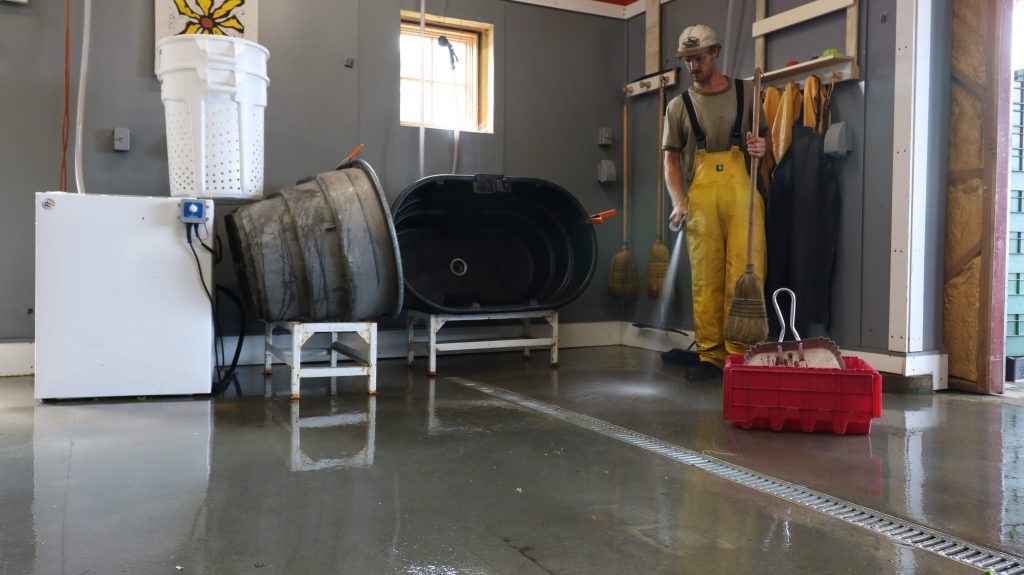
The steel grates on trench drains can be removed for cleaning the trench with a square shovel to remove the sediment and can then be hosed or and brushed out for cleaning. With minimal ventilation and some time, these drains can also be fully dried once cleaned, which is an added produce safety benefit.
When cleaning the drain, look for any wear that should be addressed. Cracks in the concrete should be repaired to prevent harborage.
Trench Drain Schematic
Download this PDF for a construction drawing you can use to build your own trench drain.

Thanks for reading!
Acknowledgements
Funding for this publication was made possible, in part, by the USDA Northeast Sustainable Agriculture Research and Education program through award LNE19-375, by the Food and Drug Administration through The Vermont Agency of Agriculture Food and Markets via the Integrated Extension Educational Programming in Support of the VAAFM Produce Program Grant 02200-FSMA-2018-01. The views expressed in the publication do not necessarily reflect the official policies of the U.S. Department of Agriculture, the U.S. Department of Health and Human Services or the Vermont Agency of Agriculture; nor does any mention of trade names, commercial practices, or organization imply endorsement by the United States Government or the State of Vermont.