
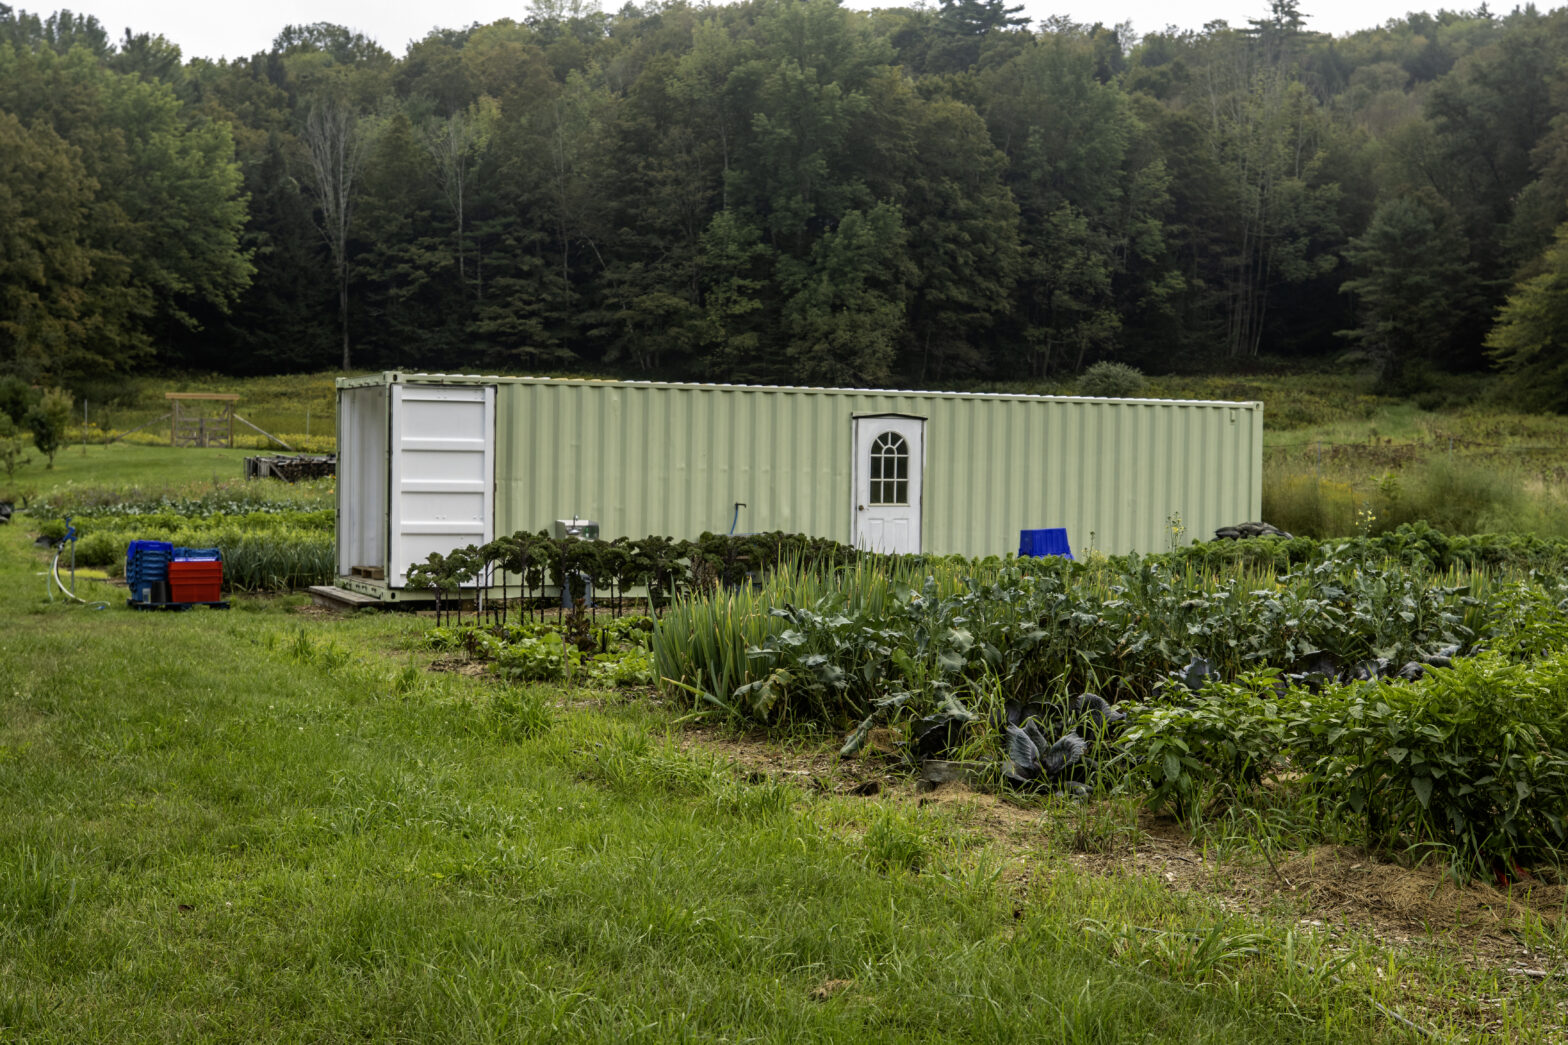
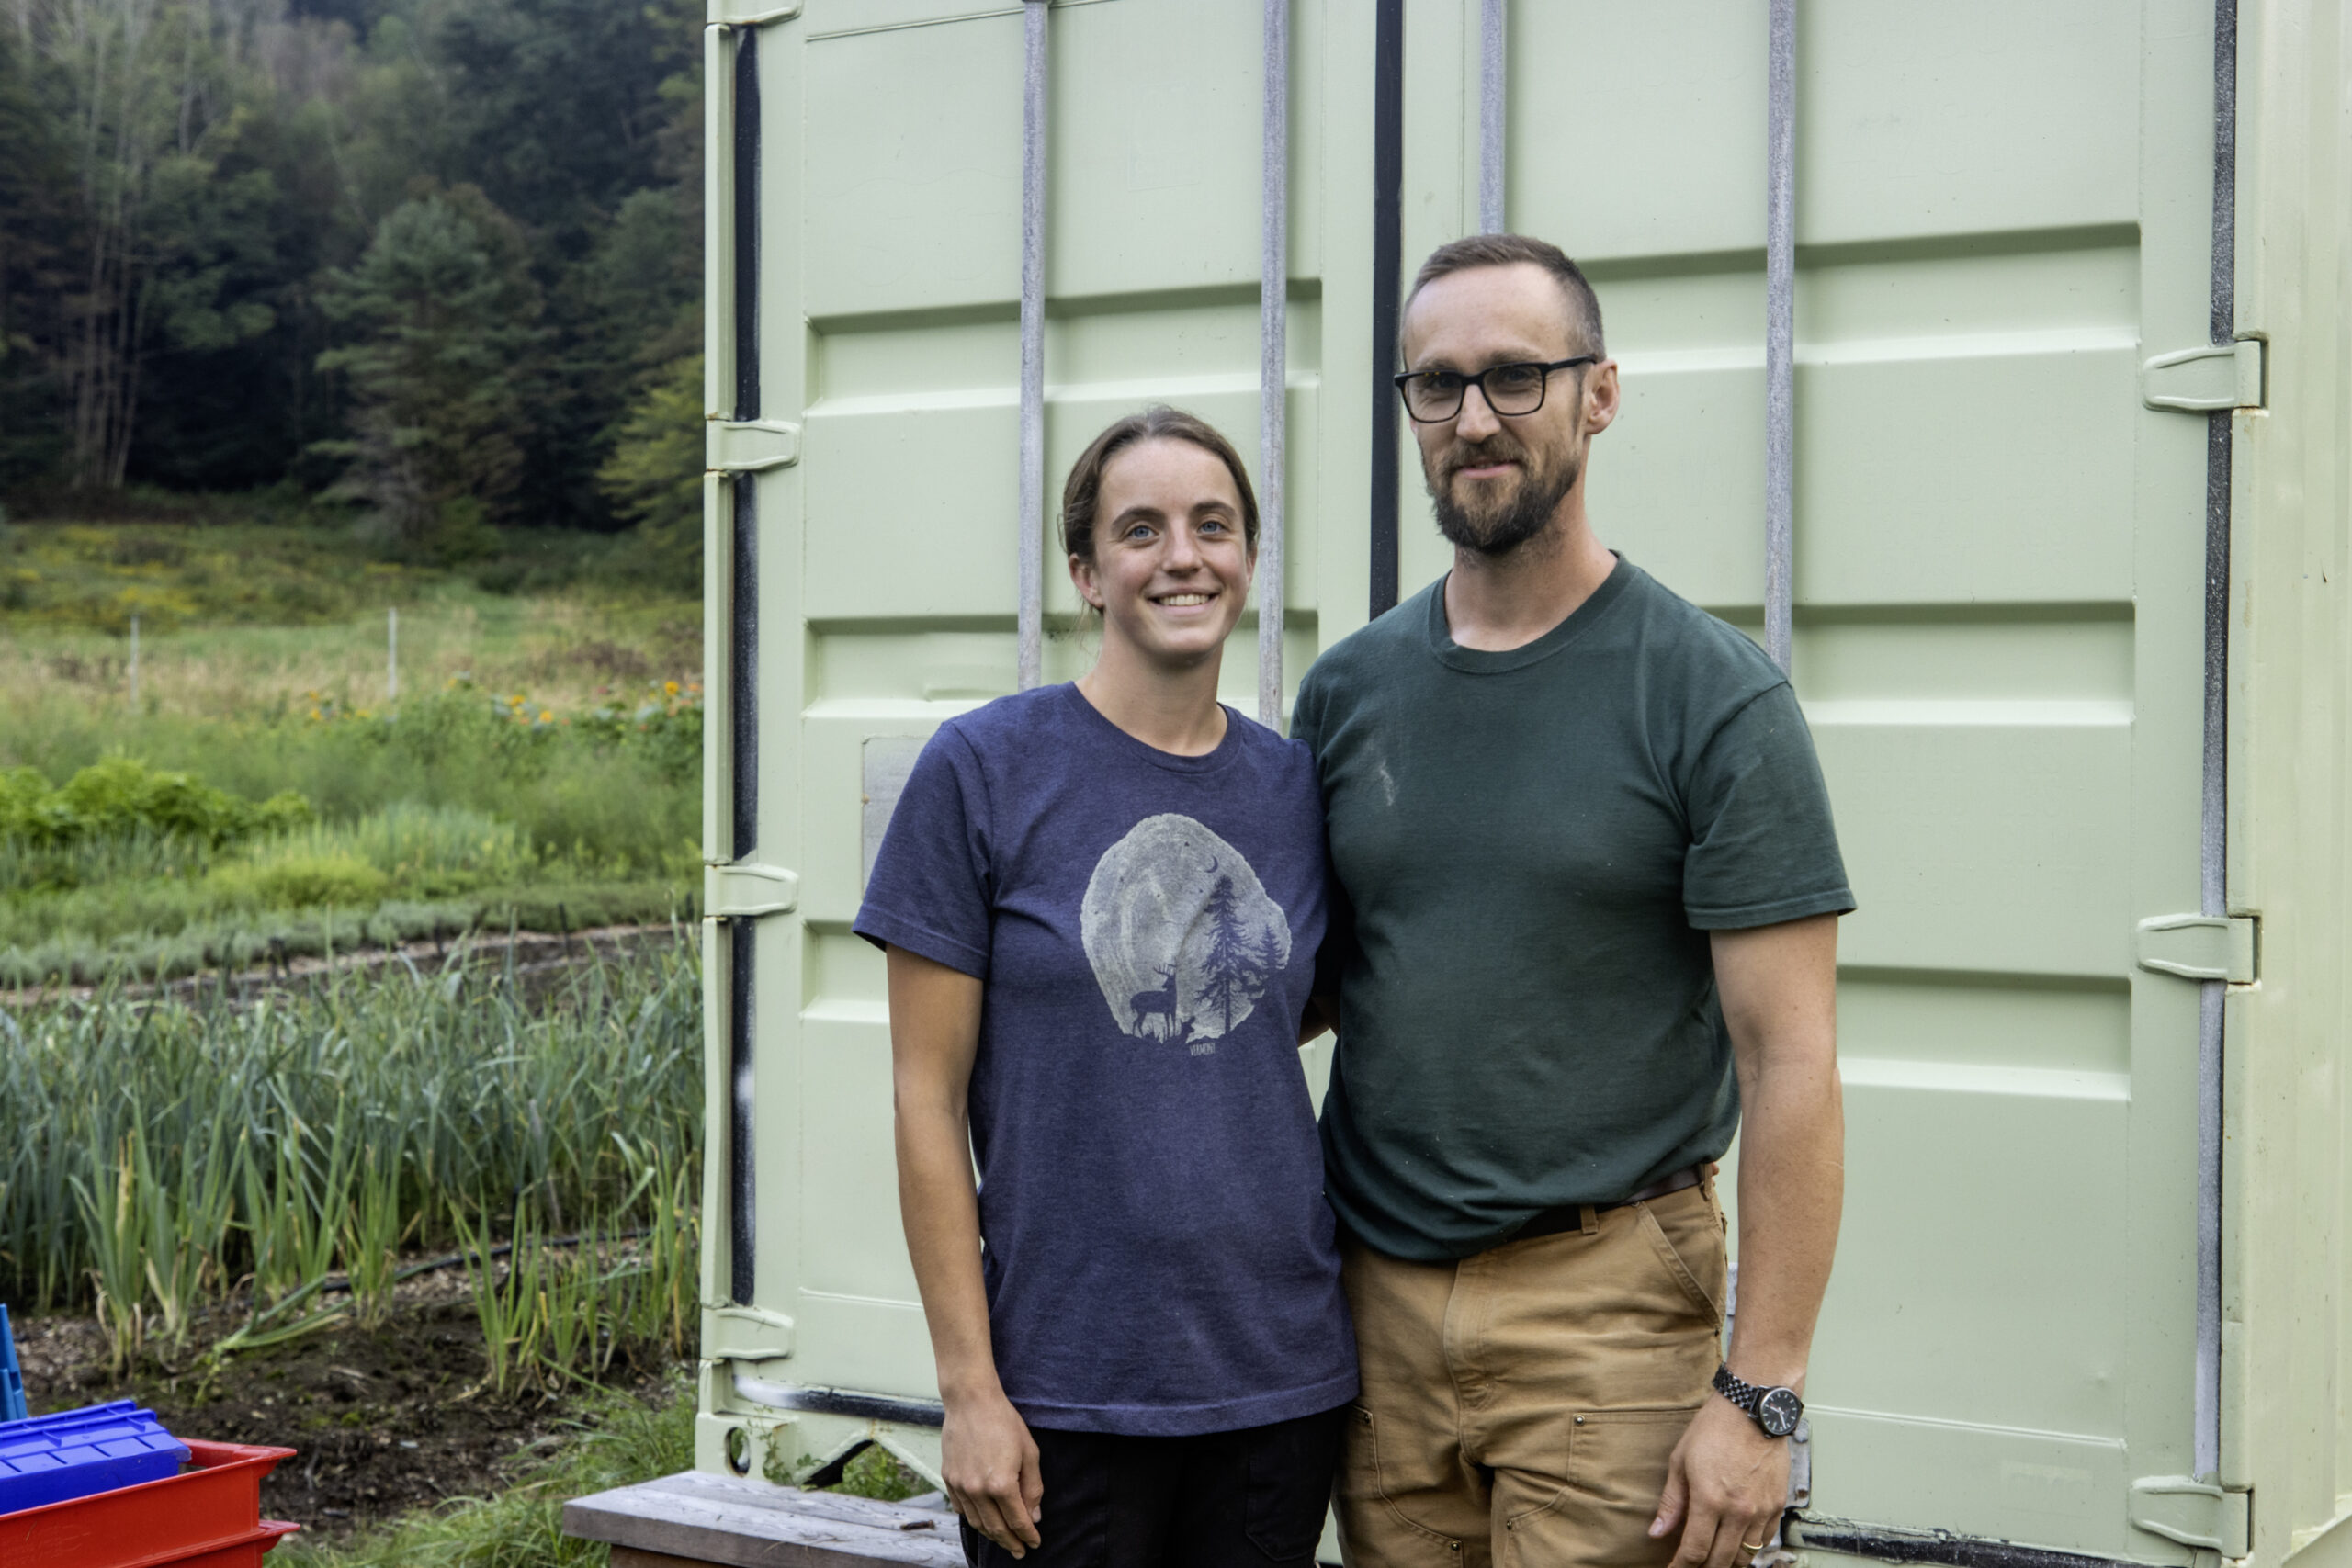
Lauren Mucha and Oliver Owen own and operate Ascutney Harvest in Ascutney, Vermont. Their half-acre market garden consists mostly of mixed vegetables and herbs which require washing and packing before heading off to two different farmers markets and a few wholesale vendors. They are fairly new to this land, and needed to make a quick and affordable improvement to the wash/pack area of the farm.
Lauren has been farming for just over ten years and has been cultivating the beds at their current location for over three years. Oliver has a background working on animal farms and working with tractors doing things like making hay. He does carpentry as his day job which was helpful on this project, because he has a lot of tools and experience. But of course it also means a lot of other projects were begging for his attention.
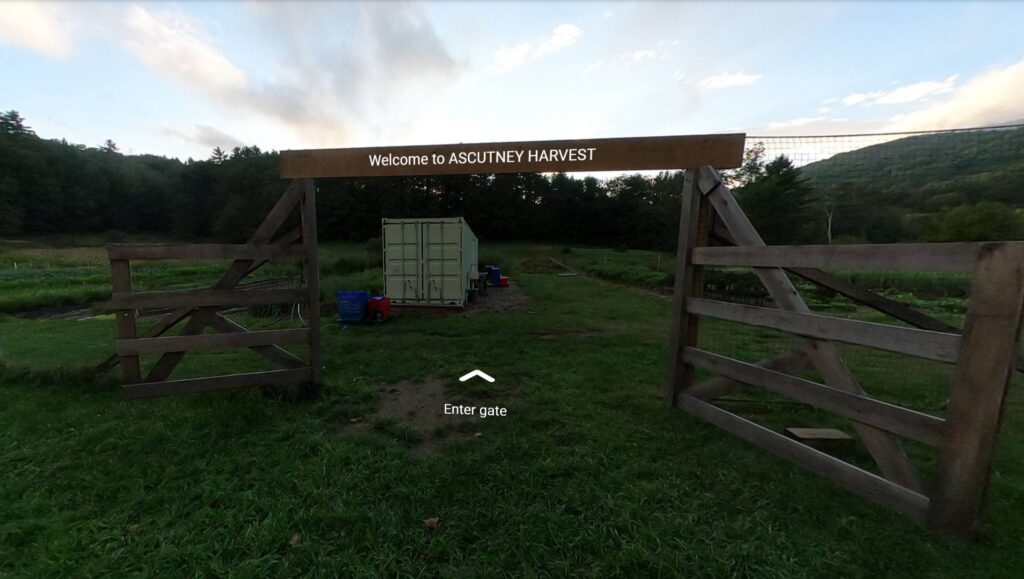
Watch the interview, or explore the space with a 360° tour.
About Ascutney Harvest
- ½-acre in production
- Farmers markets & wholesale channels
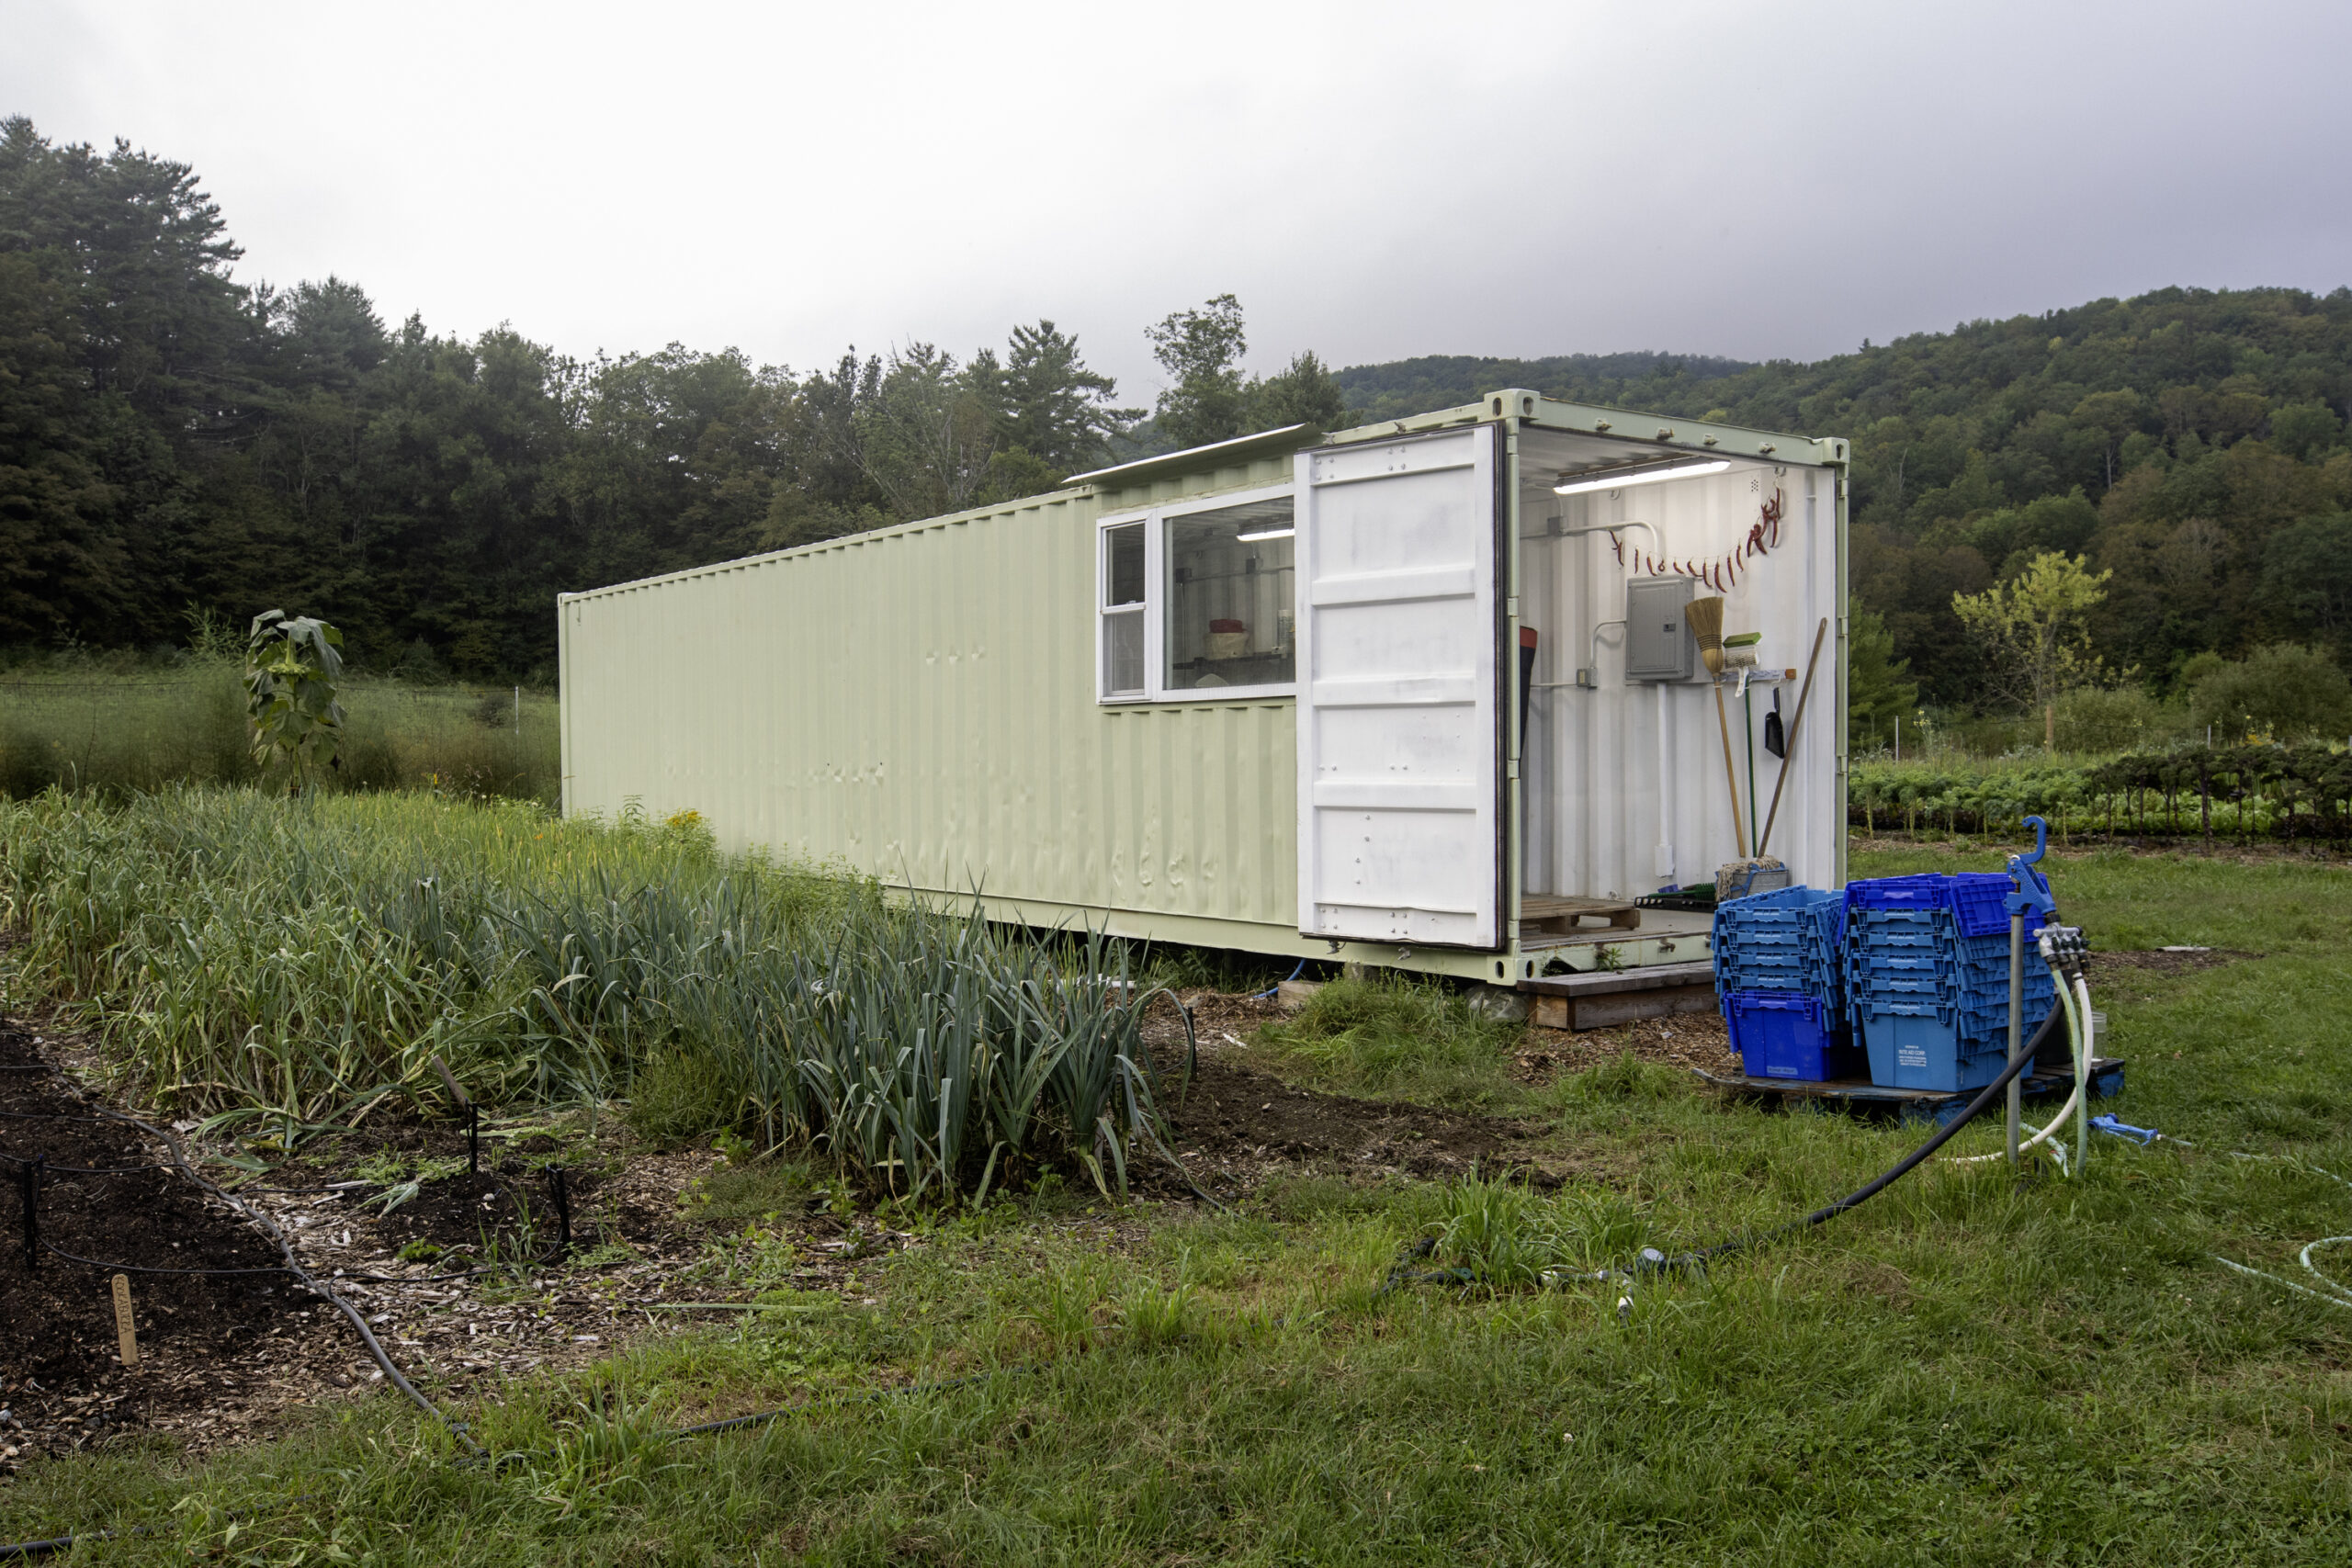
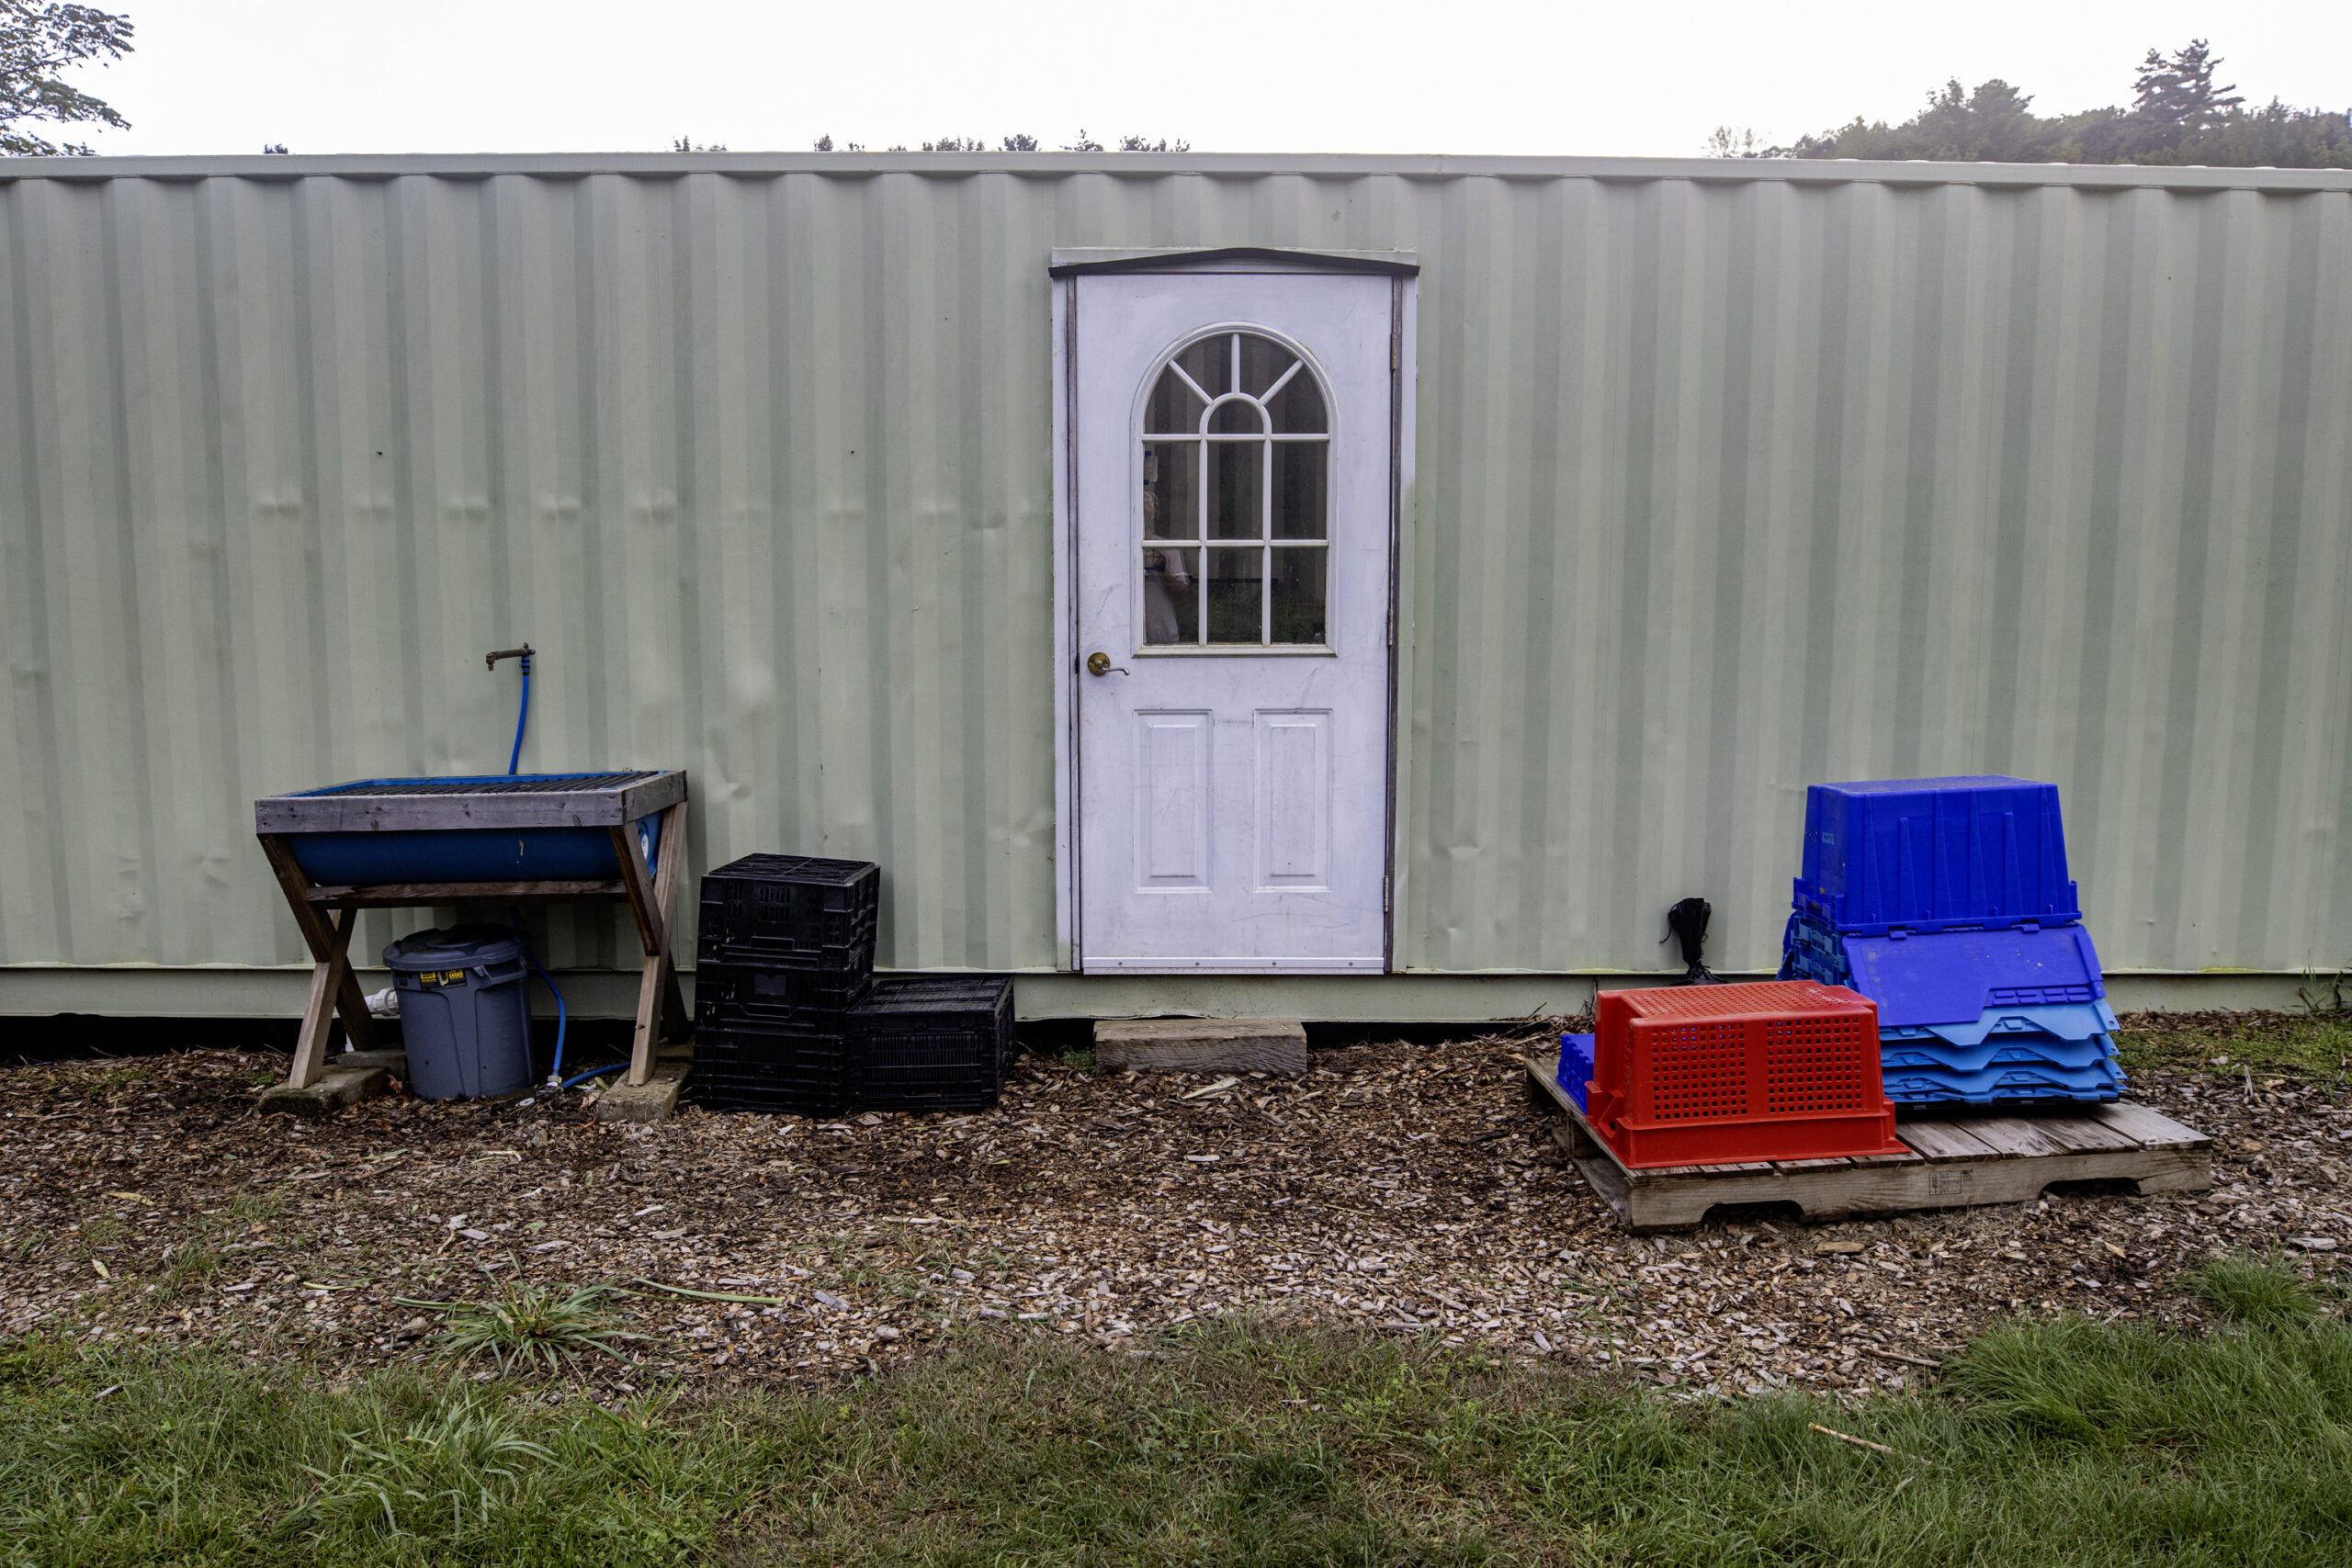
- Retrofitted a shipping container for vegetable wash/pack & cooler space
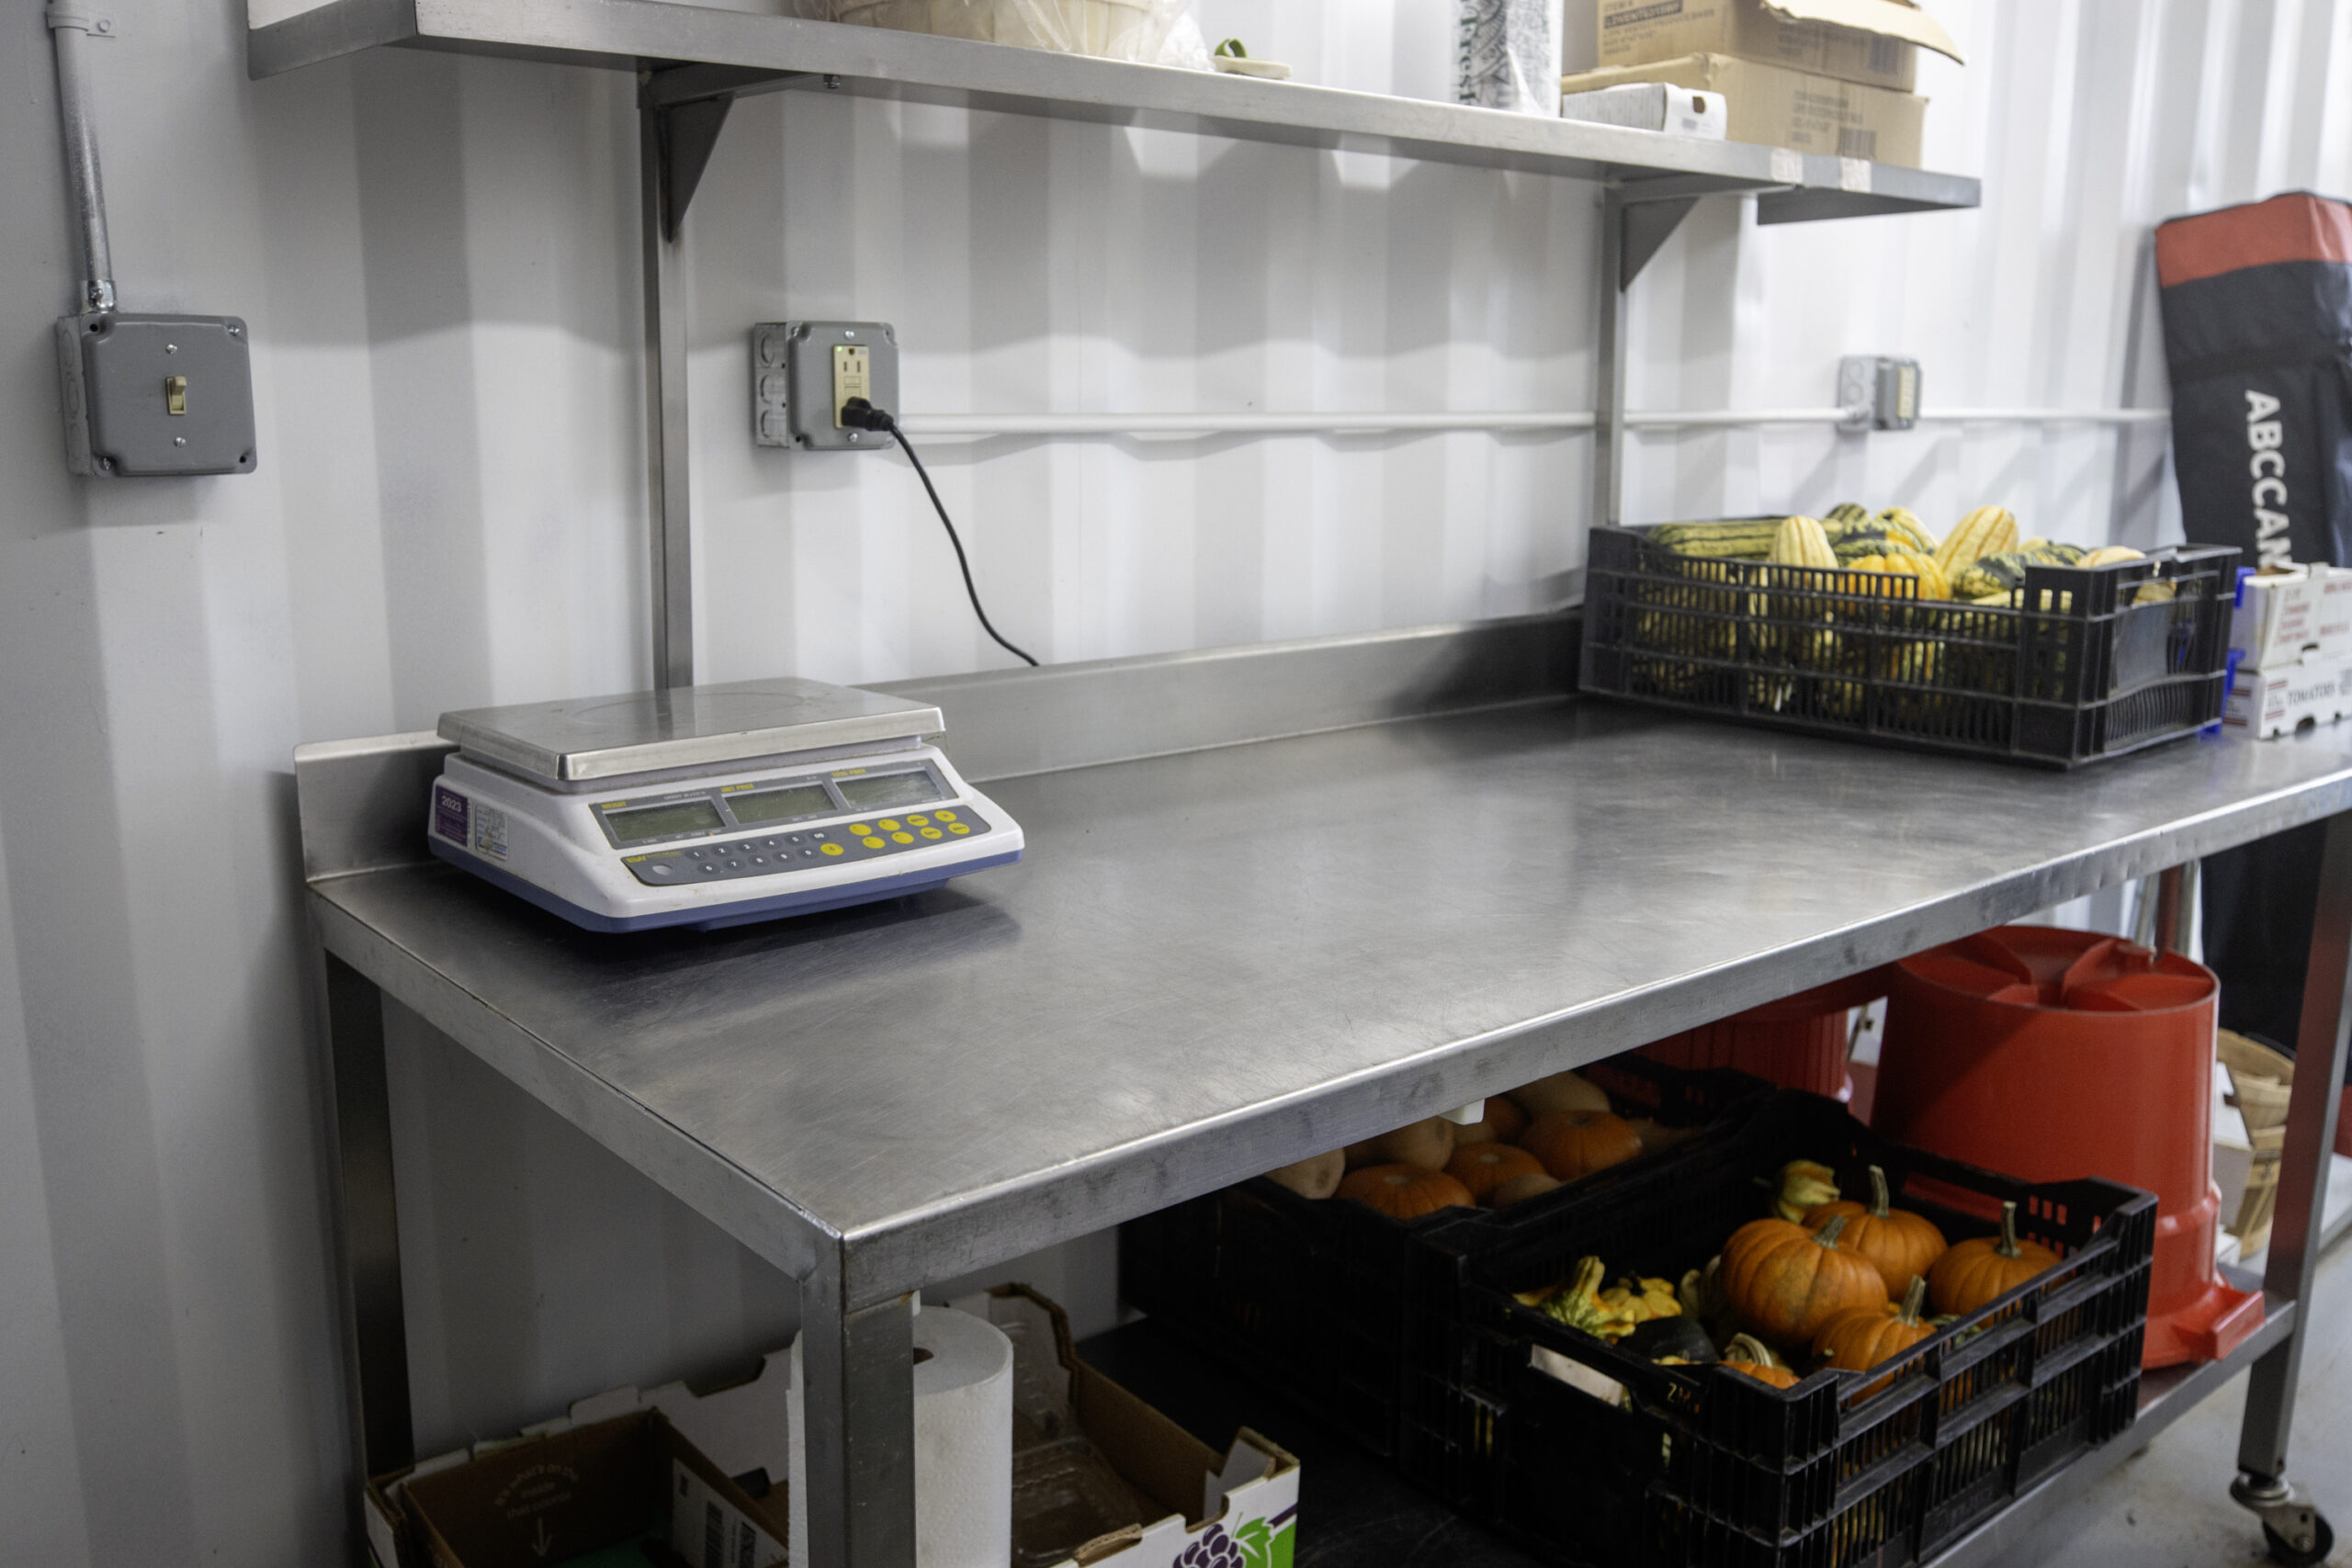
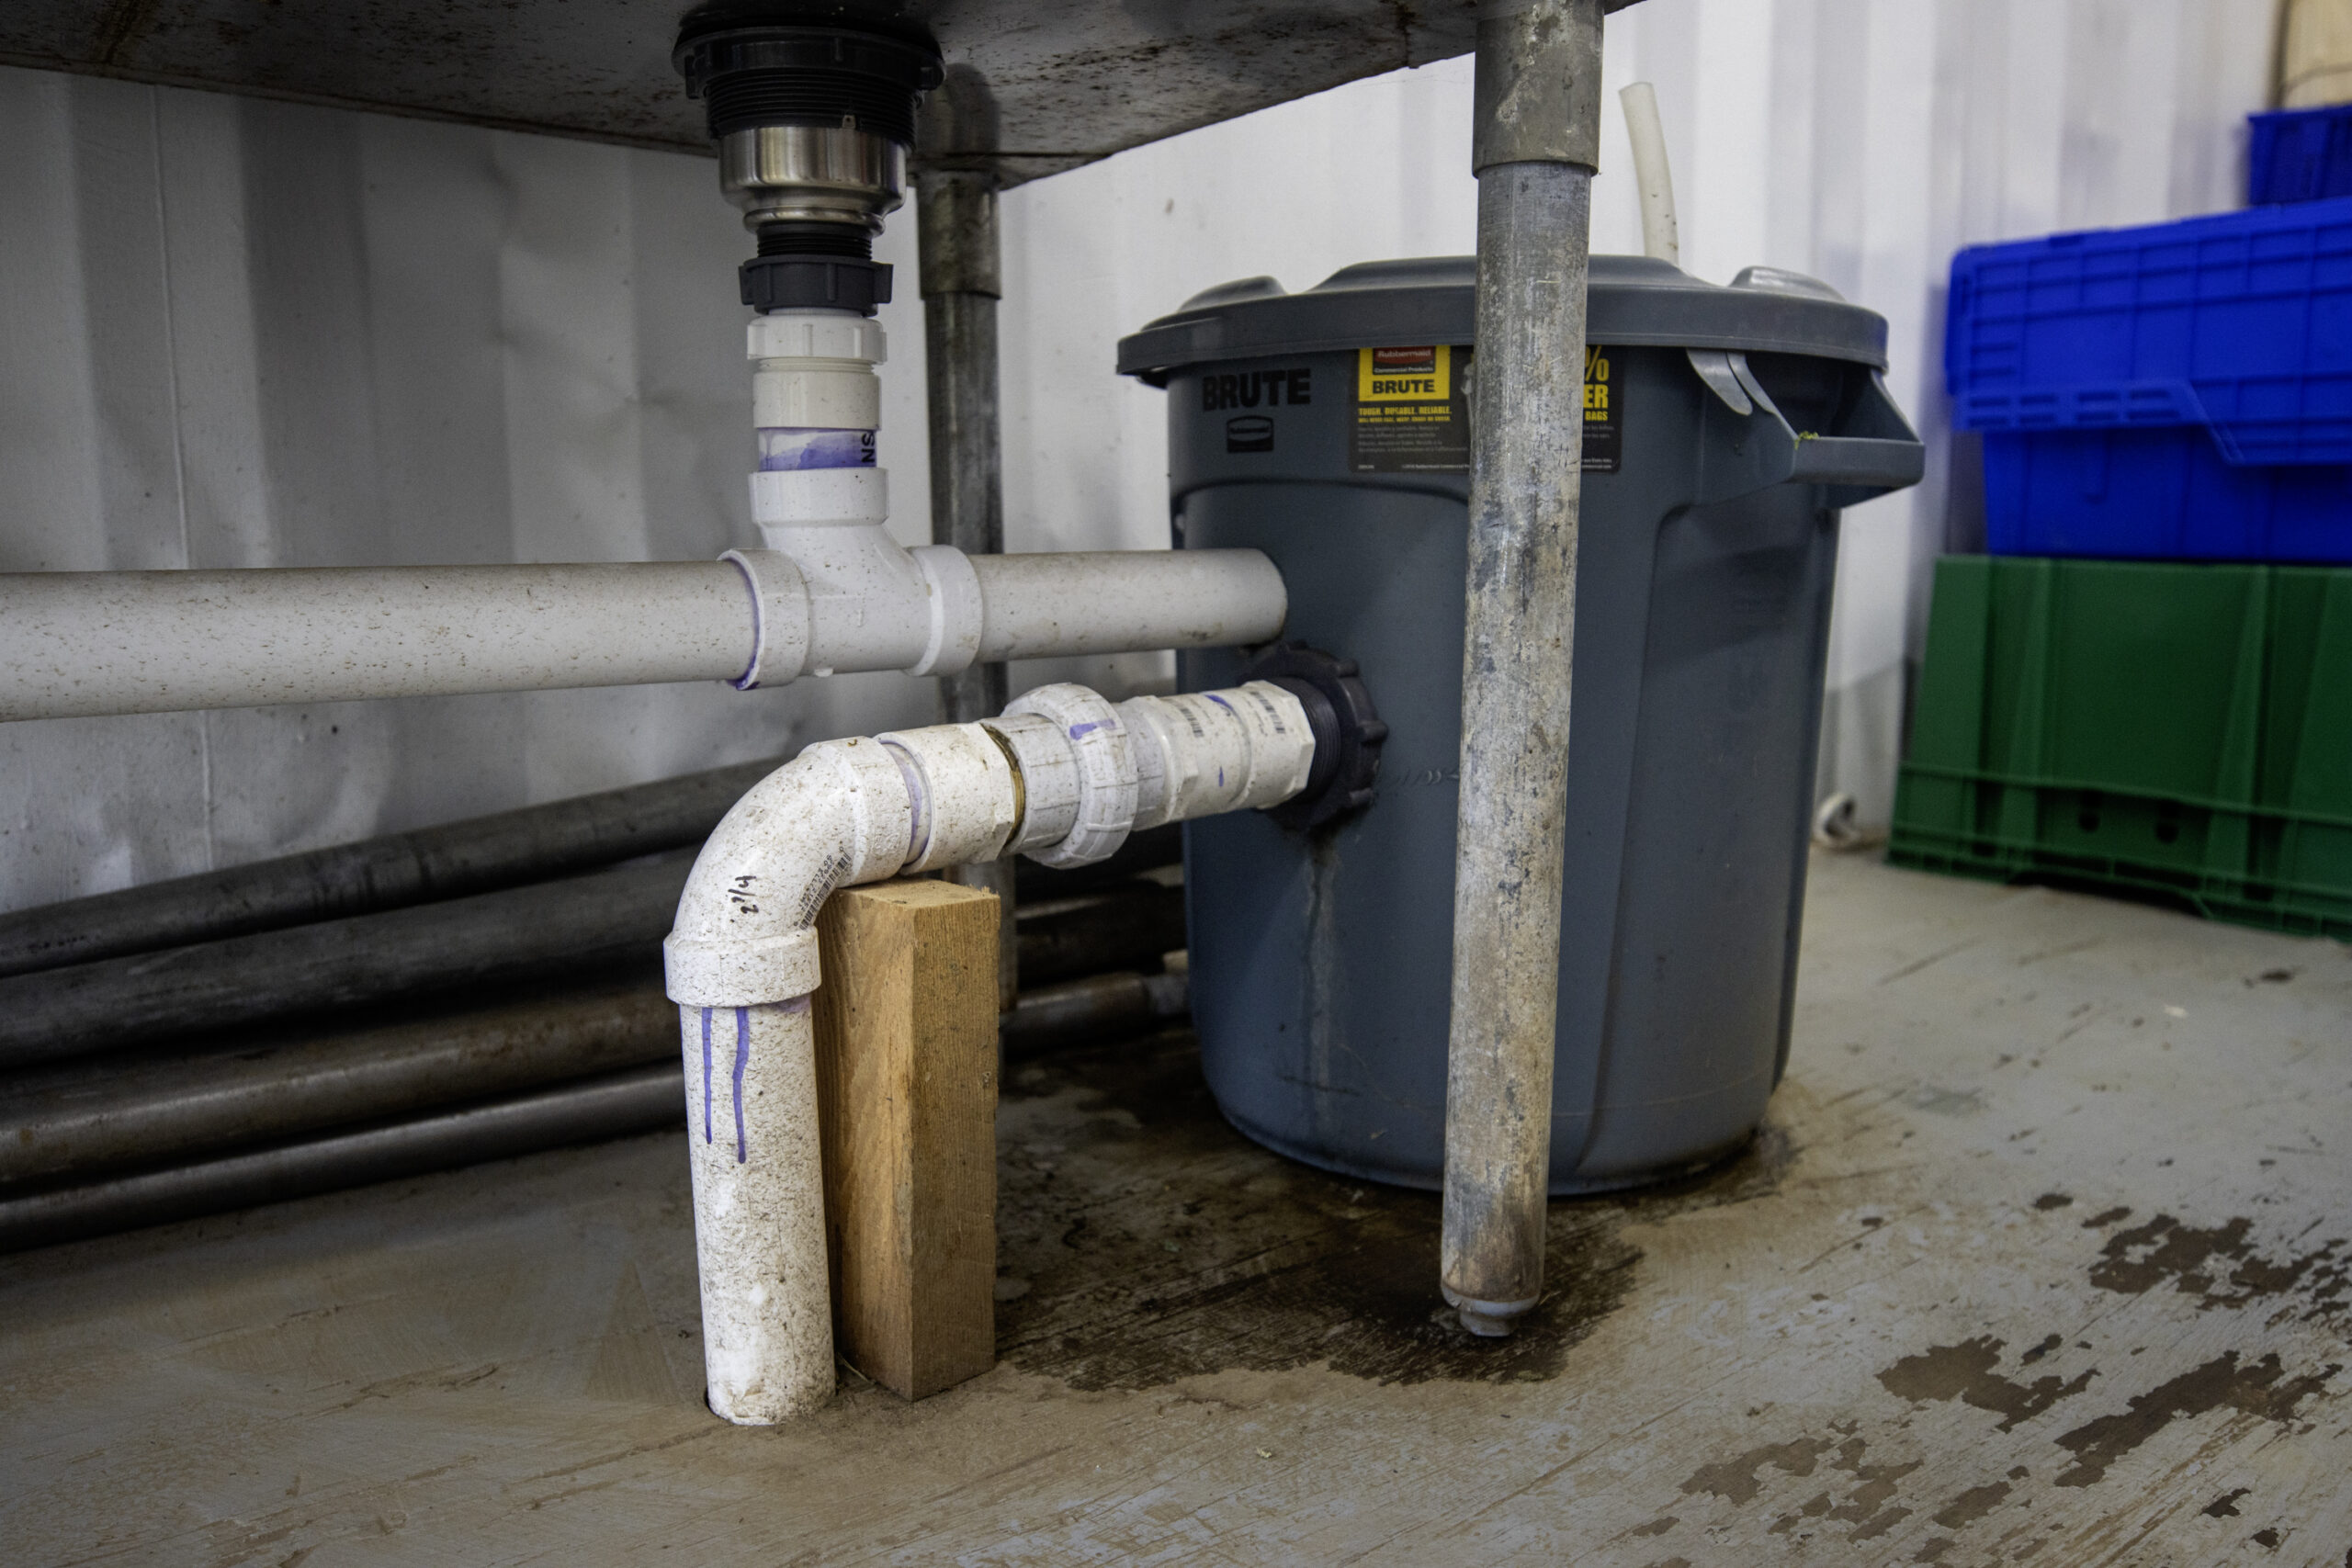
- Triple bay sink, packing table
- 8’x16’’ Cooler
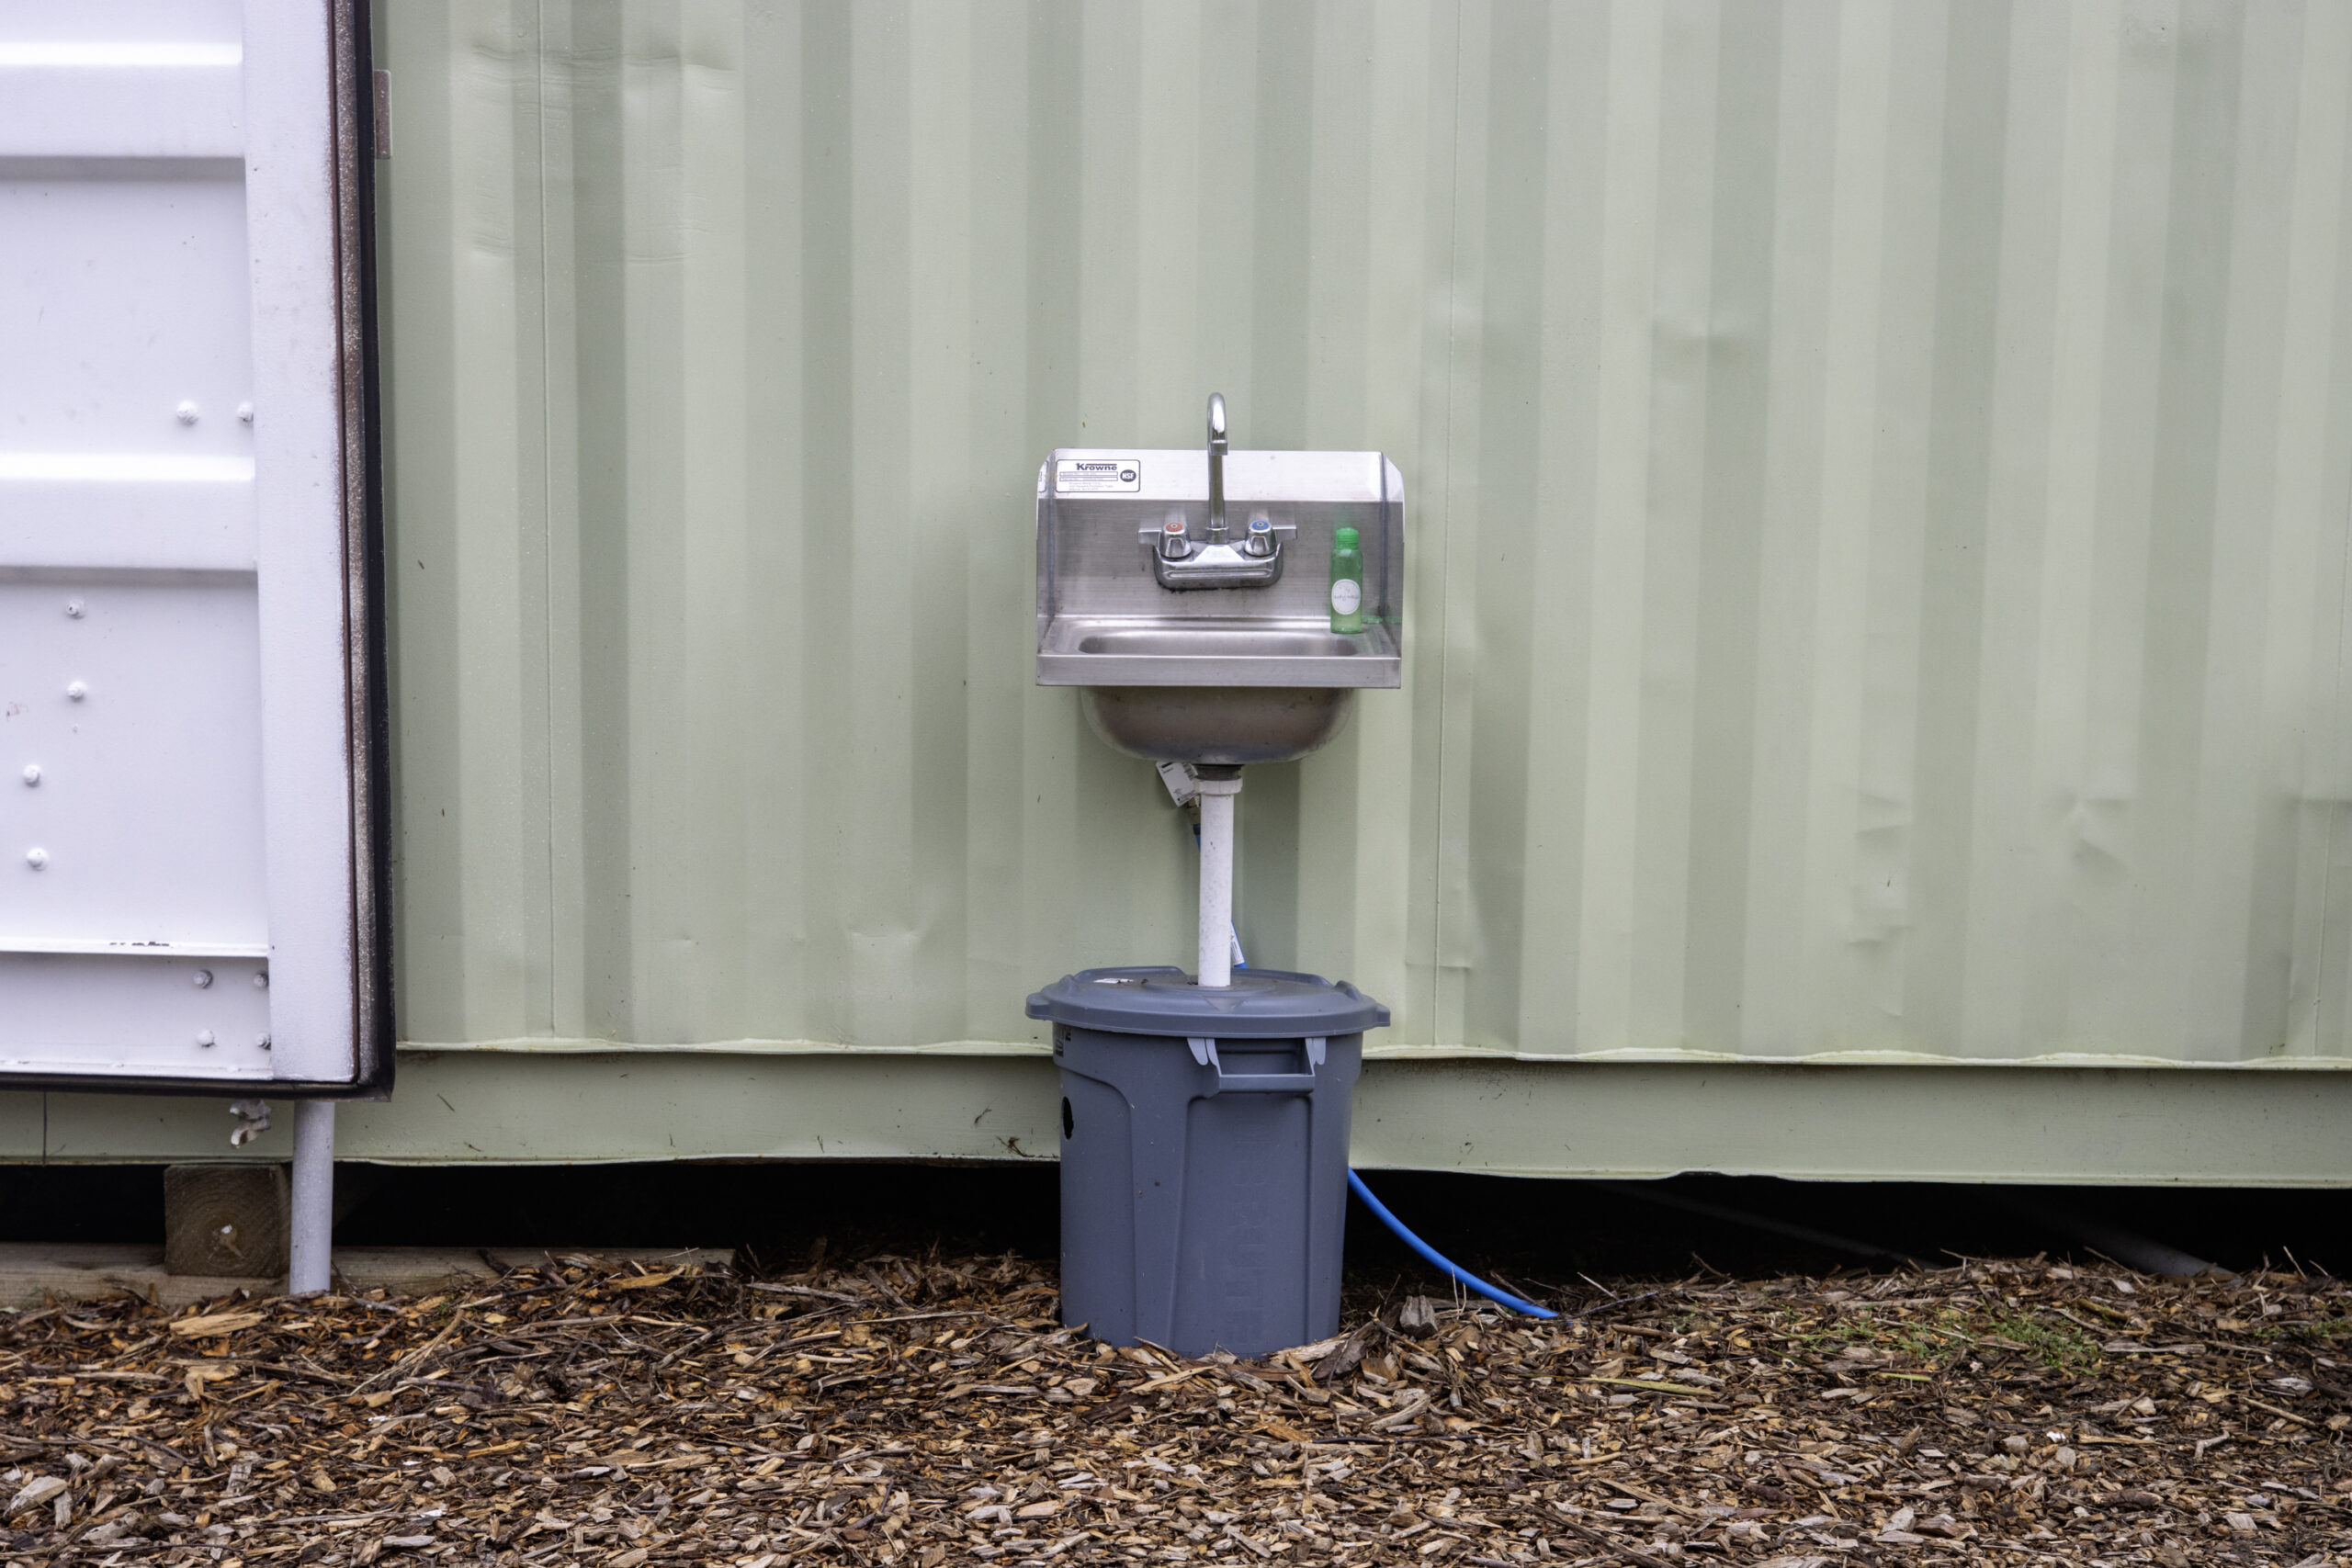
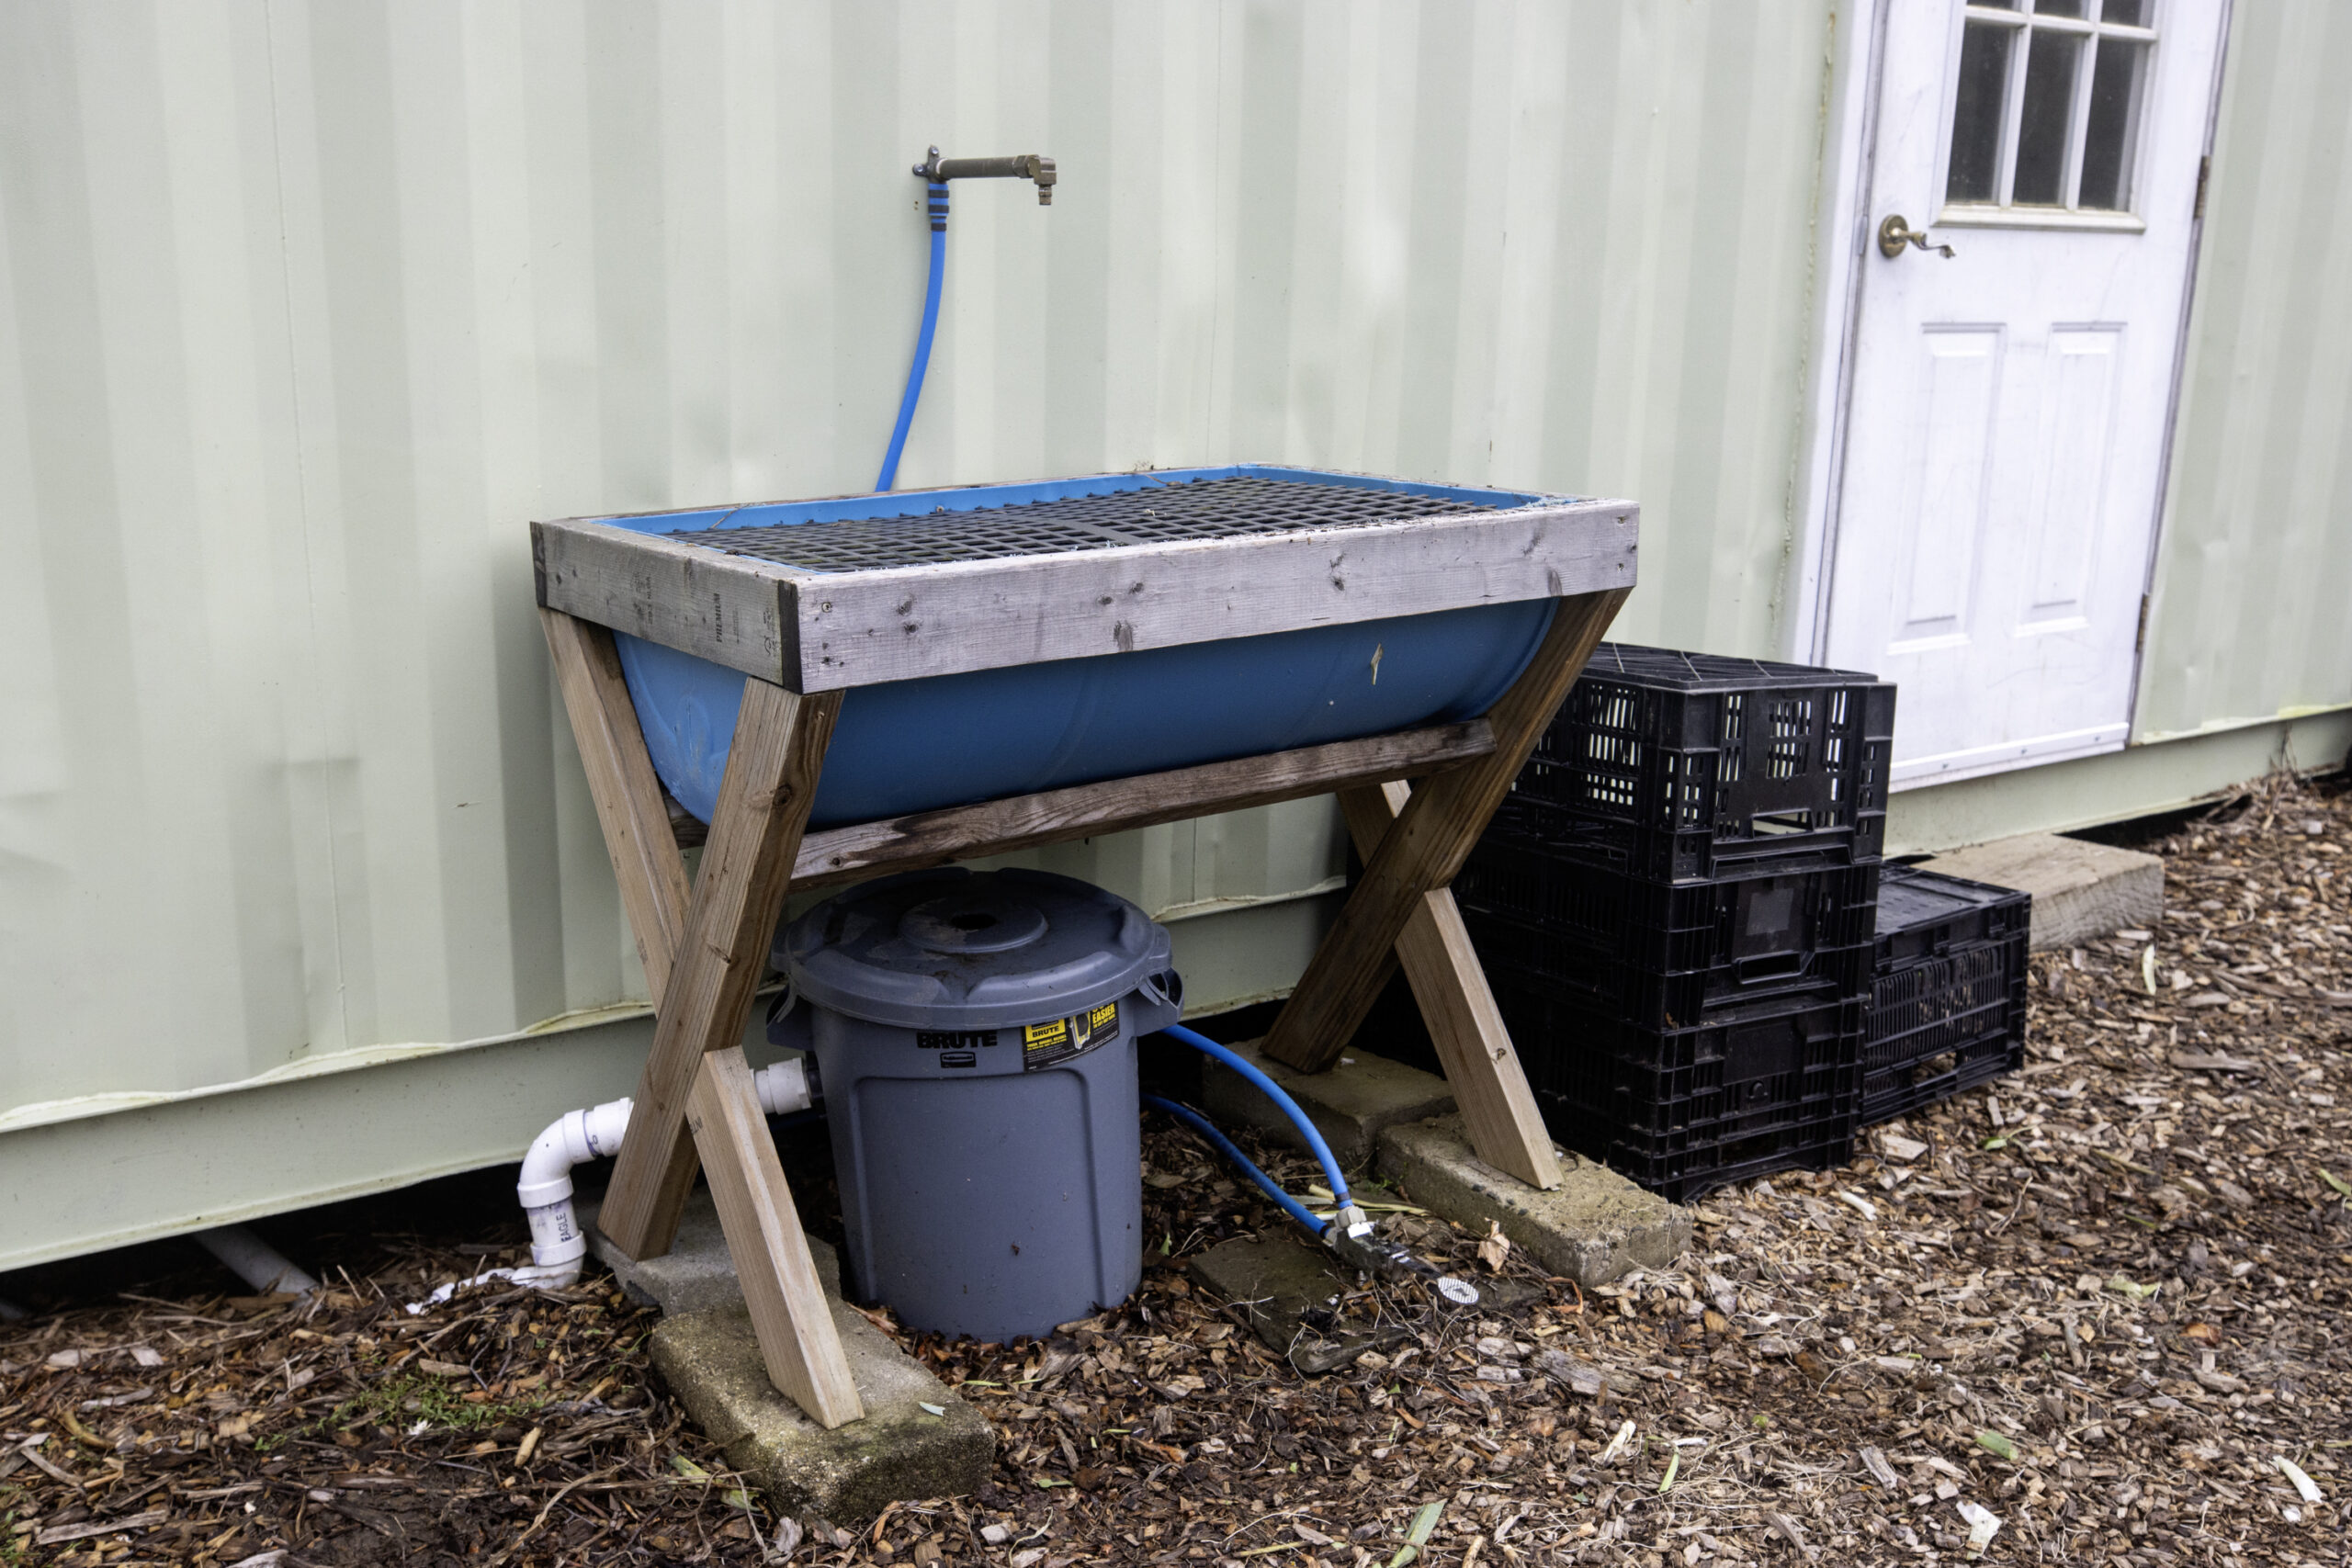
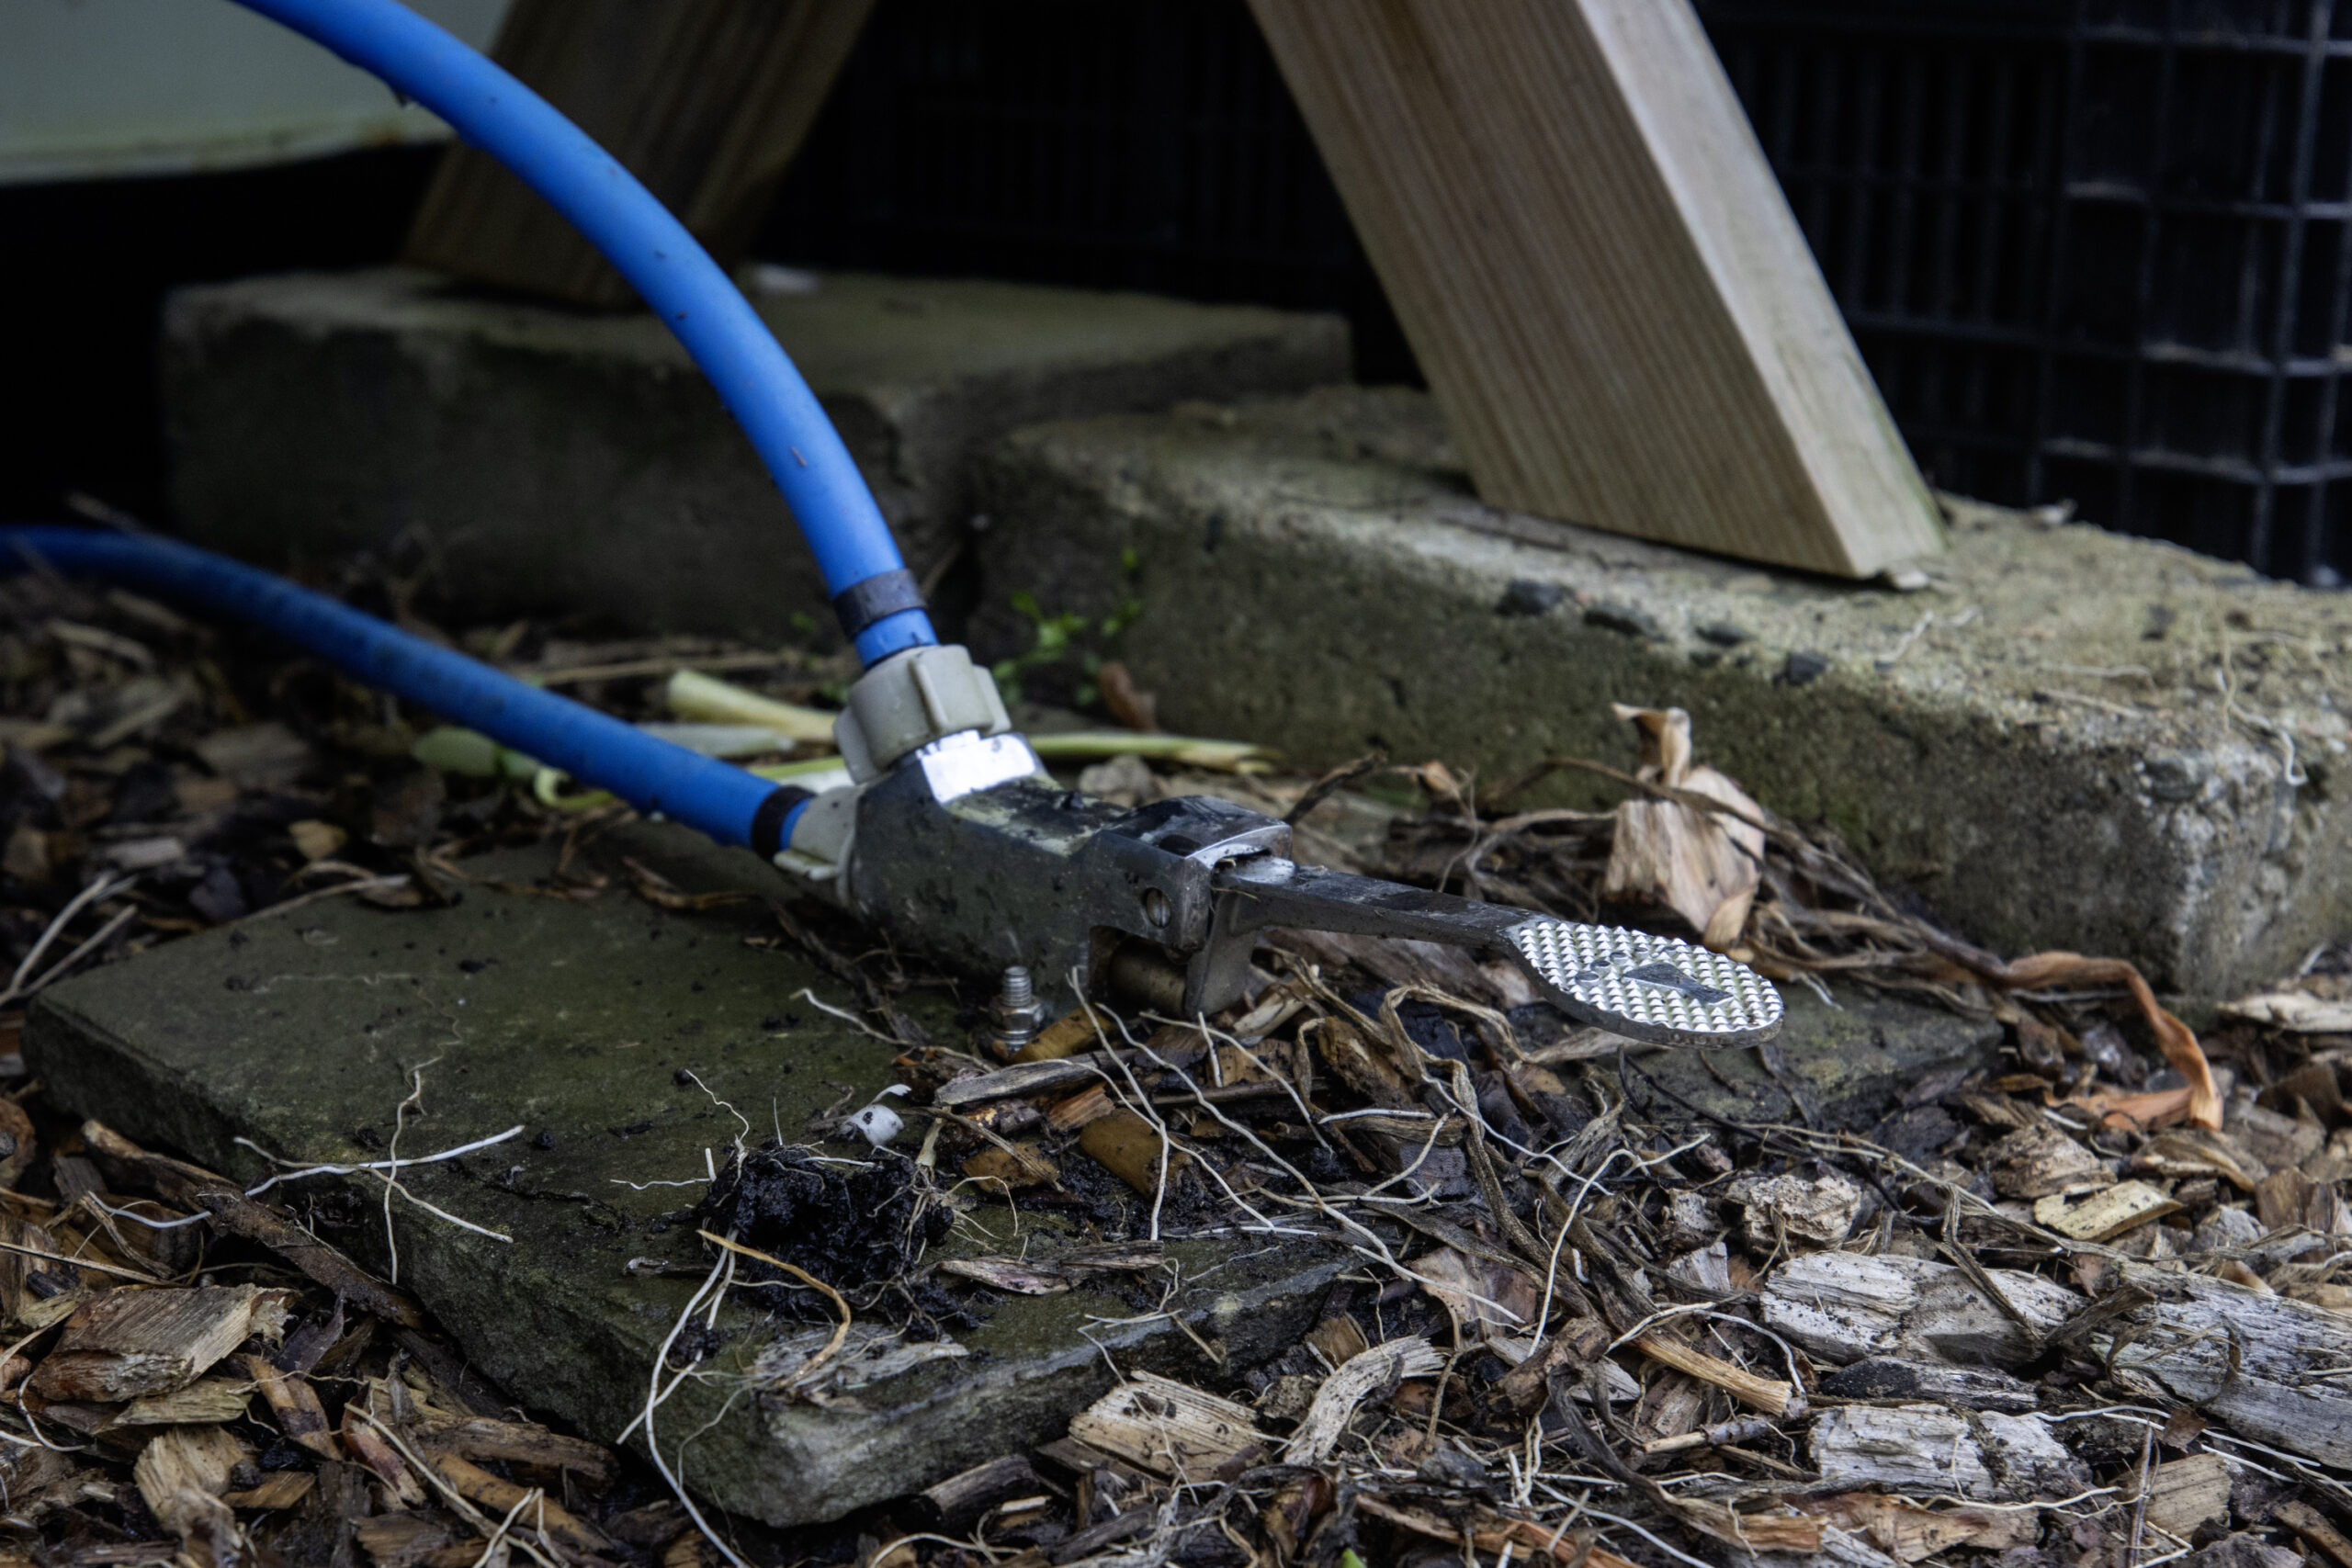
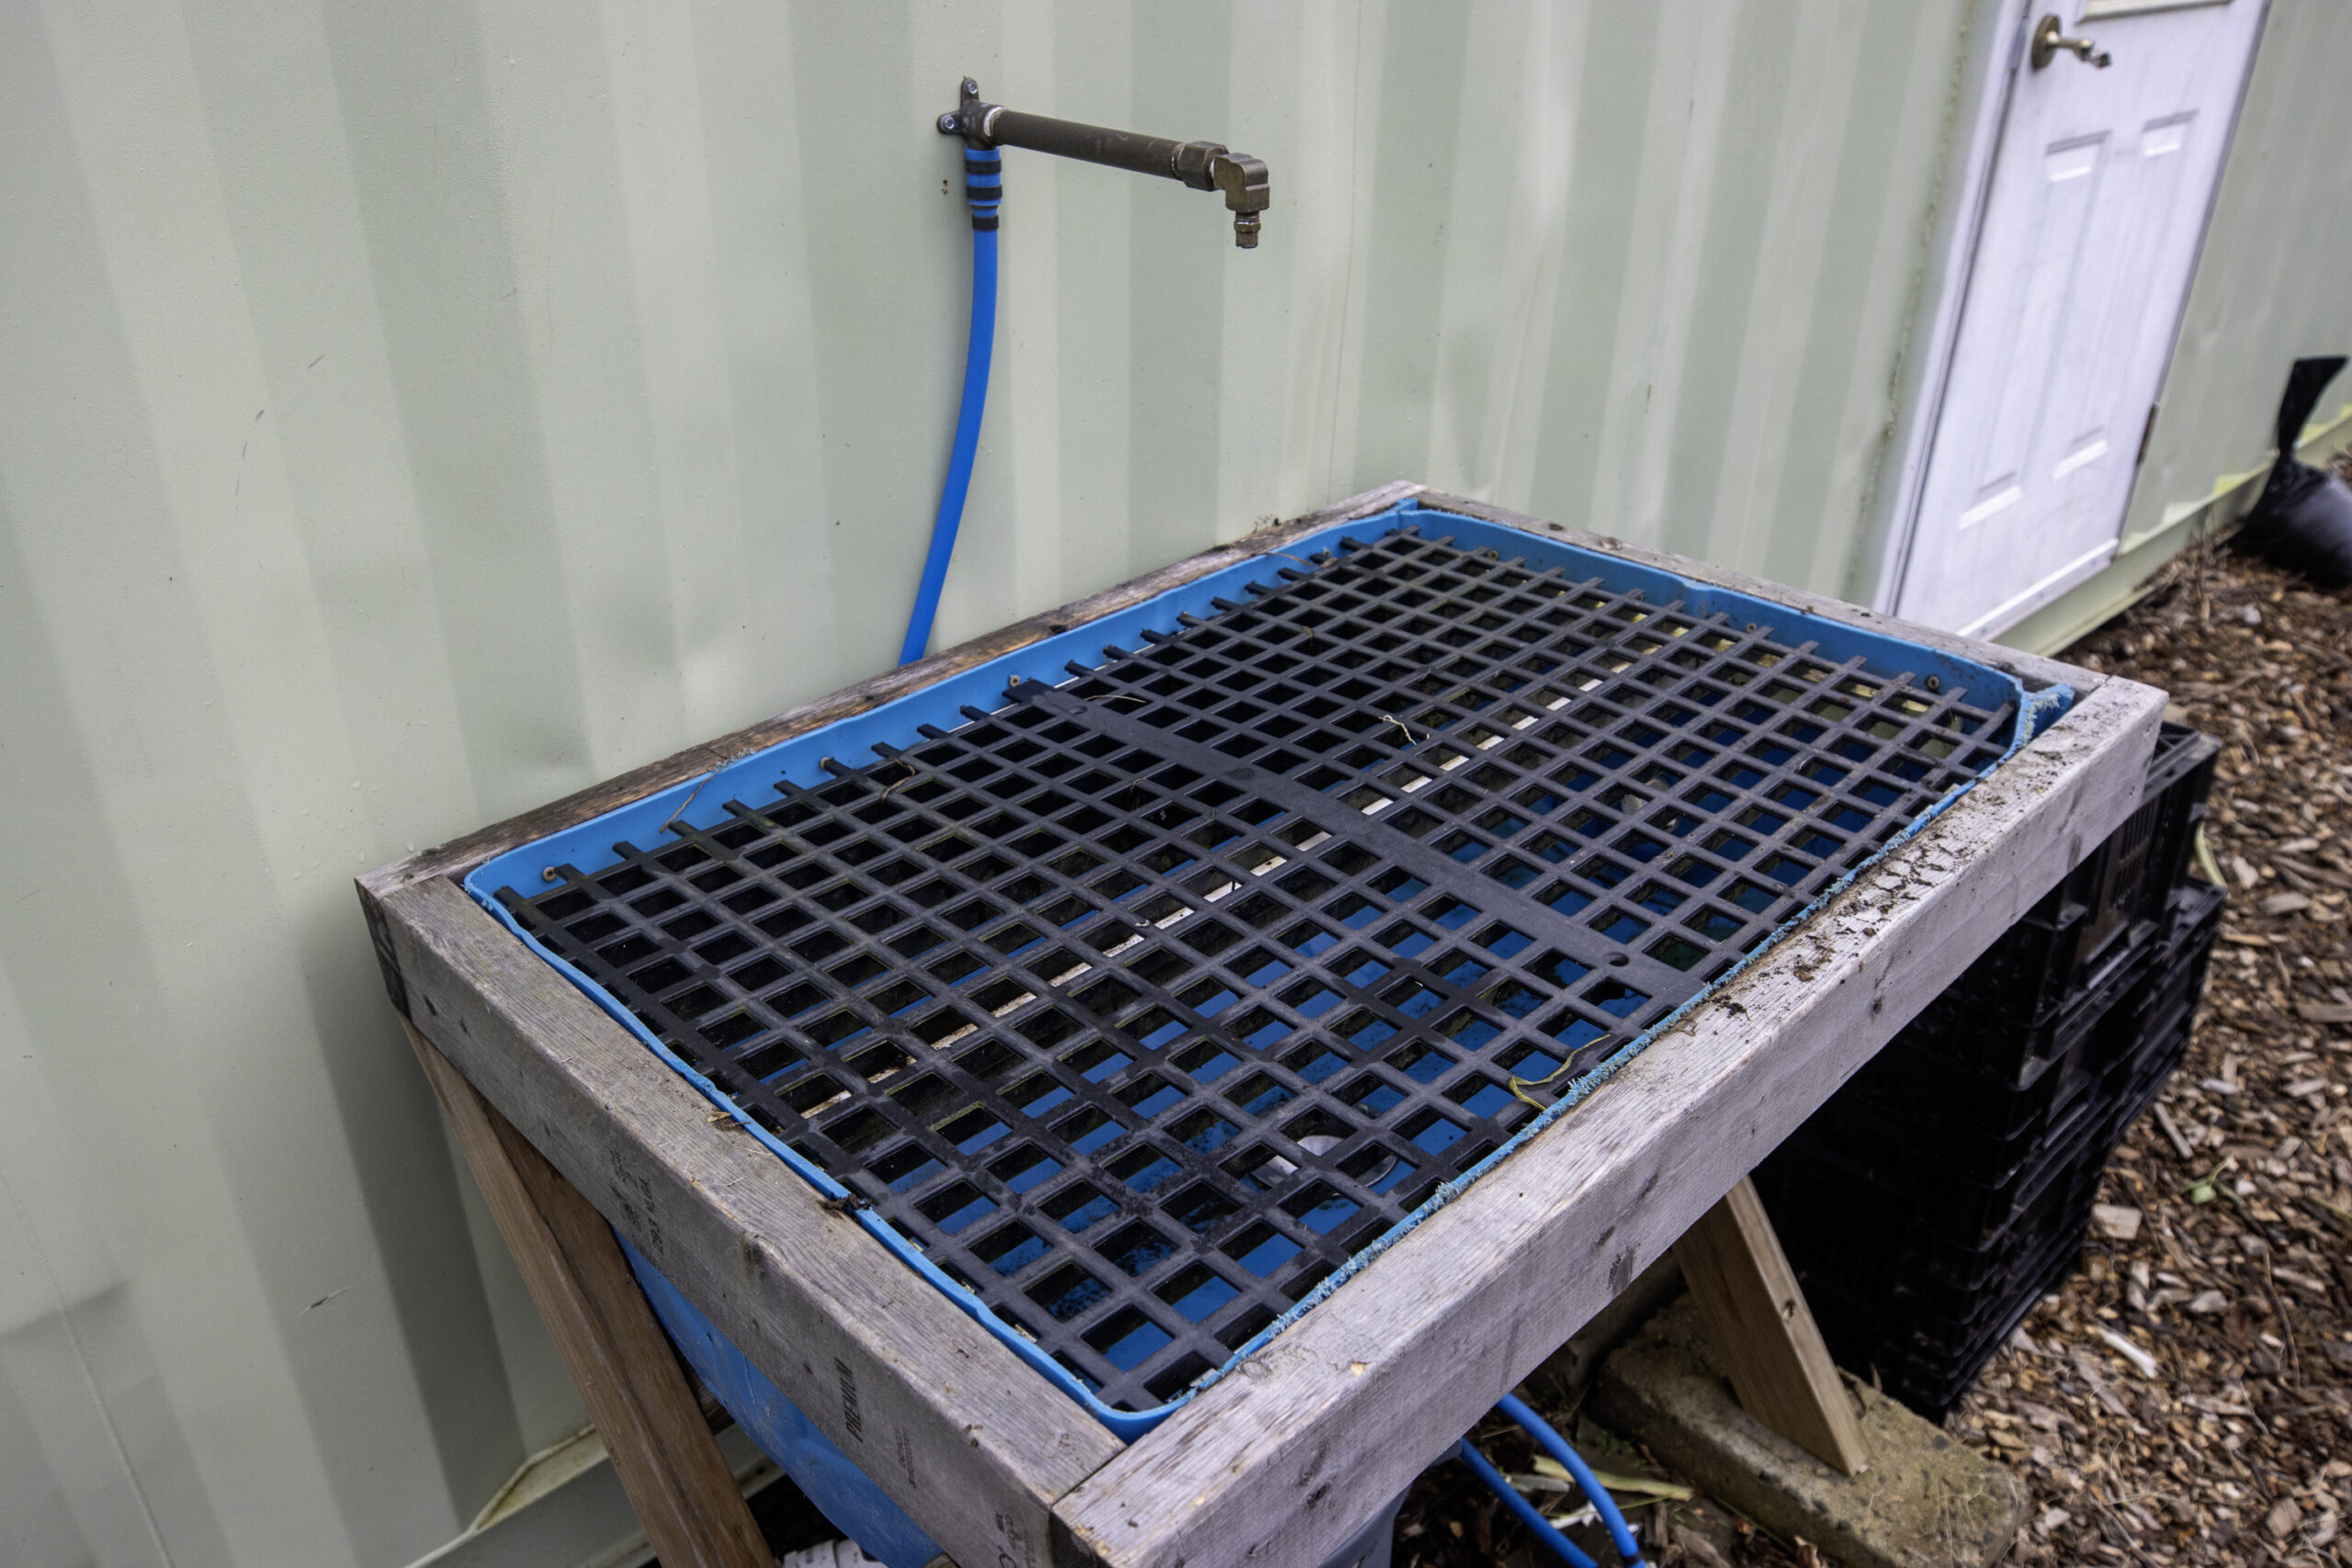
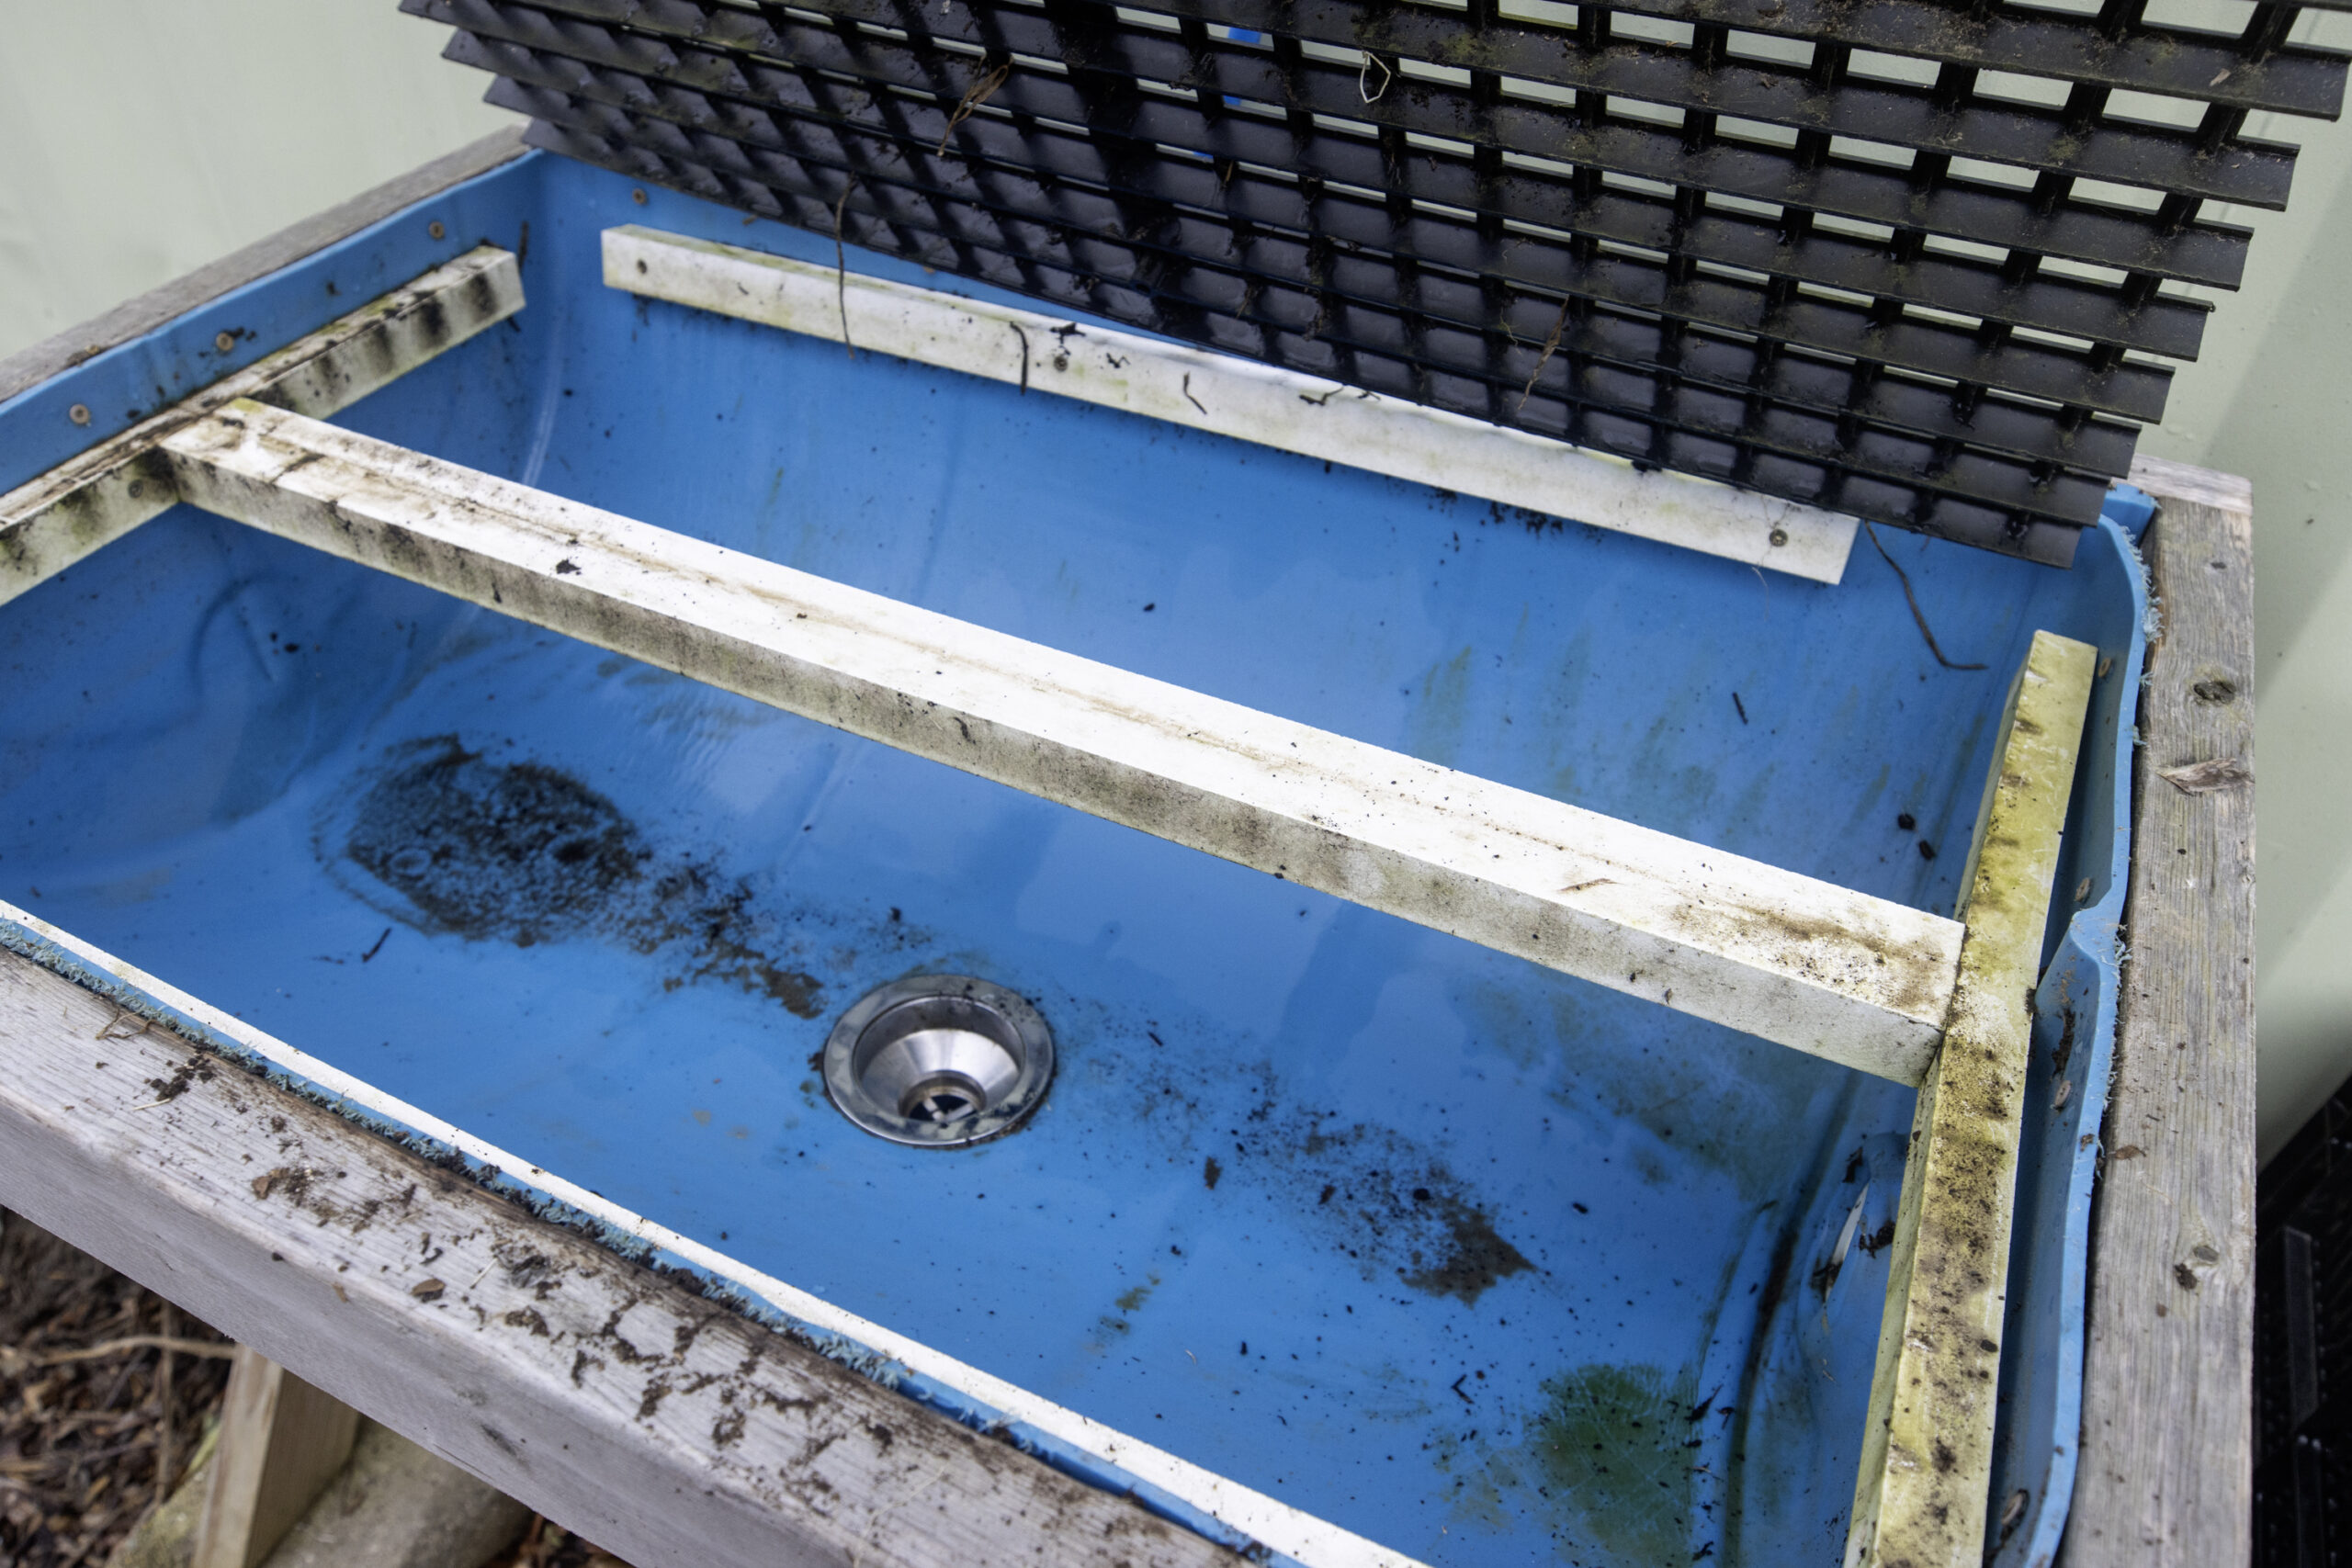
- Outdoor hand washing sink and hands free spray station
- Cost: $16,000
Original Wash/Pack
For the first year of washing and packing at this farm Lauren used market tables set up under the market tent, using the market totes filled with water as washing basins. This setup was simple and worked using things on hand but was inefficient due to the regular setup and tear-down needed.
Decision to Use A Container
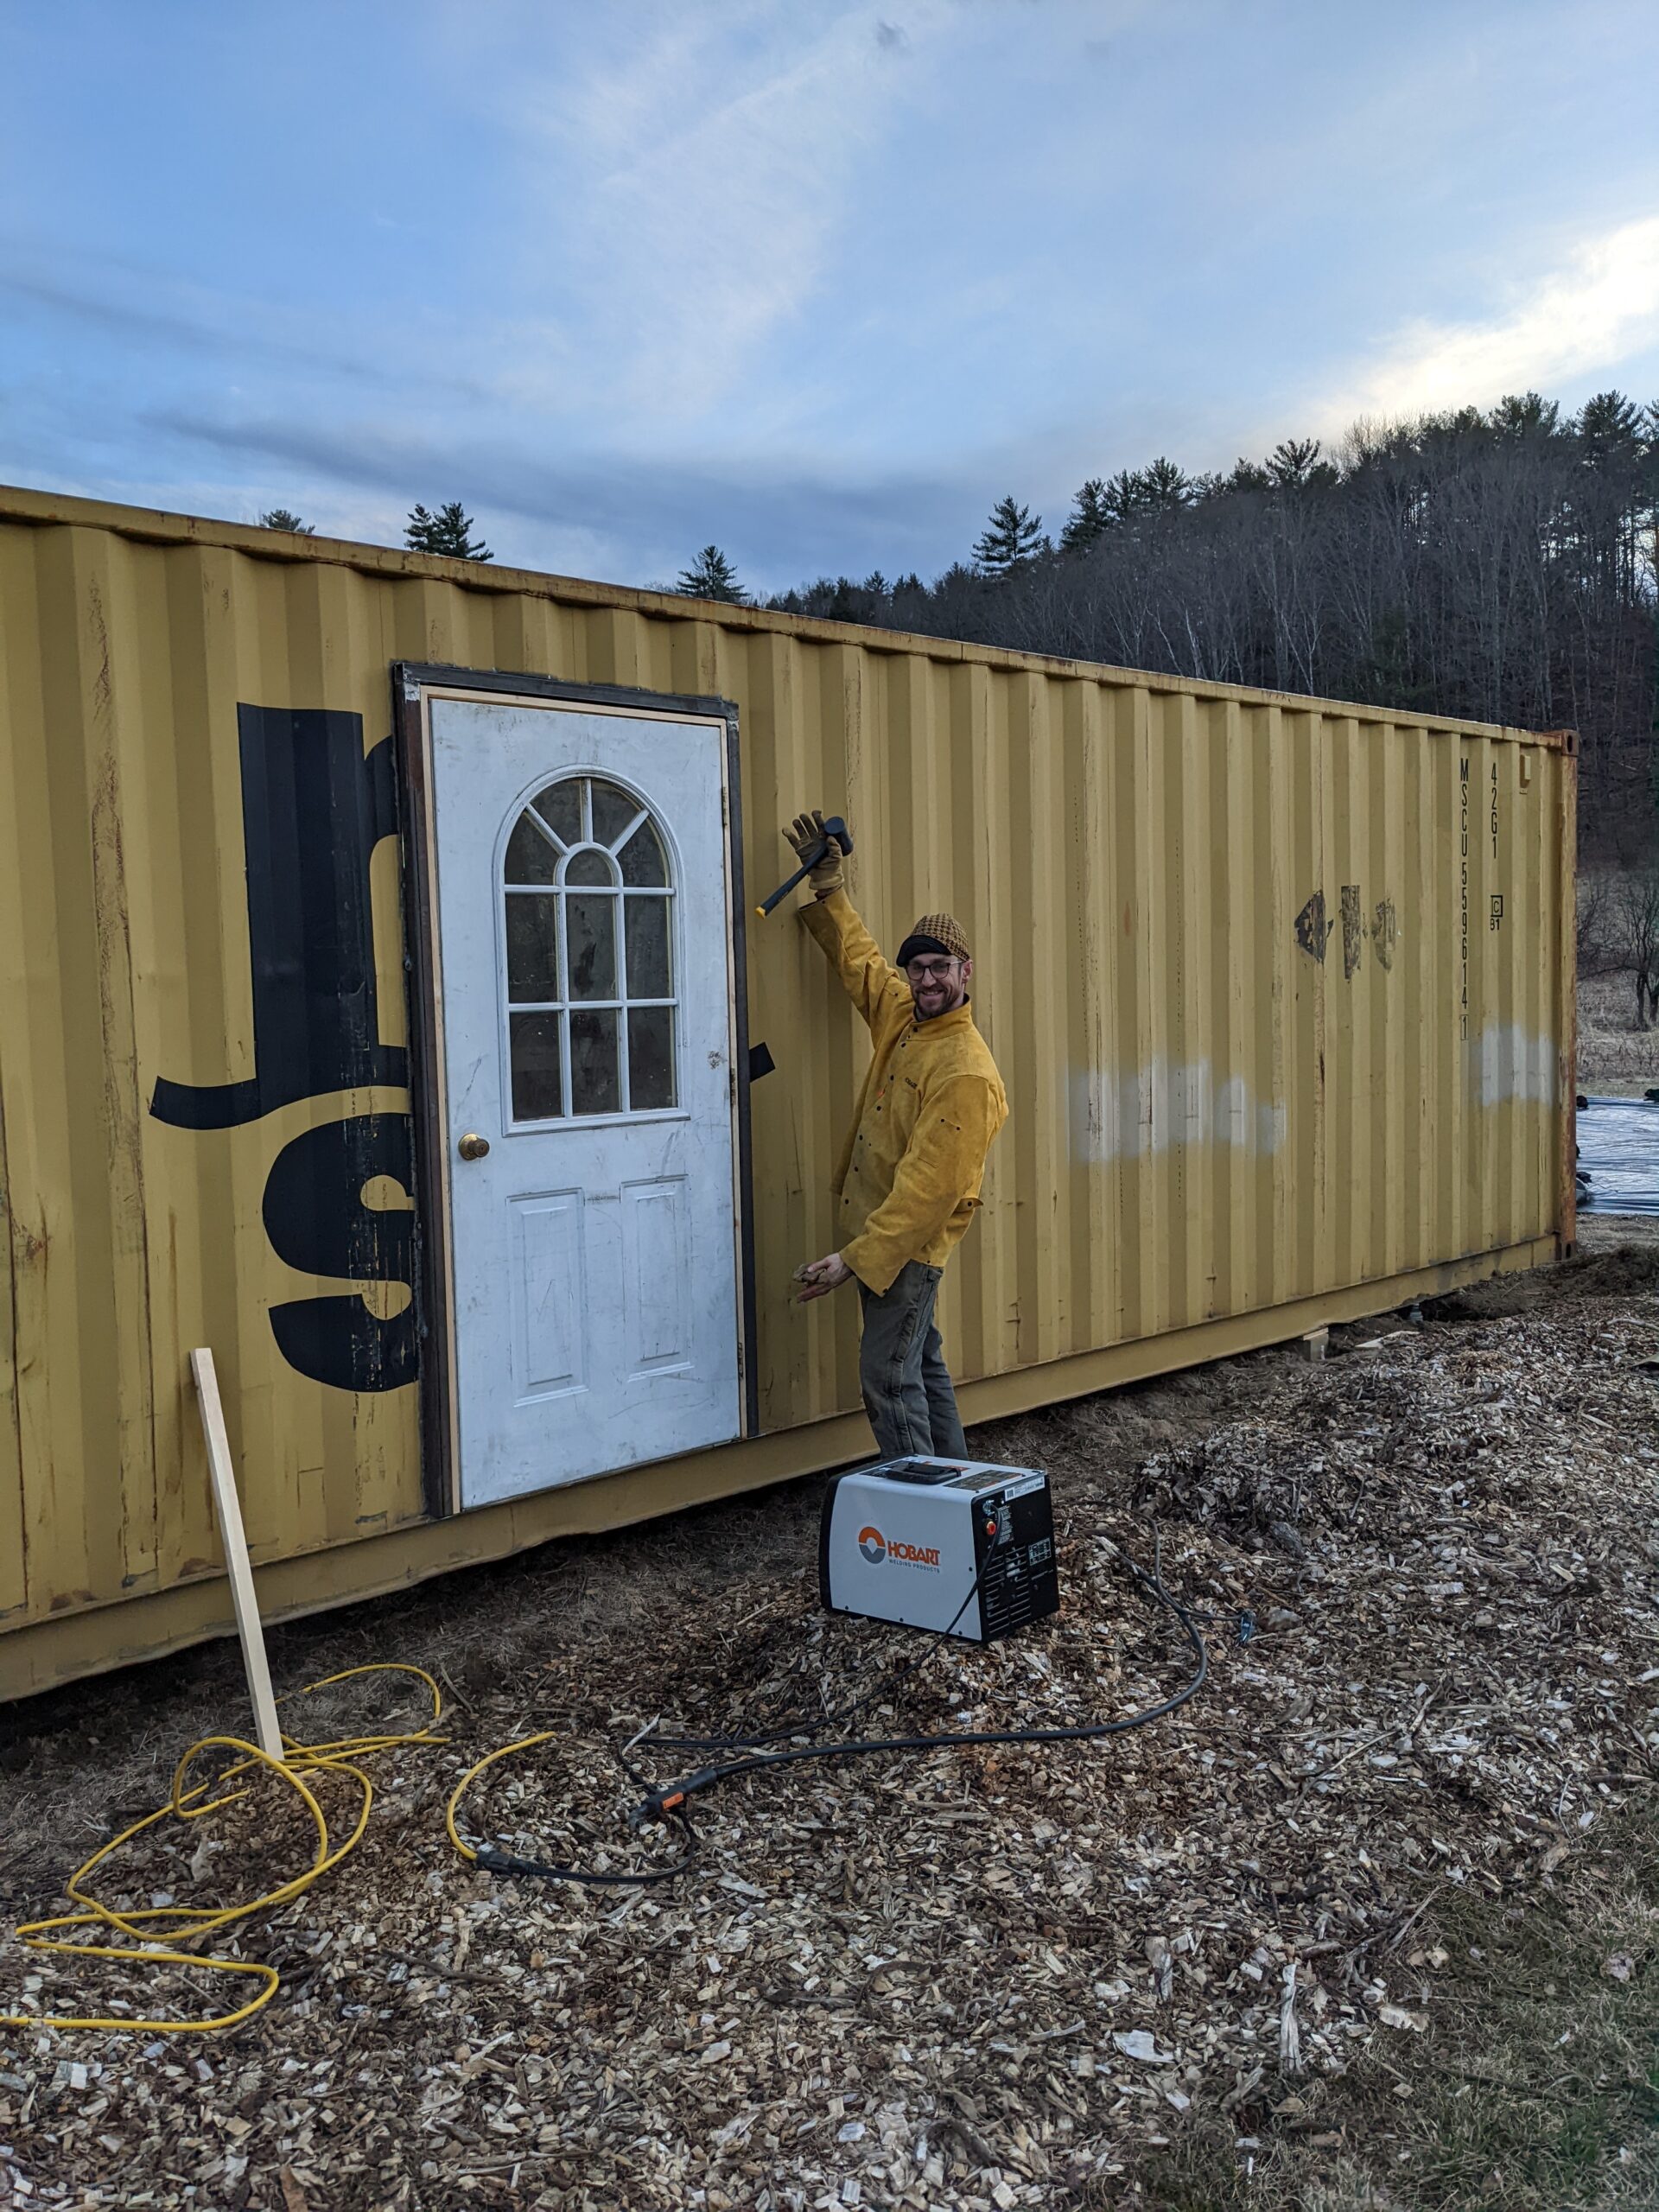
Lauren and Oliver looked at many options and considered building a shed. But building materials were expensive, prefab sheds posed flow challenges for this particular use and would still require modification. So a shipping container seemed like the quickest and cheapest option for covered workspace, with a benefit of the container being movable at any point in the future, should the need arise.
Construction Photos
(click on the photos to view full screen)

Favorite features
- One major benefit is that it is weather and rodent proof, which is great fro holding edible crops.
- Placed in the middle of their growing space, which makes it easy to access.
- Well-lit: “What a difference to see your product. And we can work late if need be!”
- The walk-in cooler: Spacious, with plenty of room to do what you need to do. Gives them room to grow.
- Flexible space which is adaptable if they want to change up equipment or processes.
- They can drive right up to both the end door or the side door.
- Window over the sink: Provides a morale boost, lets southern, natural light in and and looks out over the growing space.
Produce Safety Details
- Includes a hand-wash sink
- 3-bay sink keeps water contained and drained and not splattering everywhere
- Having an order and workflow
- Typically the big door is closed to shade the produce
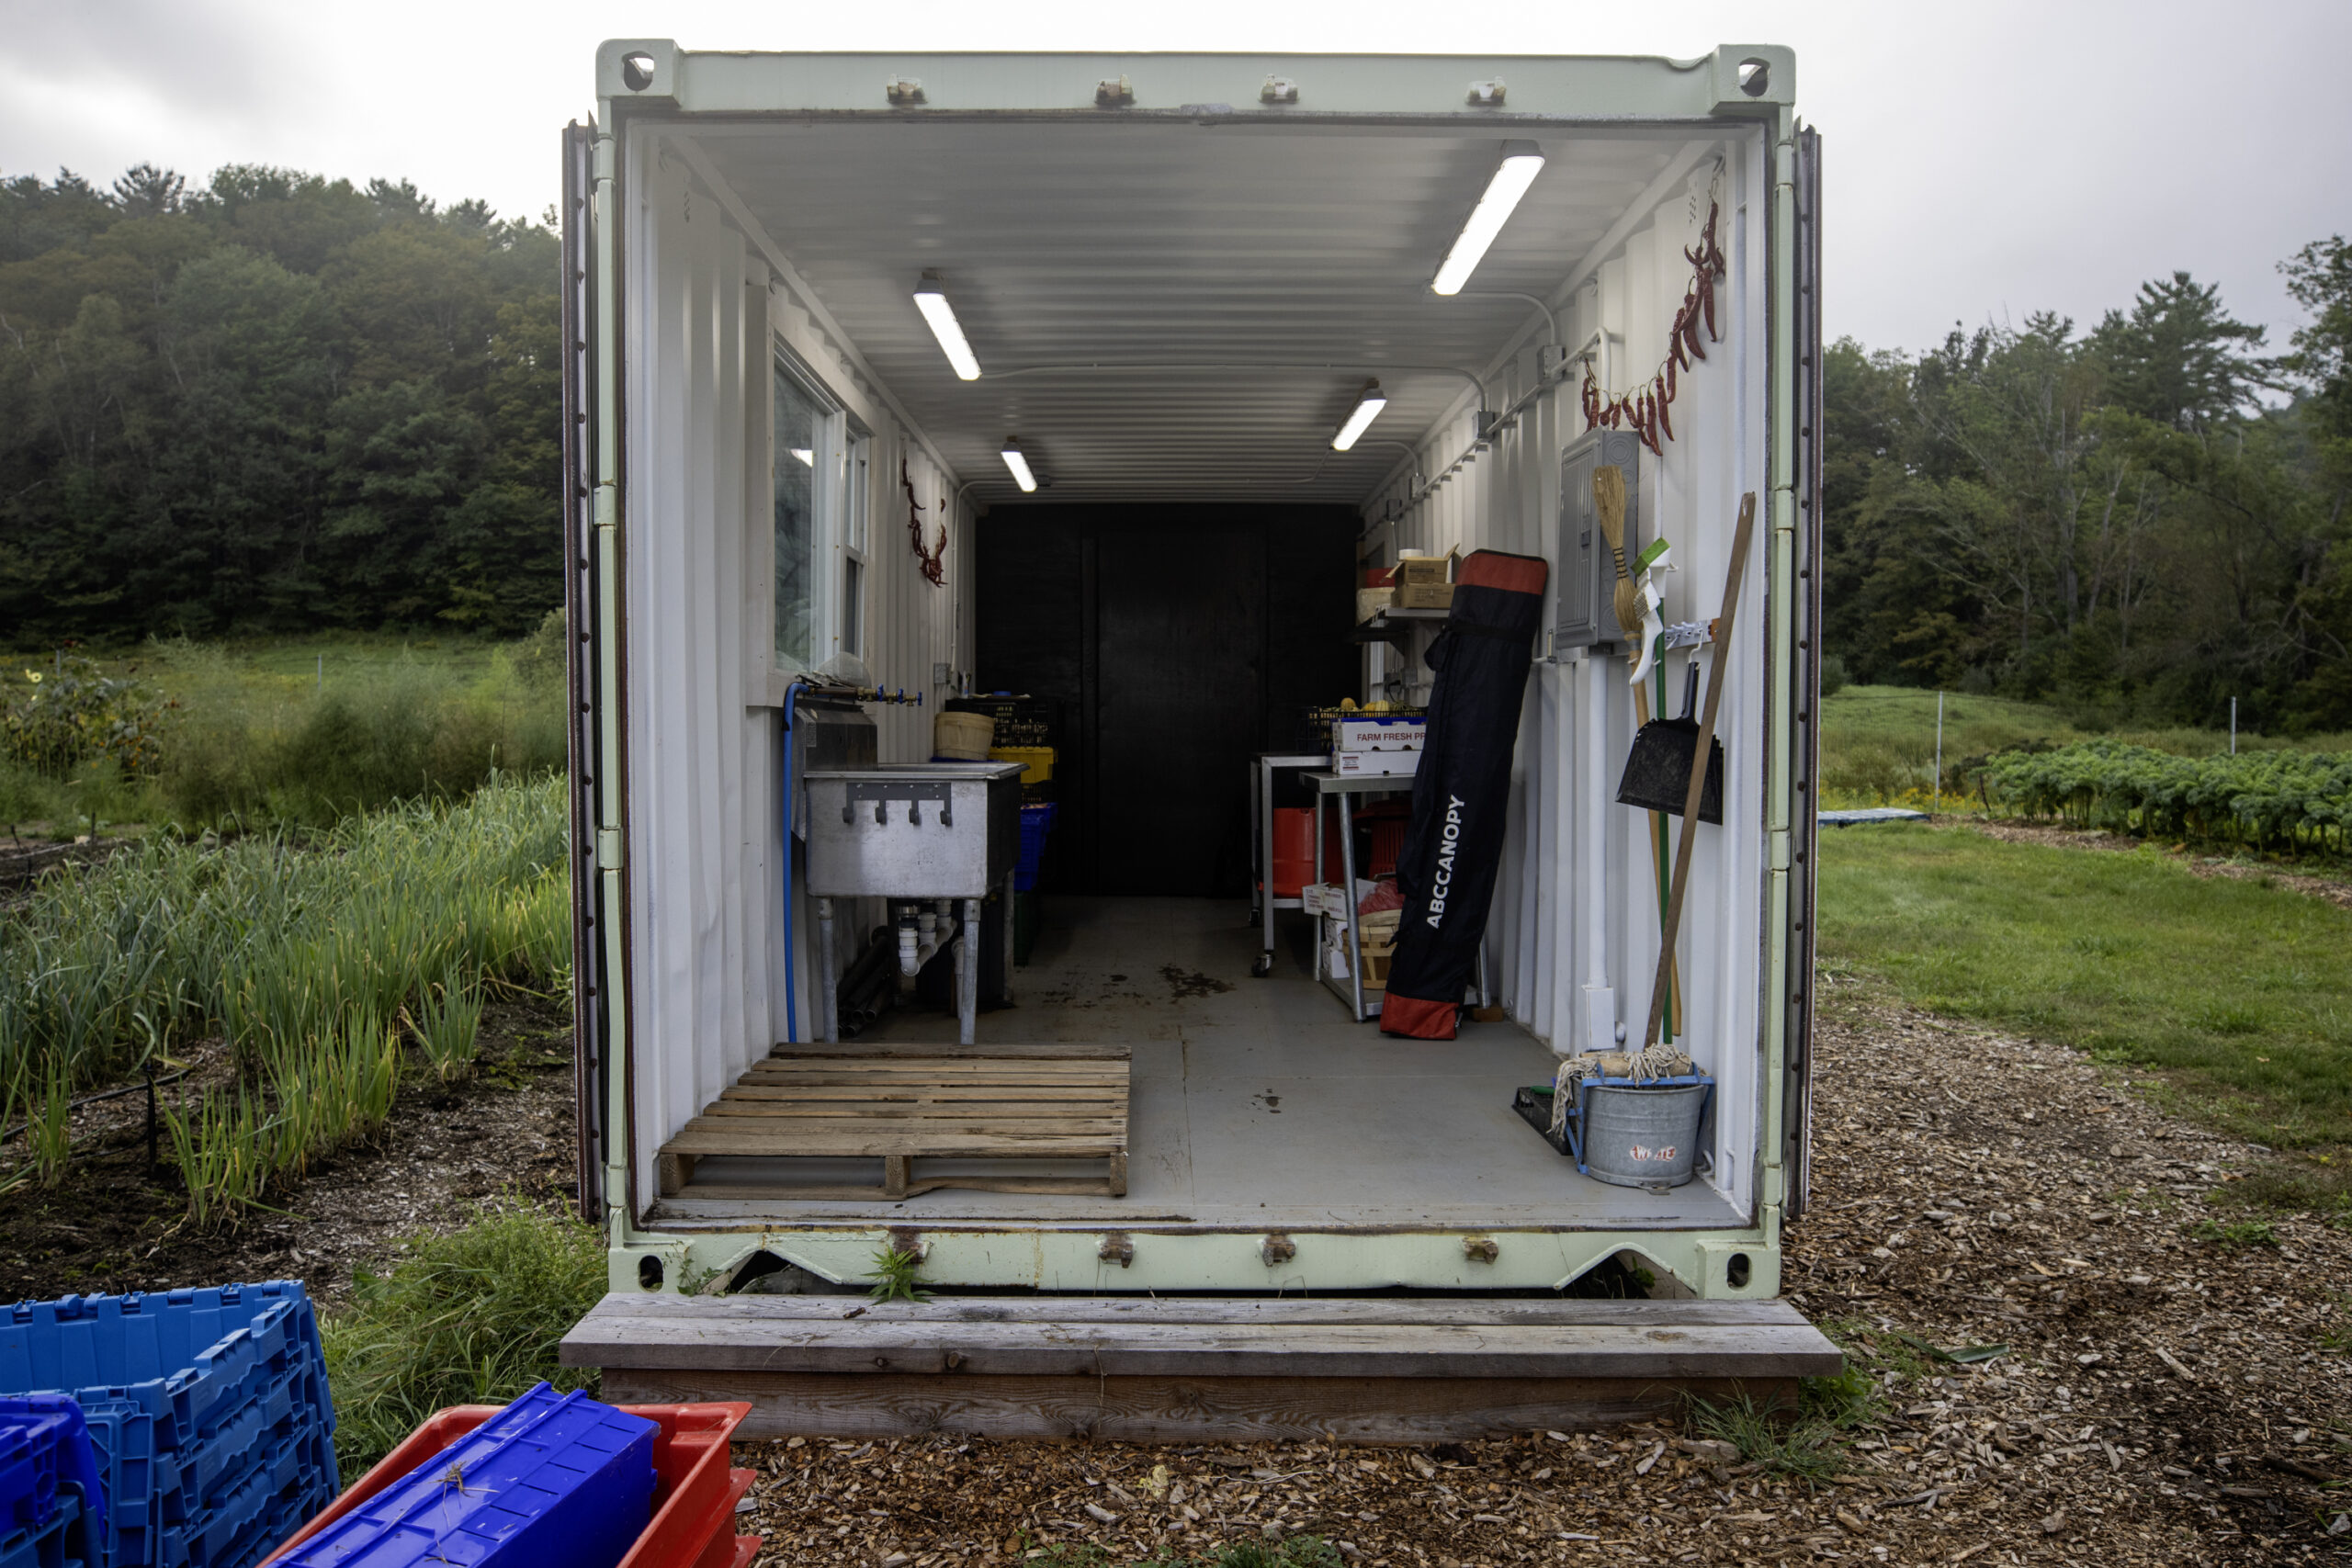
- Dirty bins remain on one end
- Dunnage rack keeps things off the floor
- Washable walls are durable by design

Downsides

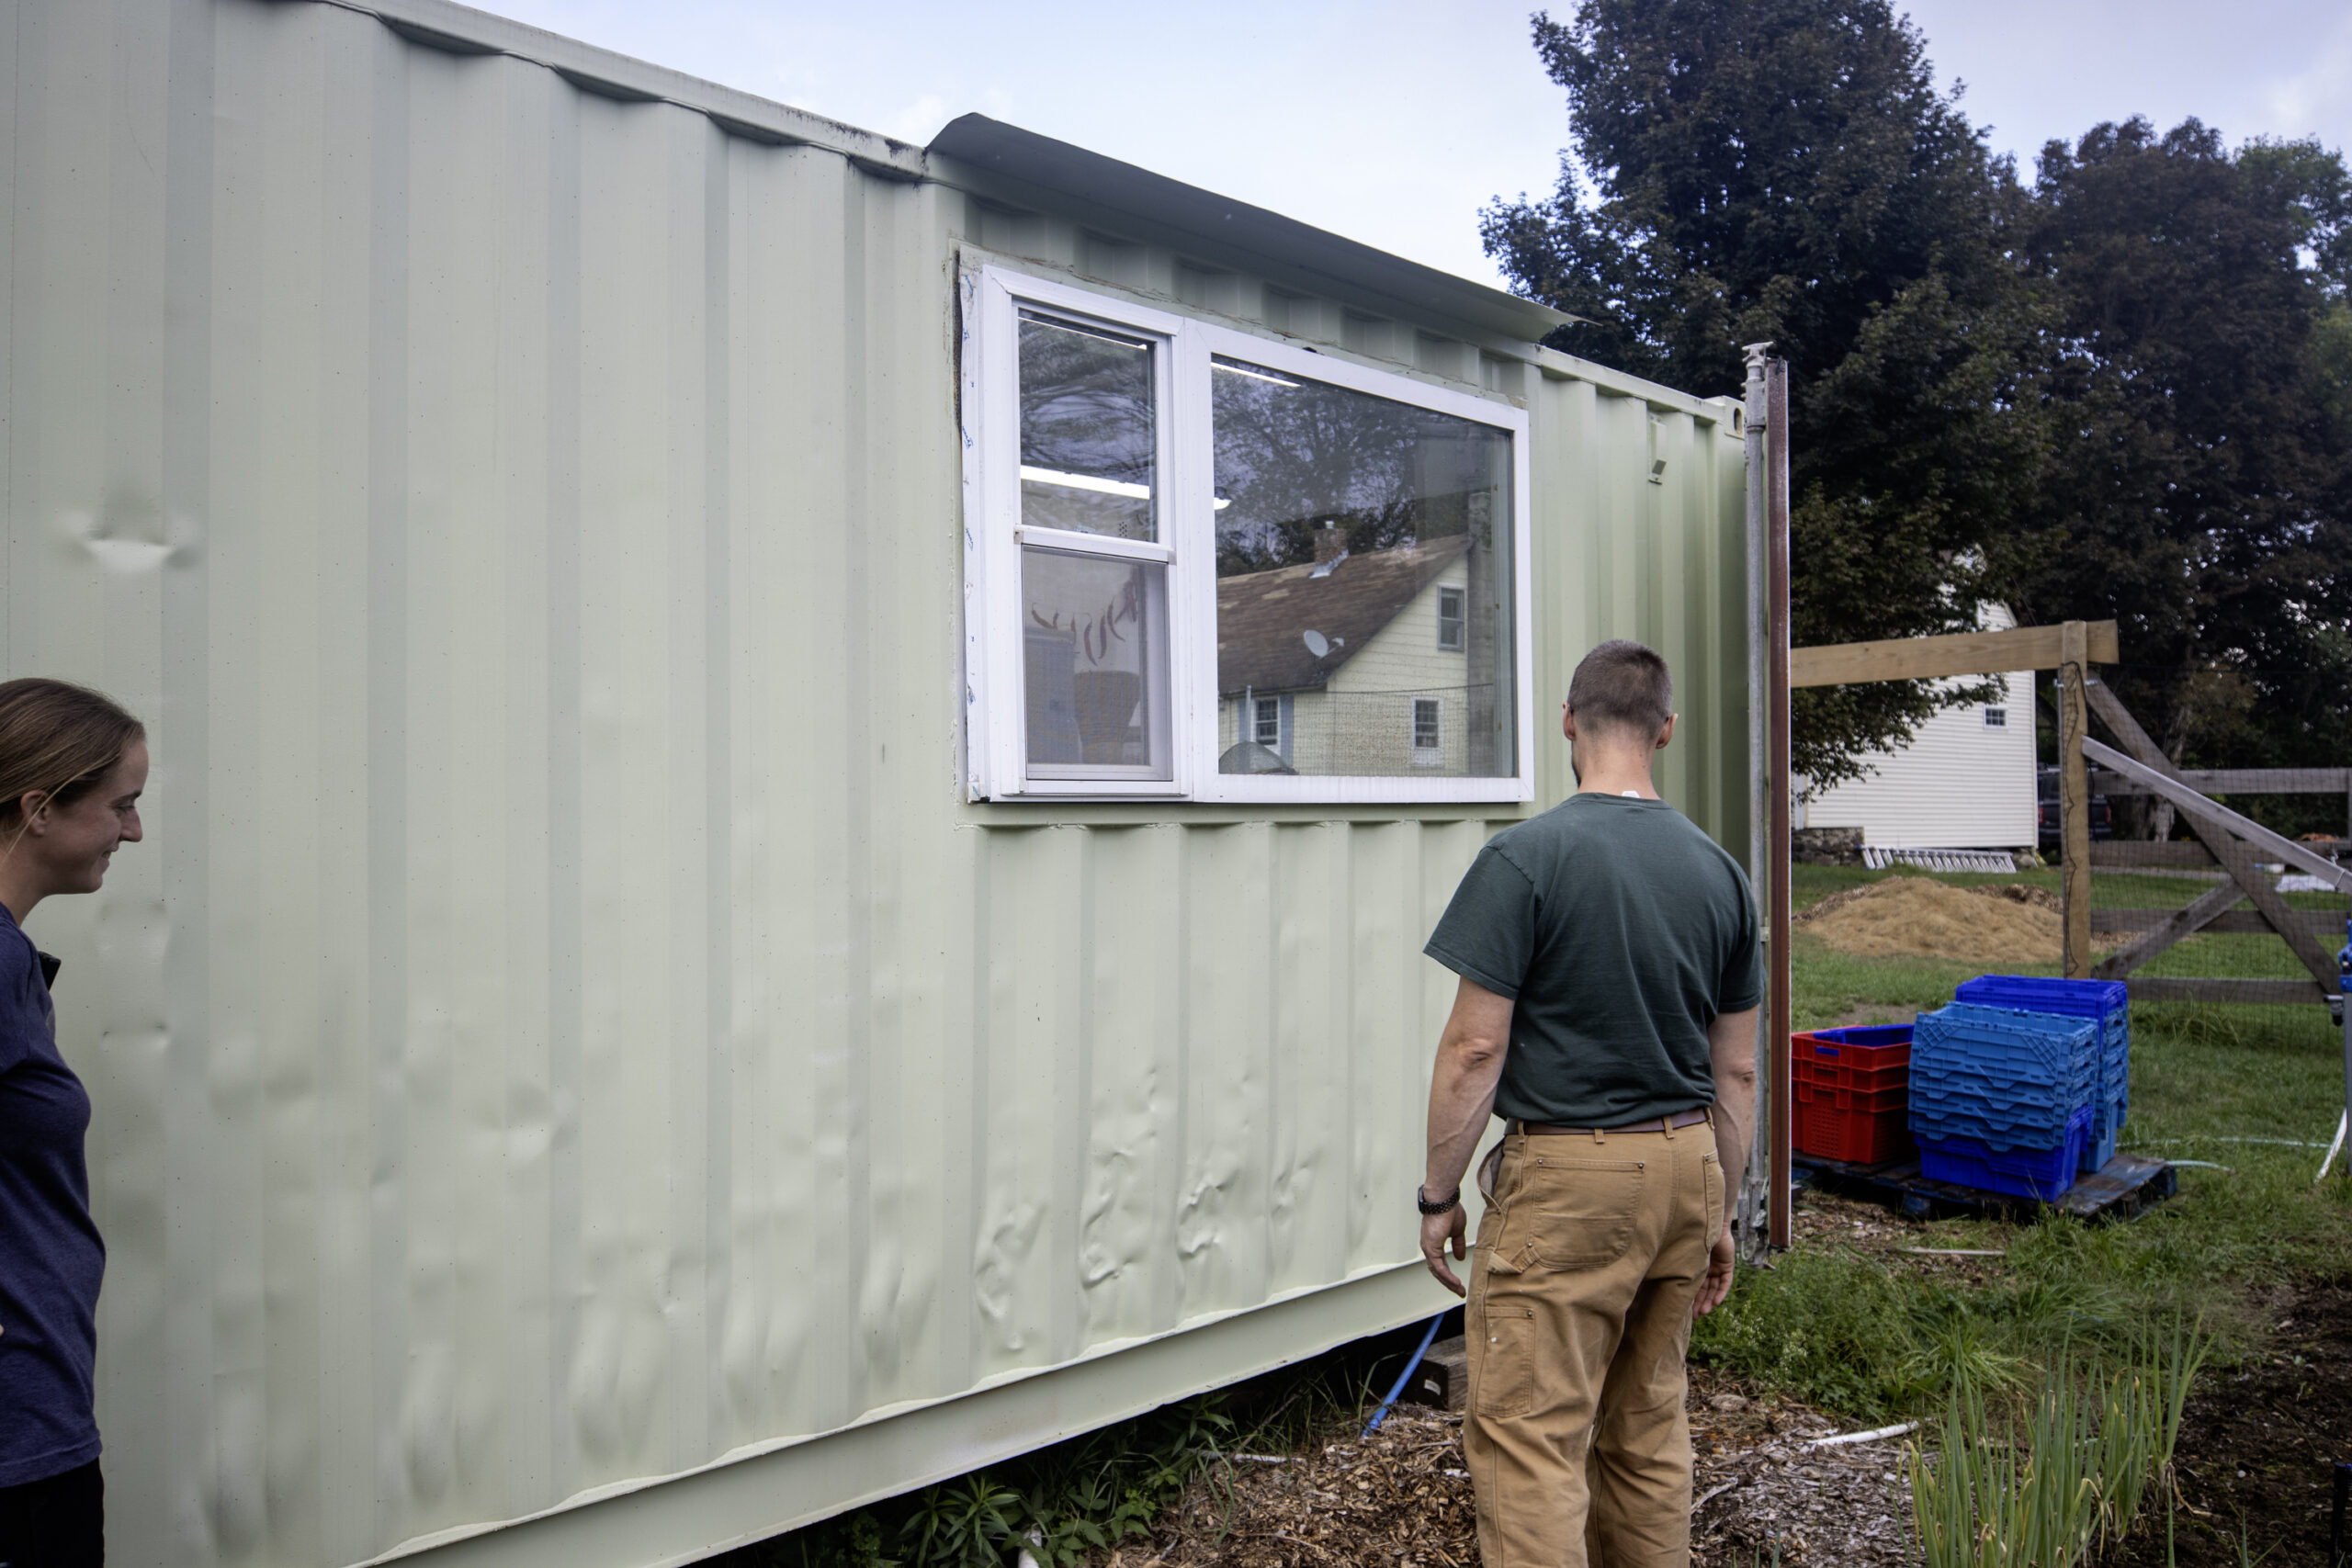
- Shipping containers can be an eyesore. To mitigate this, they painted the outside a soft, neutral green, and the inside a clean, bright white. Though still somewhat industrial, the interior feels clean and the exterior blends into the surroundings.
- They located the container in the middle of their growing space, which makes it easy to access, but is in the middle of production, which can be inconvenient.
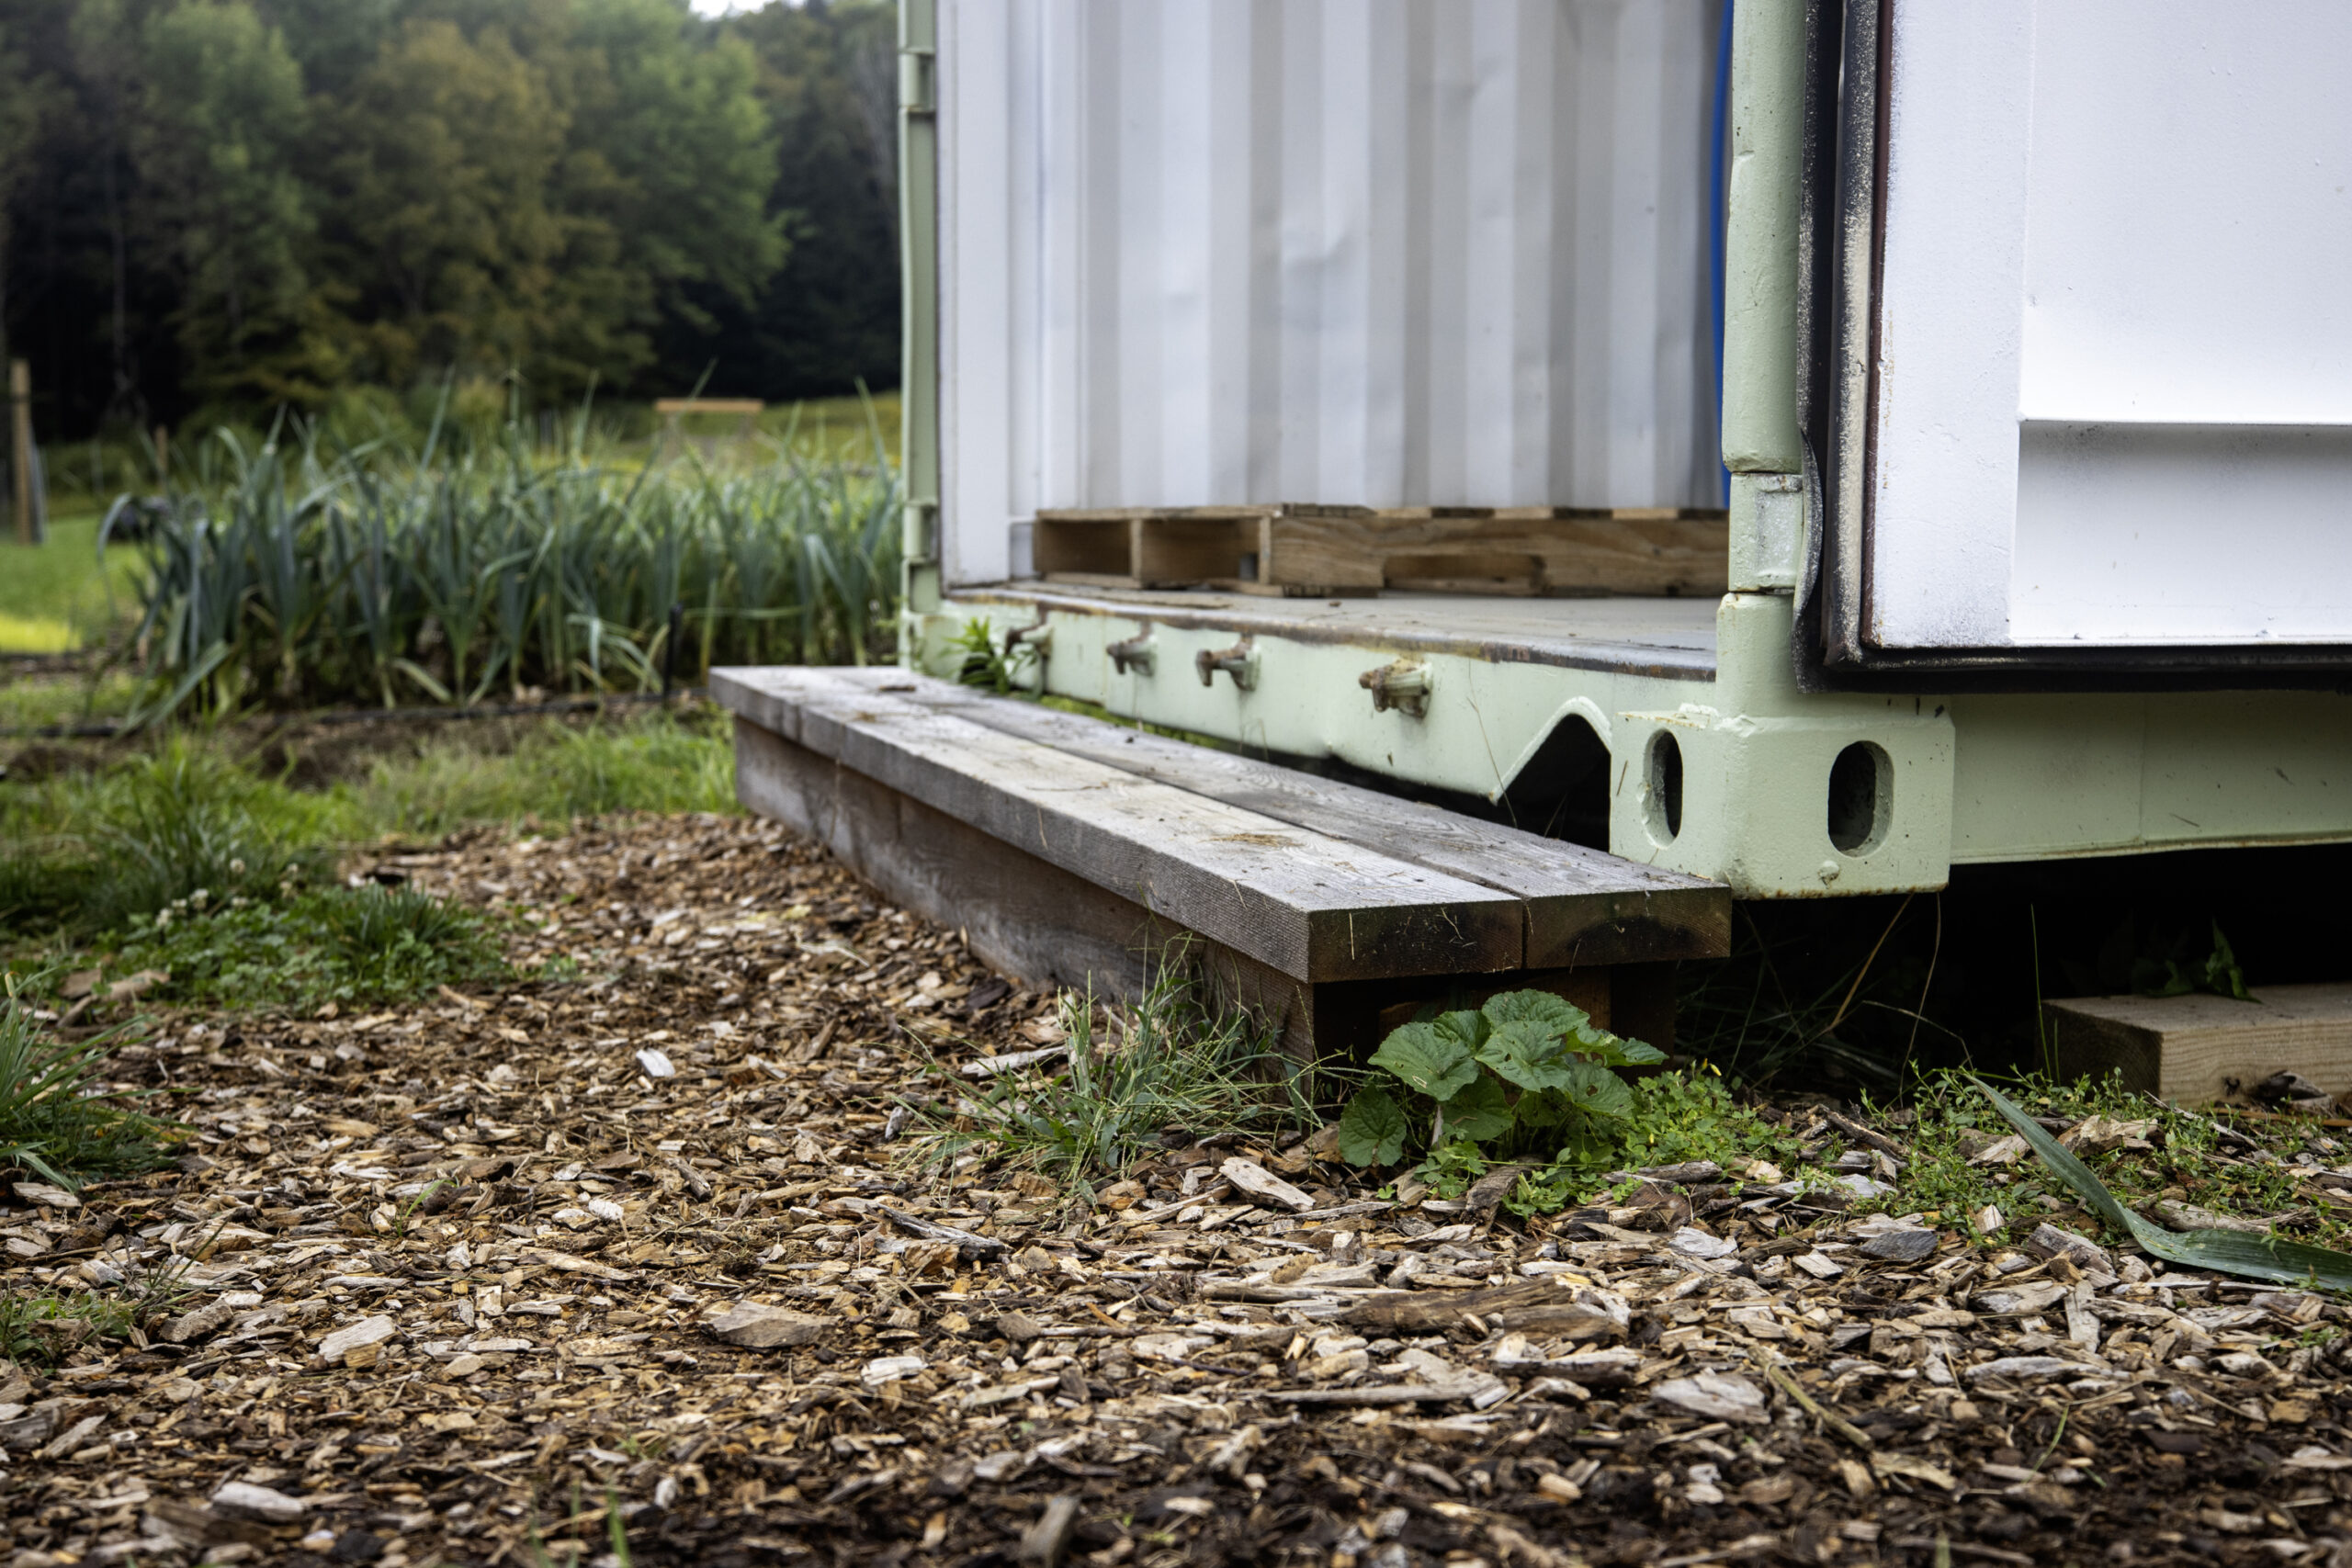
- Despite using a heavy duty floor plain, it still flaked and deteriorated in just a year, and will be one of those things that require periodic maintenance and upkeep.
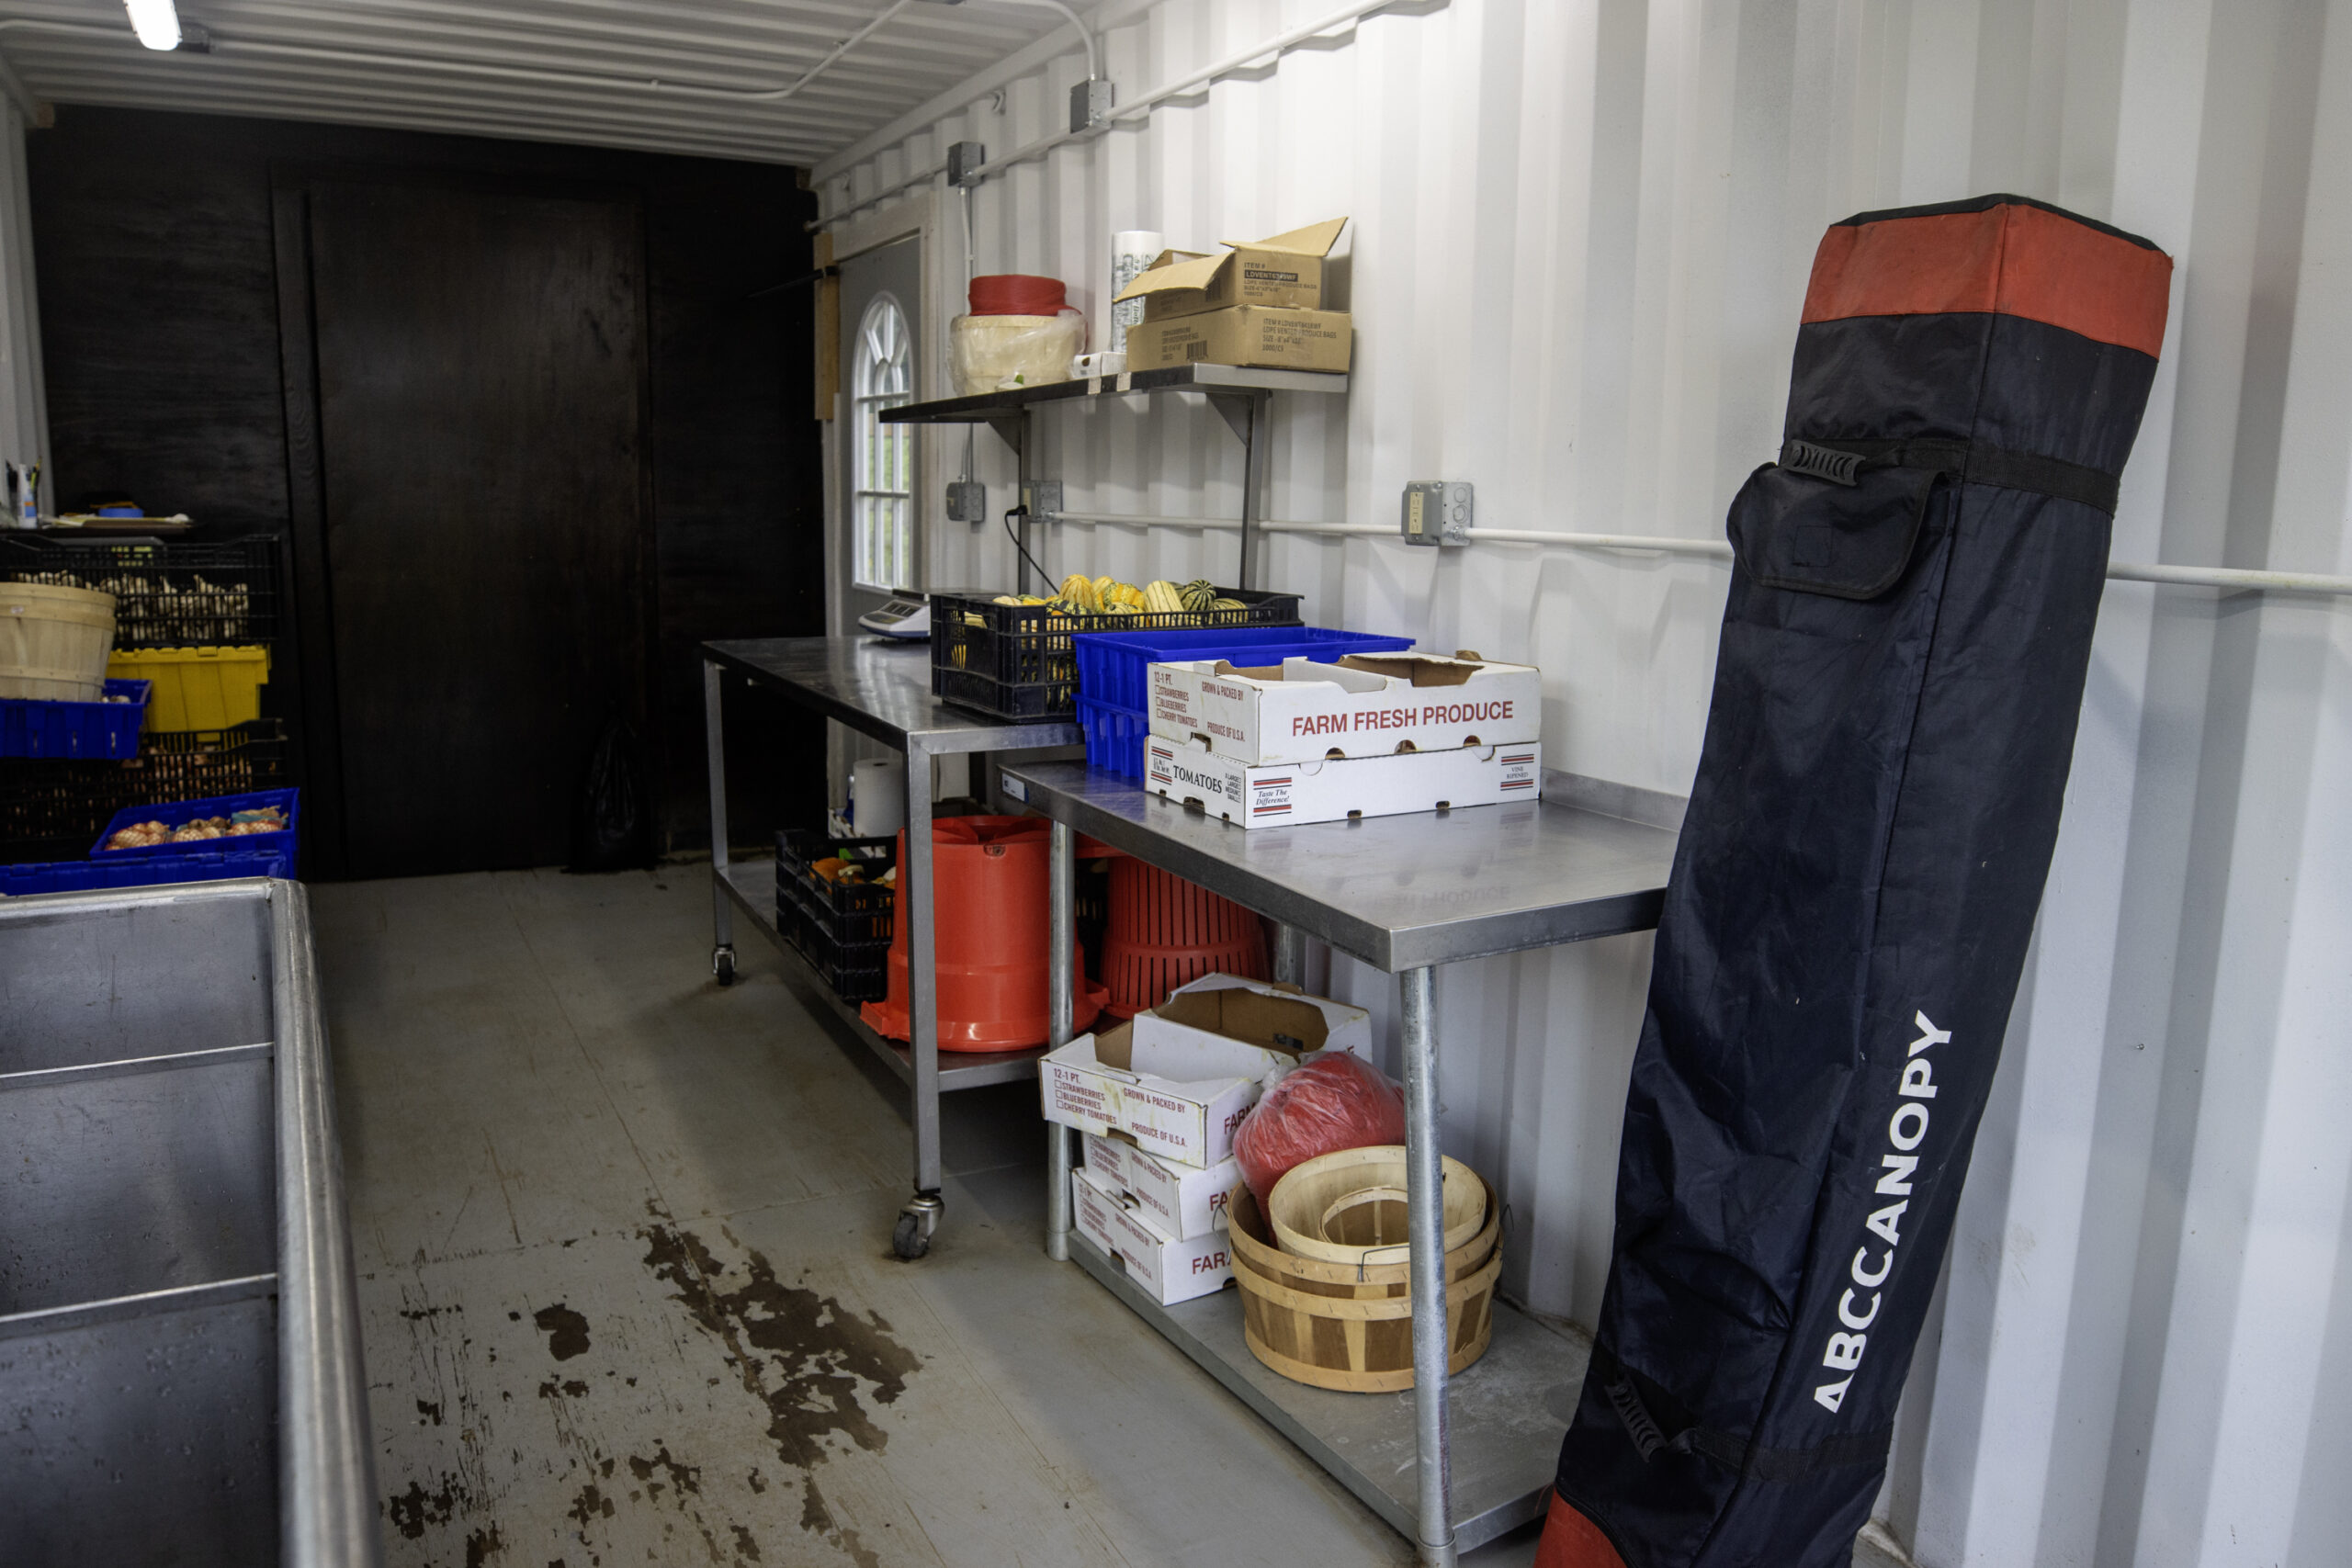
Flow & Floor Plan
Crops move through the container from left to right. Product to get washed is stacked on a pallet just inside the large doors, goes through a triple wash sink, and spin dried if needed before getting packed into bags and moved into the cooler. Vegetables needing to be sprayed off get done outside first. Typically the left large door remains closed for shade to keep the vegetables cool and the other door stays open for flow and mobility in and out throughout the day.
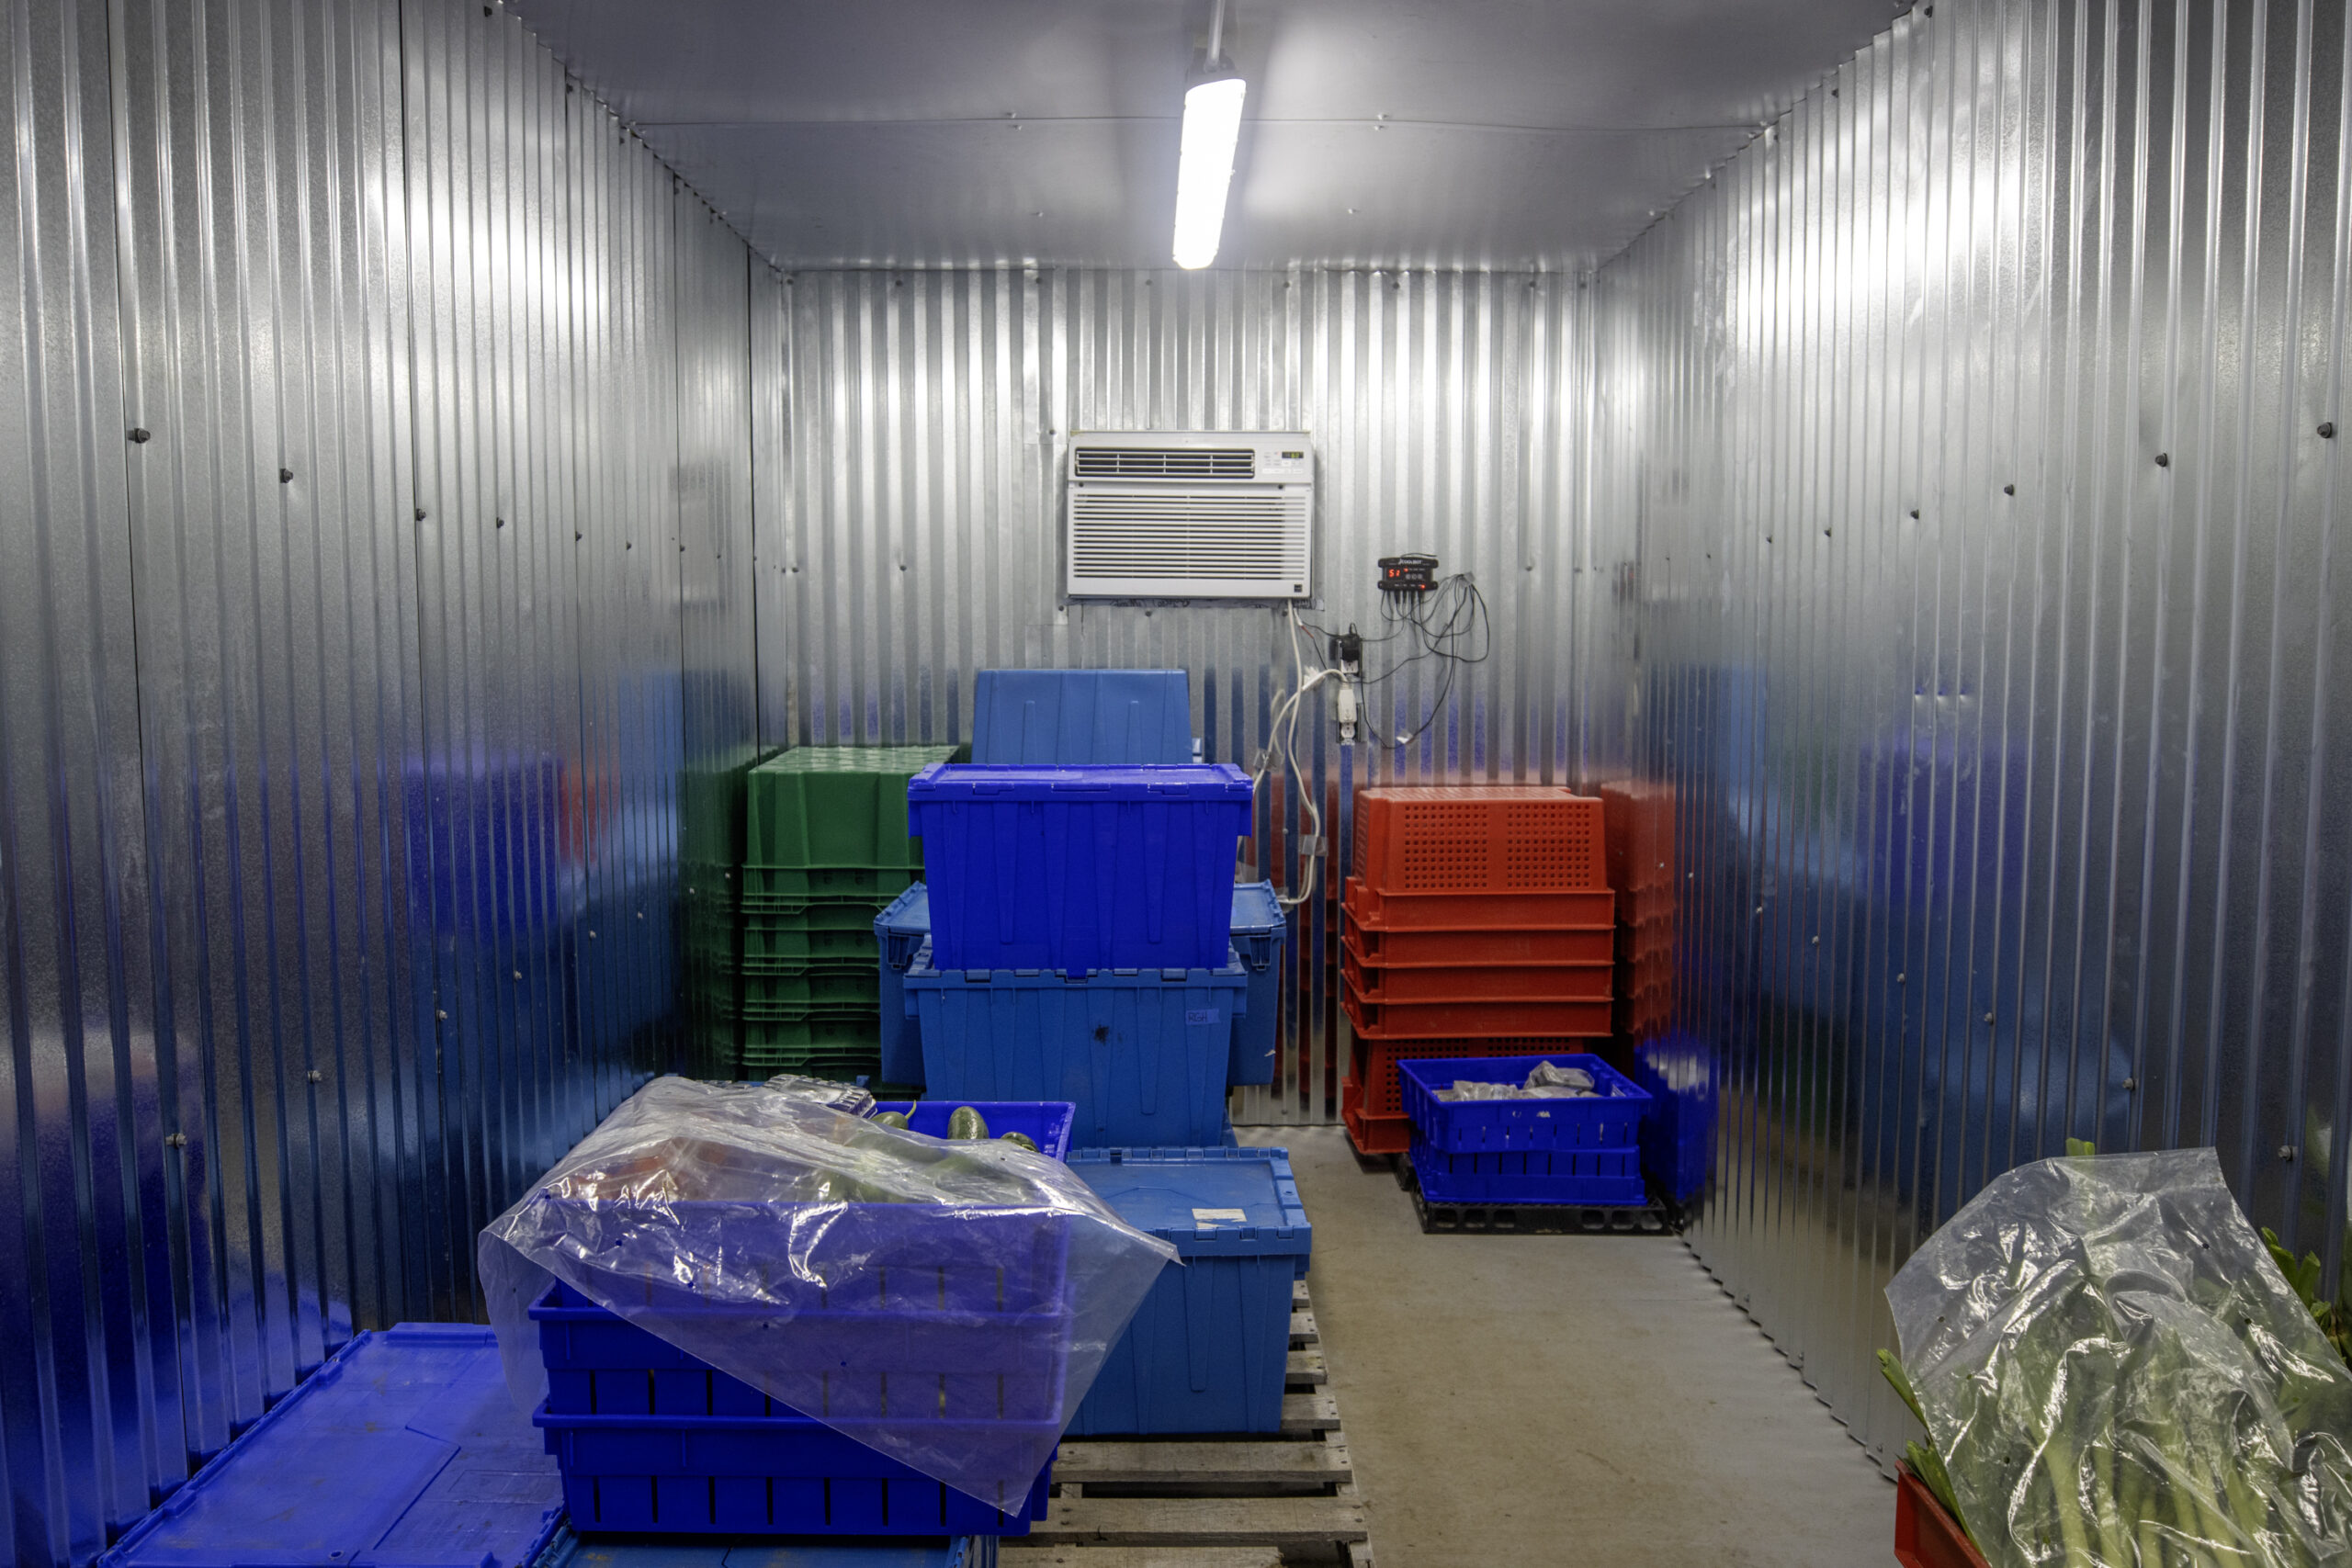
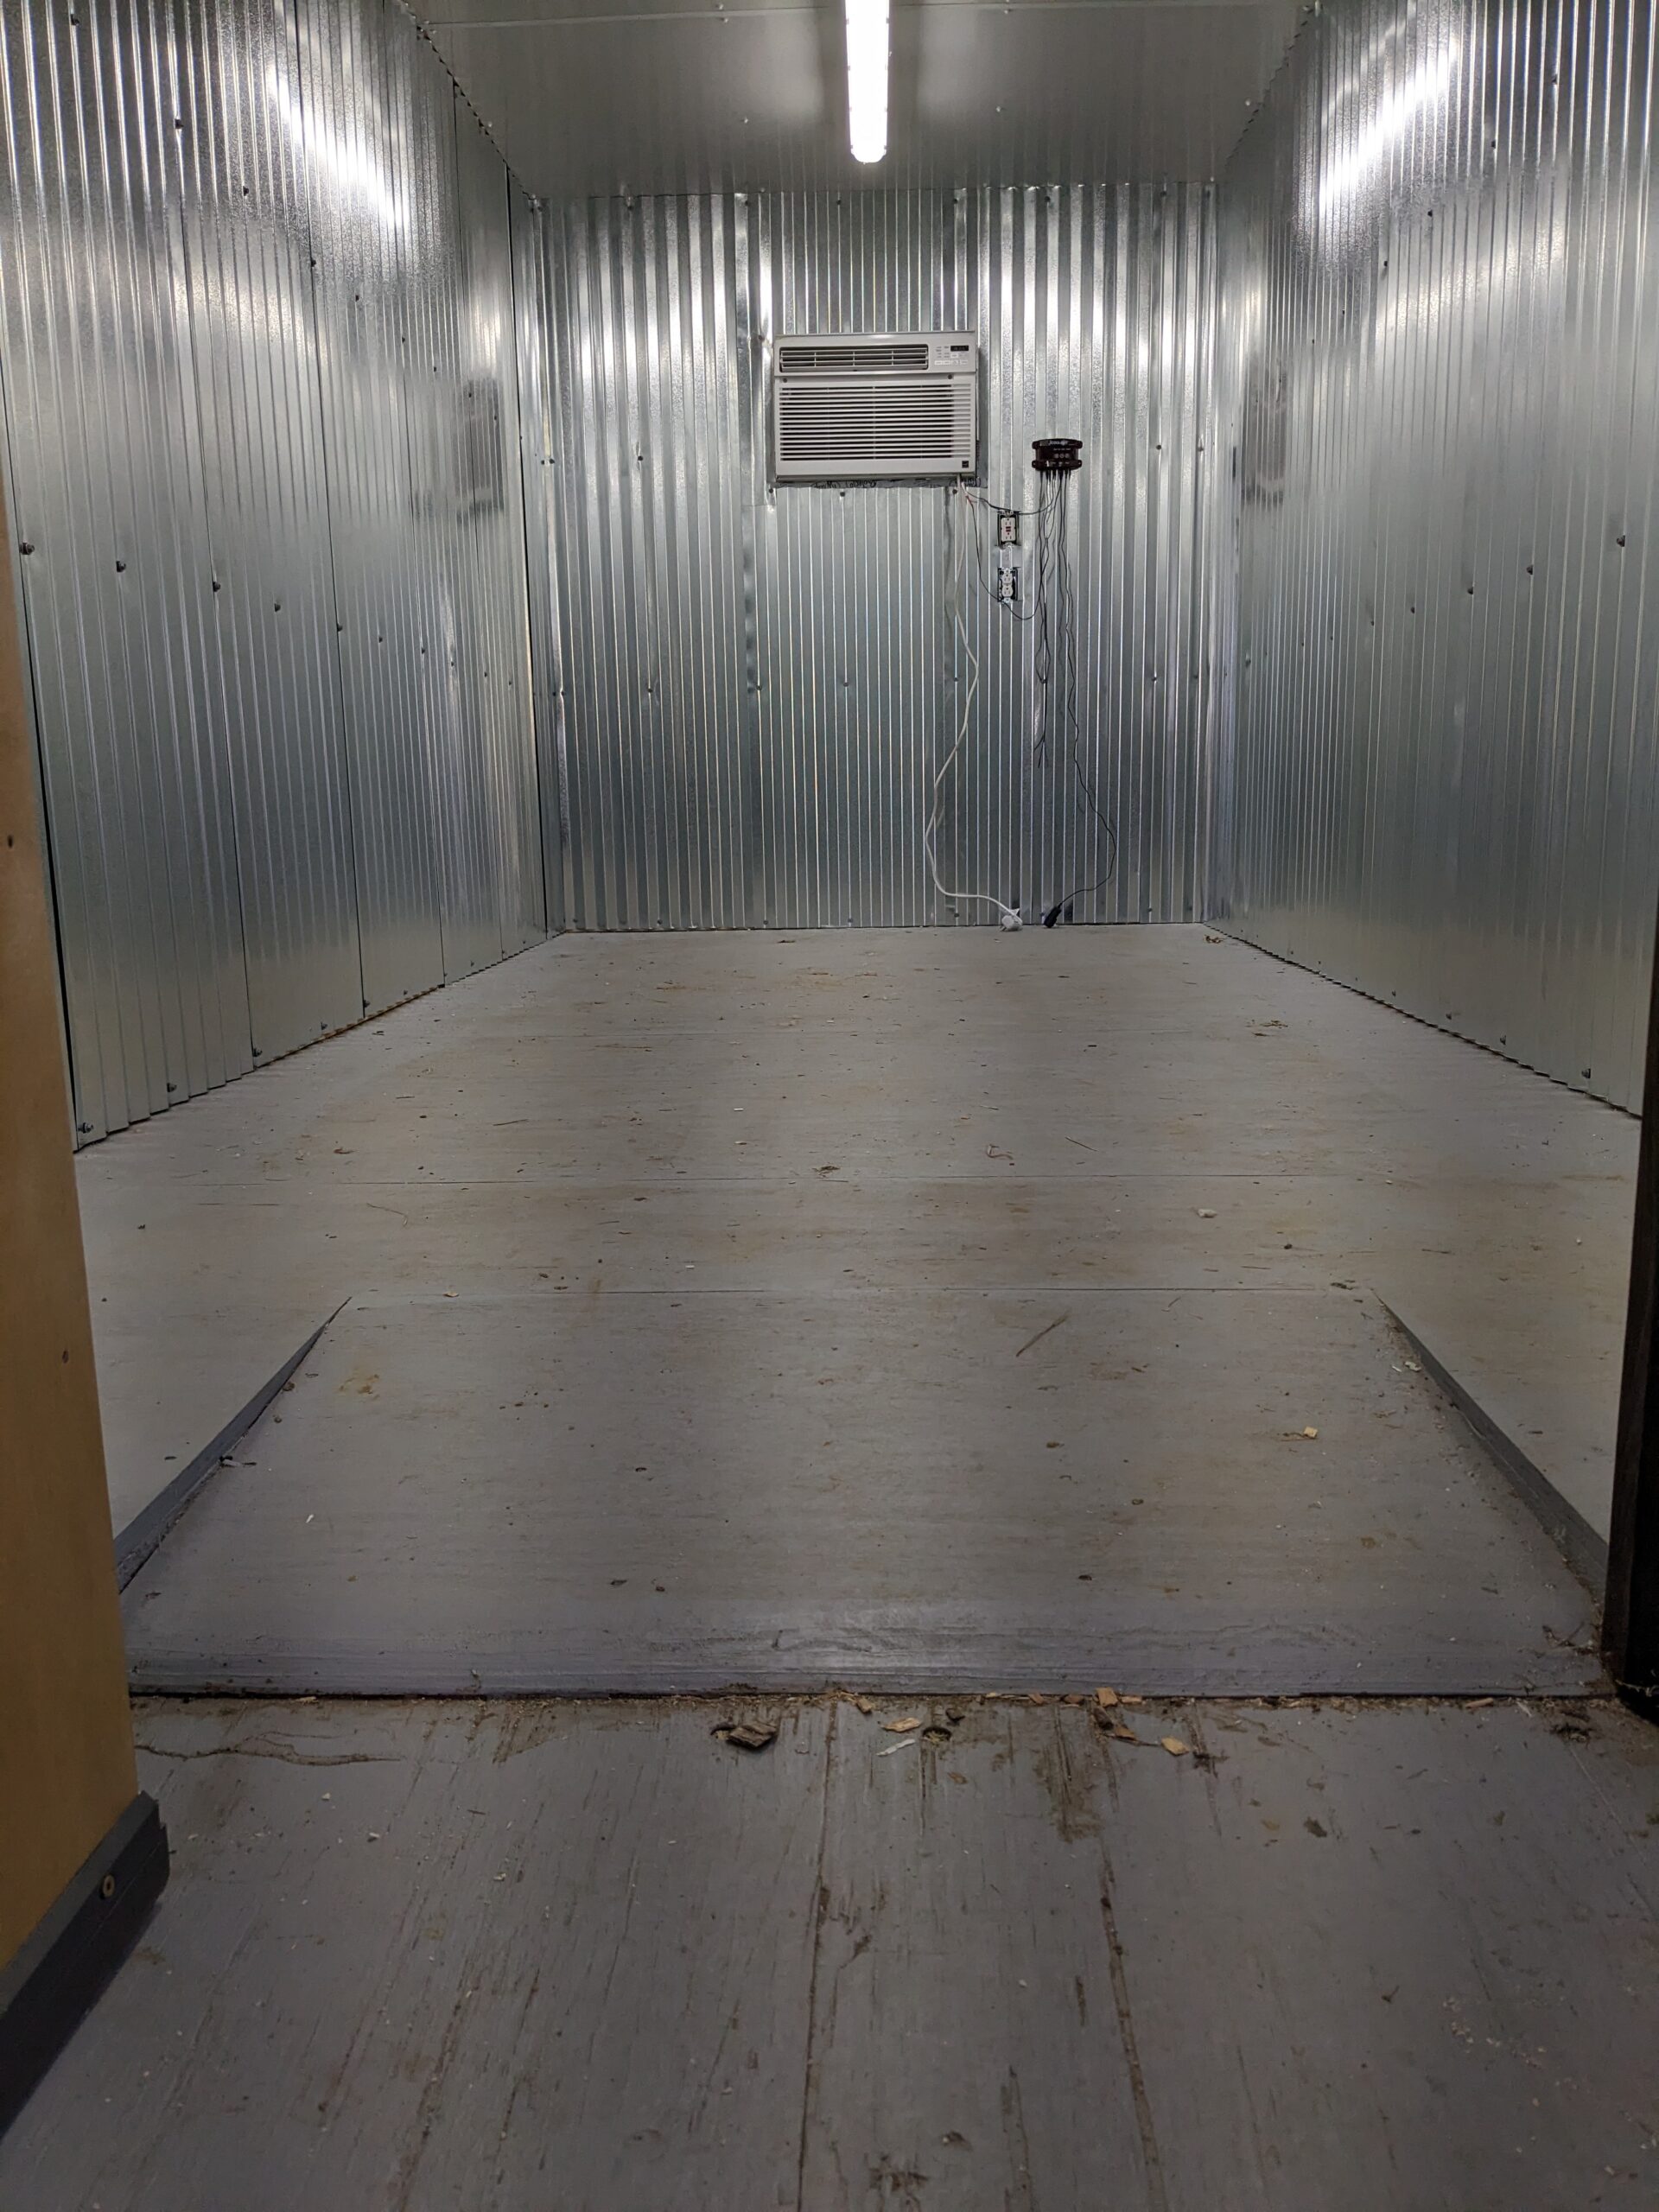
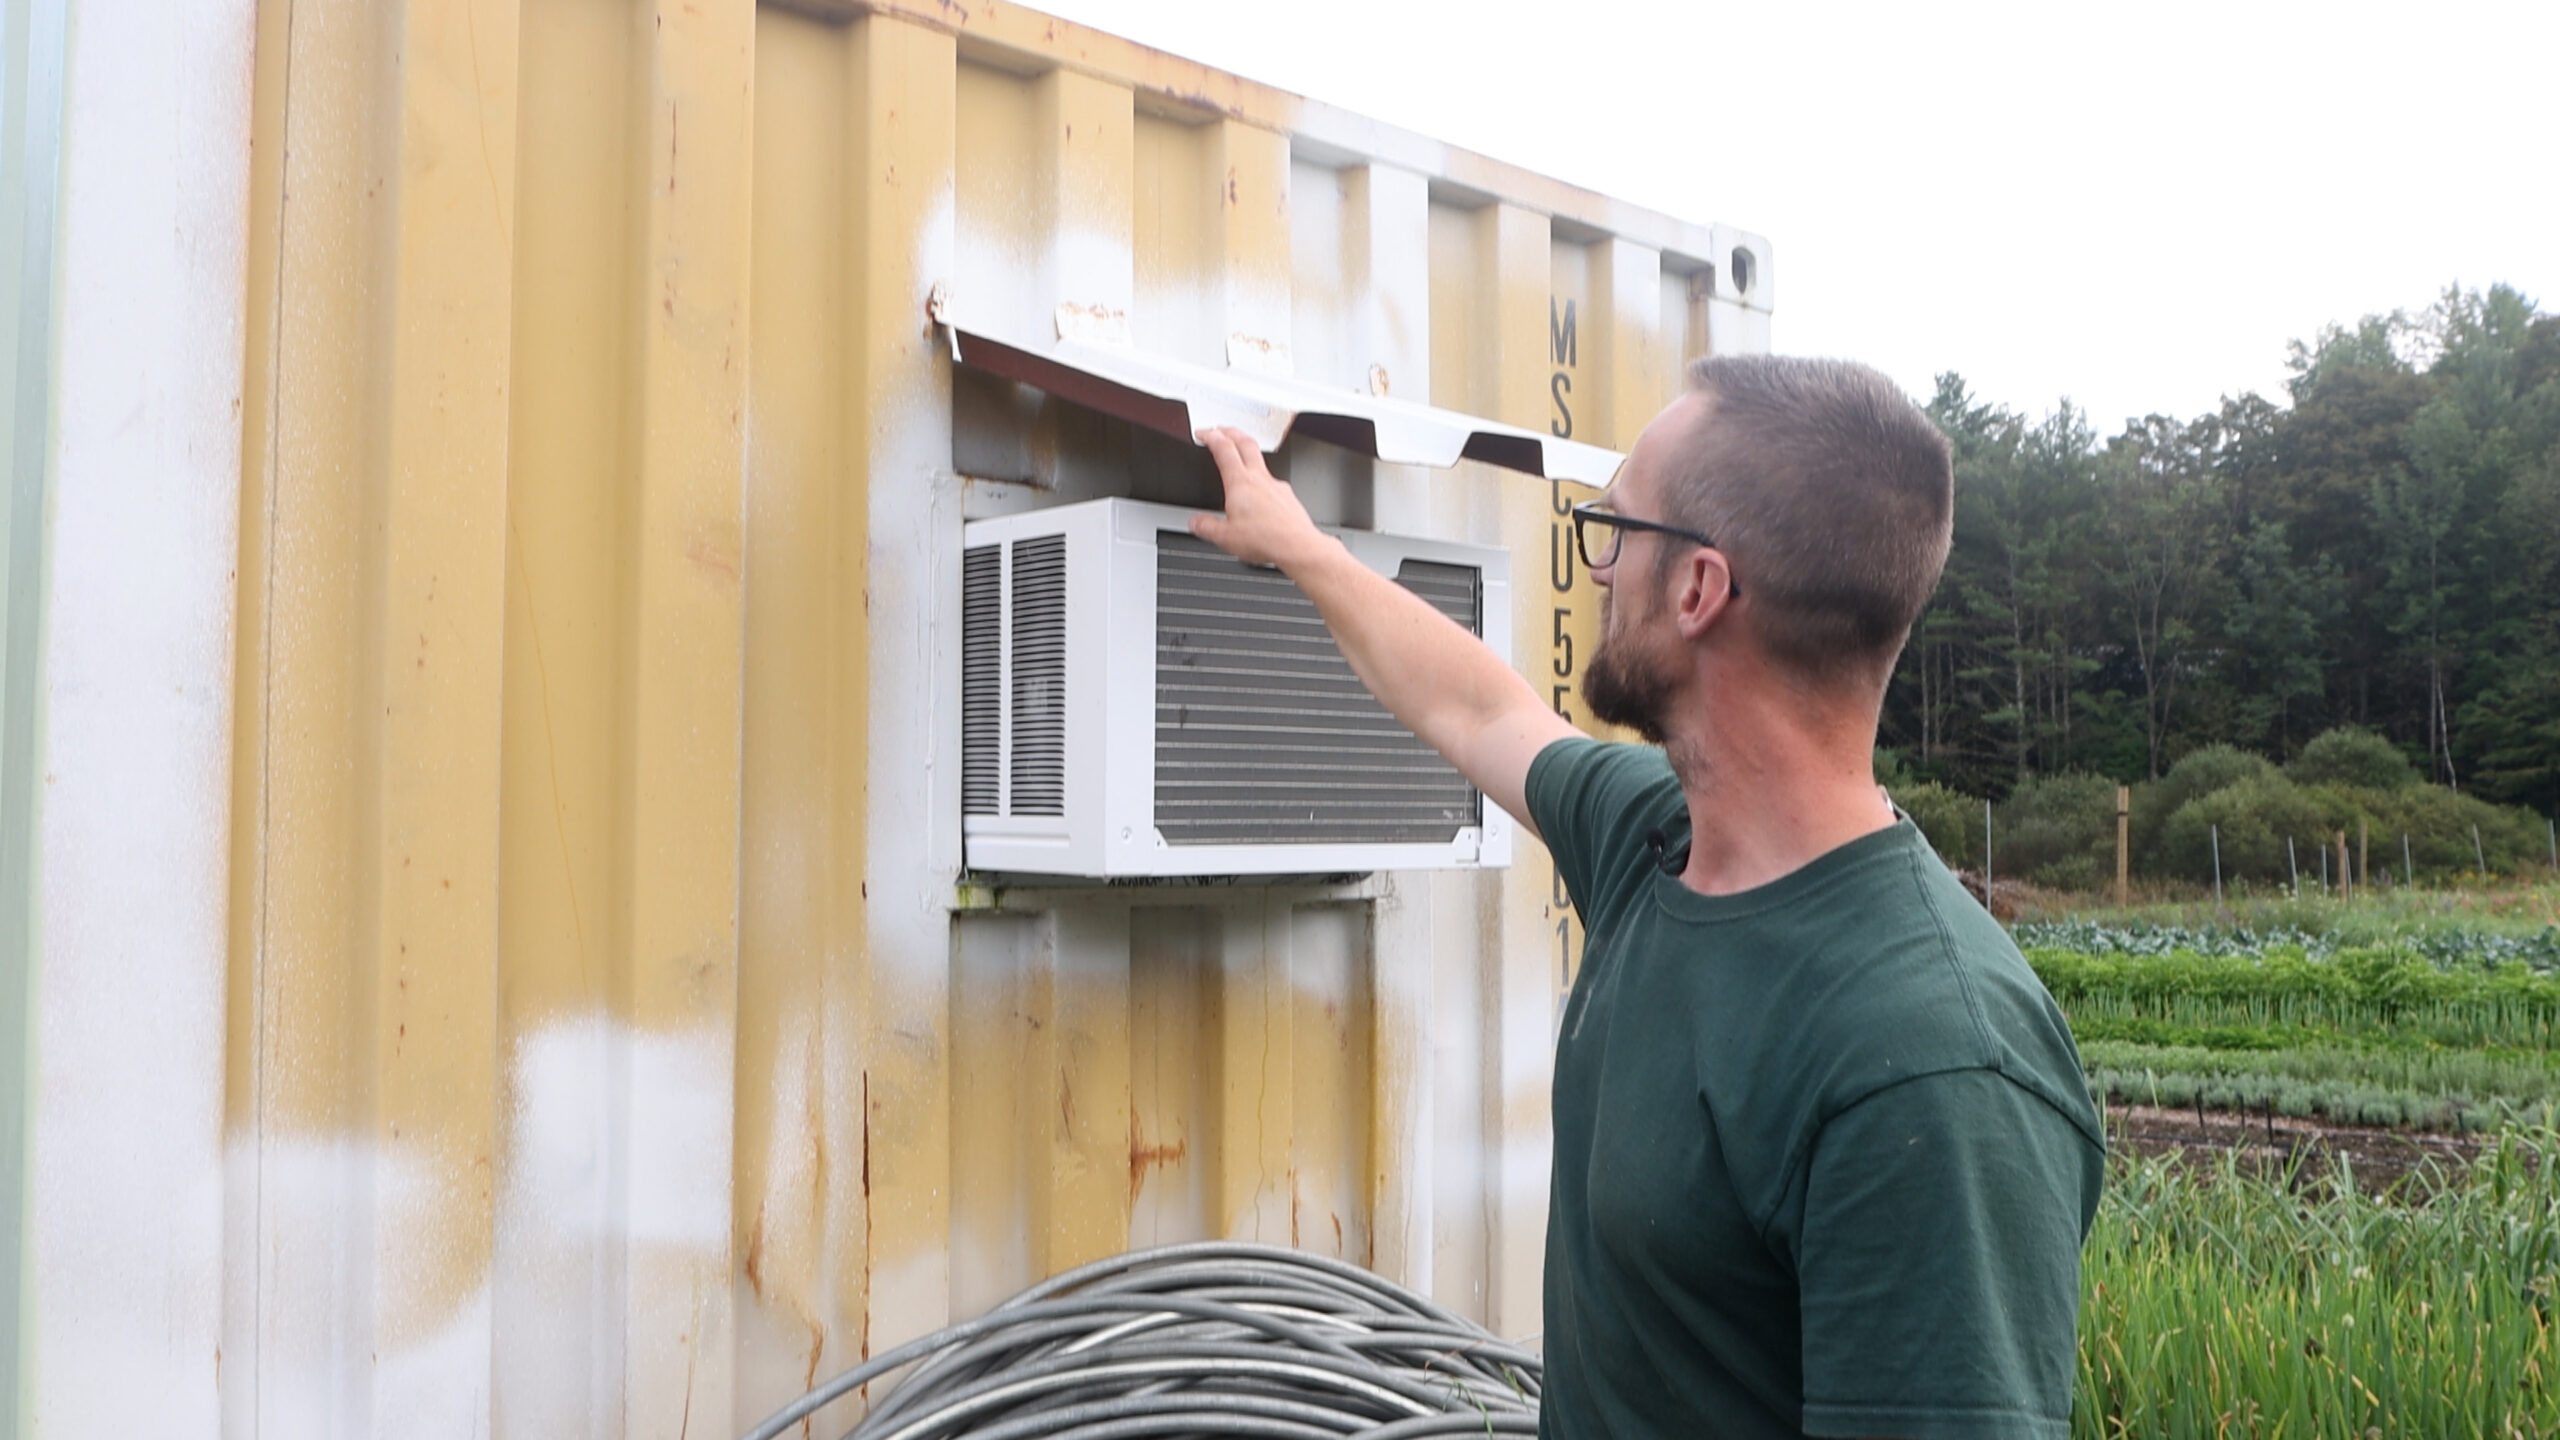
Cooler
Having a cooler saves the need for late night or early morning prep around market days! The construction details of their cooler are as follows.
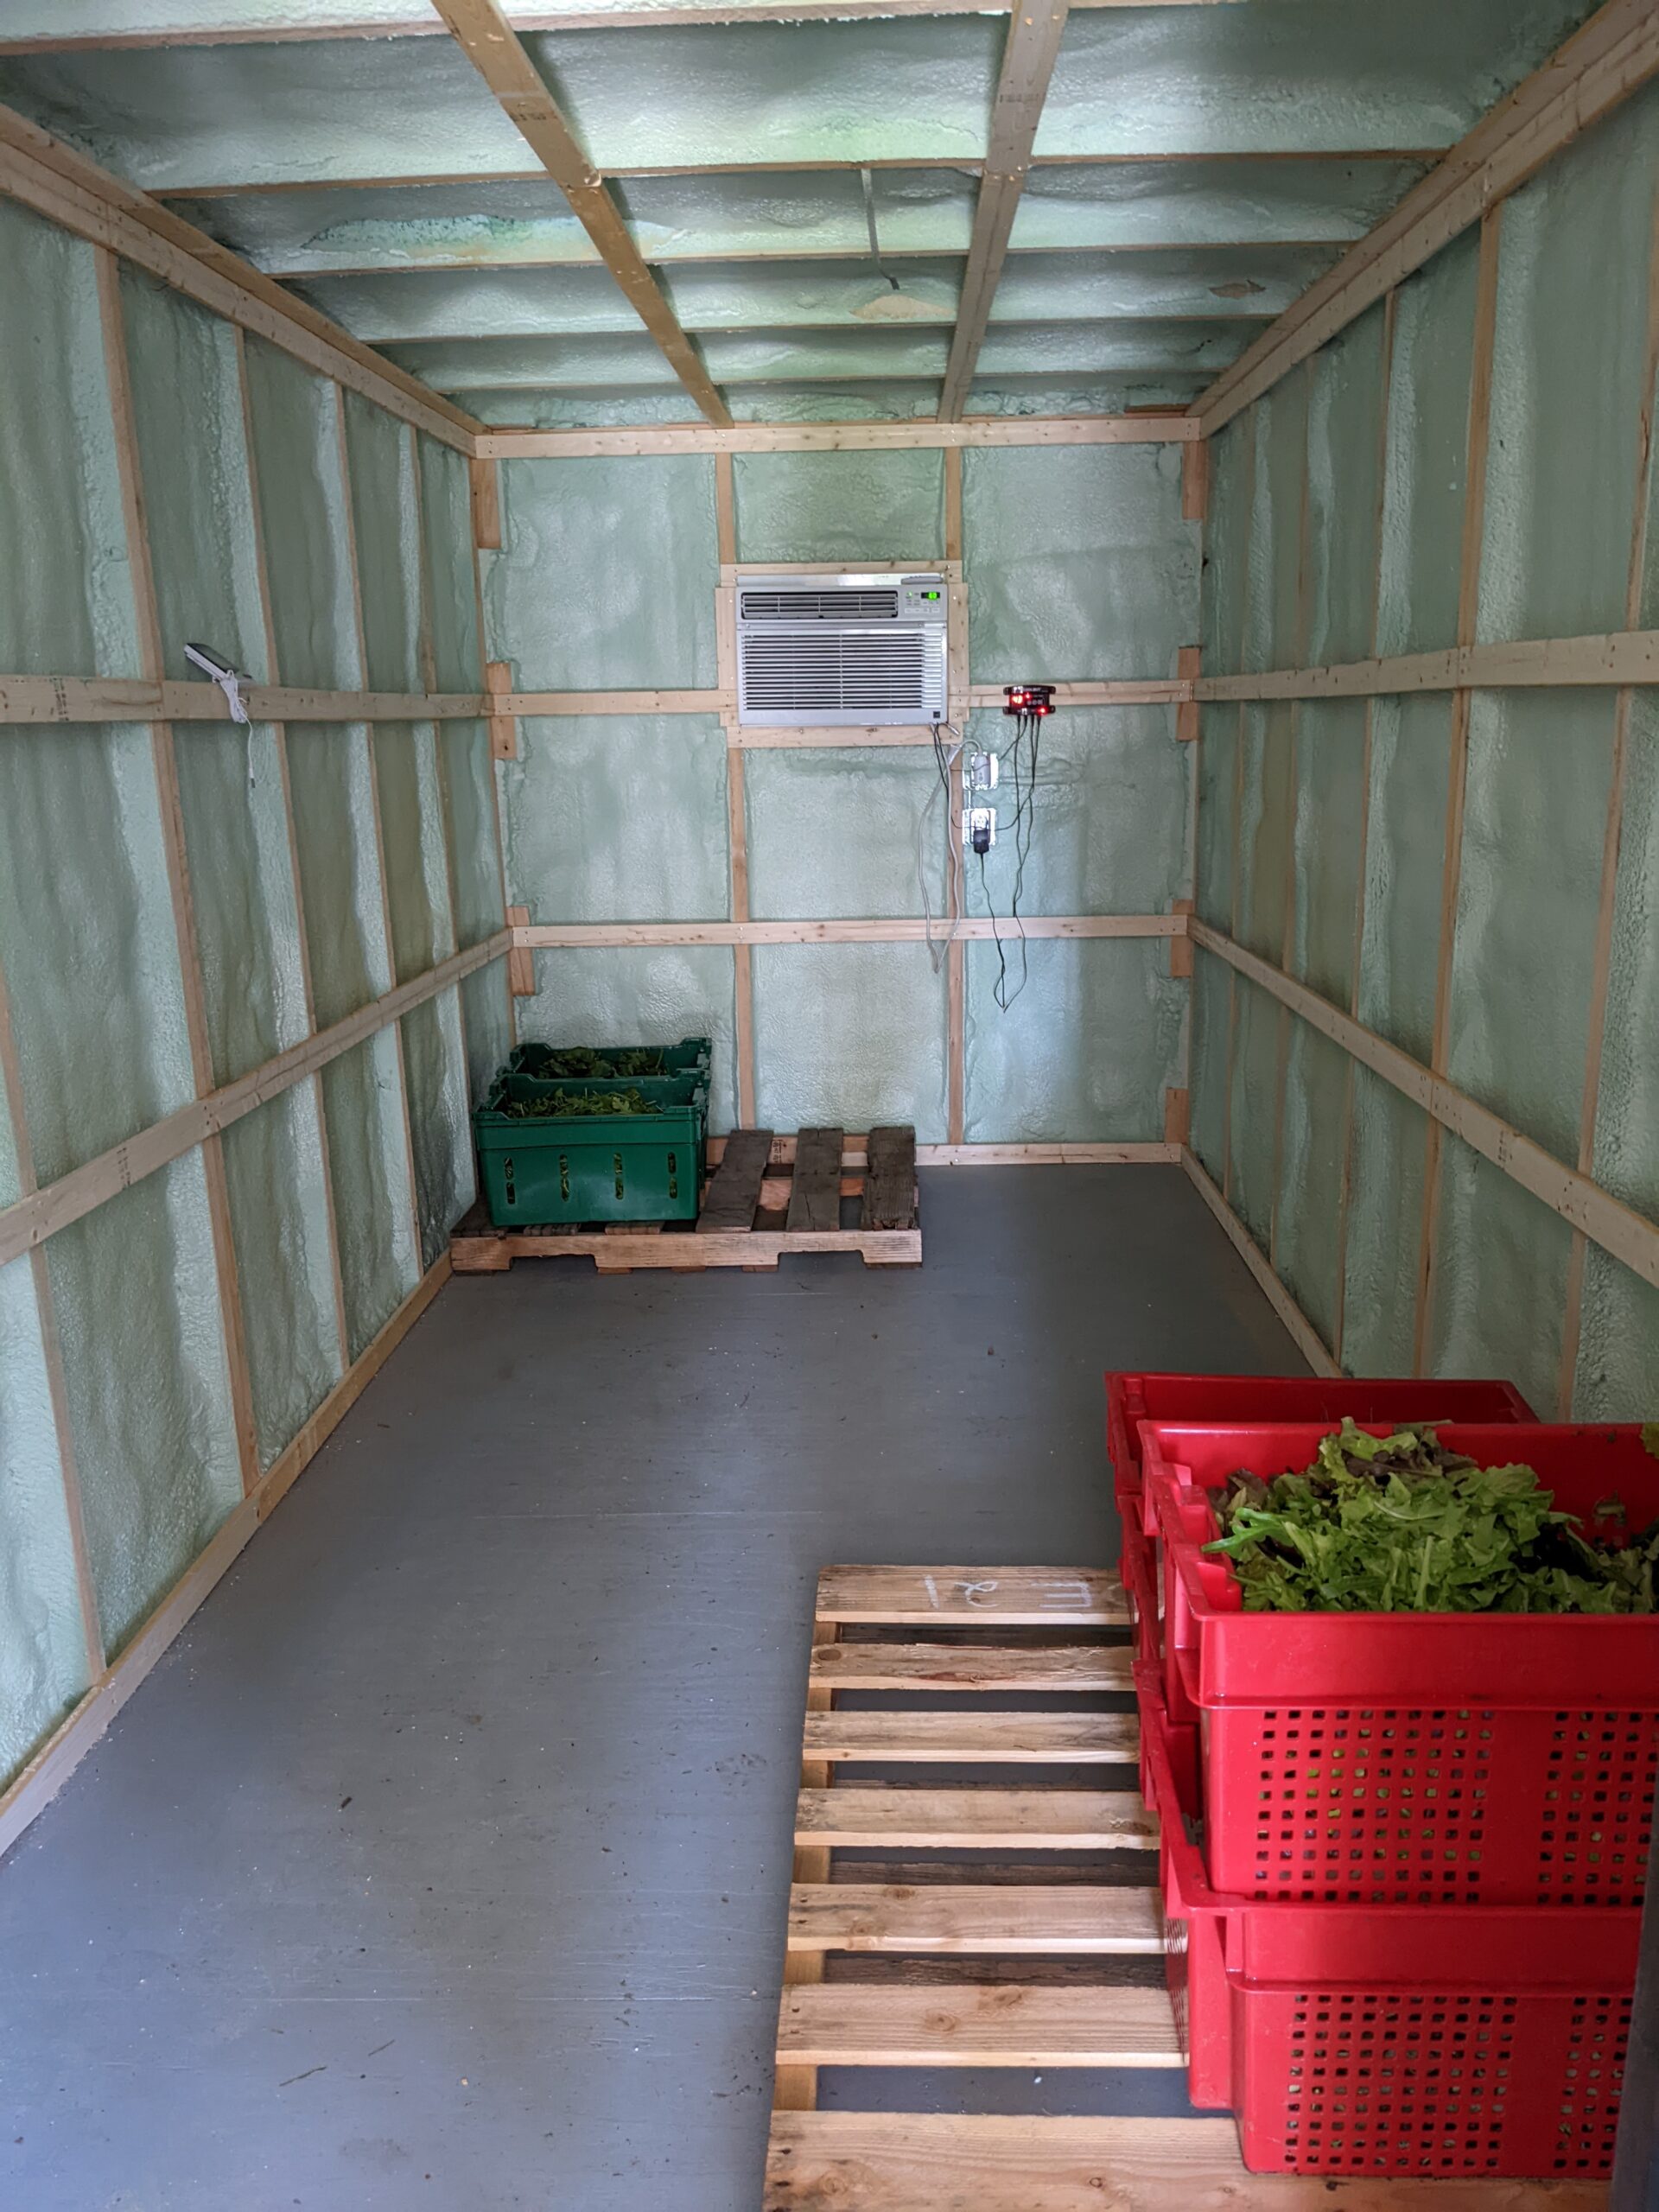
- 16′ x 8′
- 2″ x 6″ framed room
- Spray foamed for efficiency
- Beaded weather stripping, beveled door
- Corrugated metal roof siding
- 2″ foam under ¾” plywood on the floor
- Used the Heating and Cooling Load Calculator for Produce Coolers and Warm Rooms Calculator to figure out floor insulation
- Motion sensor light
- Ramp on the false floor
- Plastic dunnage racks to keep product off the floor
- Organized with one pallet for market and one for wholesale
- Store clean bins in here to keep them cool, dry, and out of sources of contamination
Cost
Lauren and Oliver purchased their container from a port, versus one already in Vermont, which saved them significant money ($5,200 vs $8,000).
They also saved a significant amount of money by doing the labor themselves. Oliver took the time to learn to weld, and worked long hours, which saved them from paying outside contractors.
There are a few areas that could have been completed a little more inexpensively, including rigid foam instead of spray foam in the cooler, not painting the container inside or out, running the power off an existing circuit, or excluding the side door, but these added expenses felt important for the daily use of this space.
- $5,500 Container (with delivery)
- $4,200 Spray foam insulation
- $1,400 Electrical work
- $2,500 Lumber & steel for framing
- $750 Paint
- $750 Mini excavator rental
- $350 Light fixtures
- $500 Used 3-bay sink and tables
- $100 Used Coolbot & AC
- $100 DIY Spray table
- $50 Salvaged door
- FREE Window – side of the road find
Total cost: $15,970
Reflections on the Project
Oliver was creative in constructing the project, and utilized a window as found on the side of the road. Unfortunately one of his lessons learned was that sparks from welding and grinding caused some damage to the window, so it has some pitting now. It’s minor, but one of the lessons learned from this DIY project.
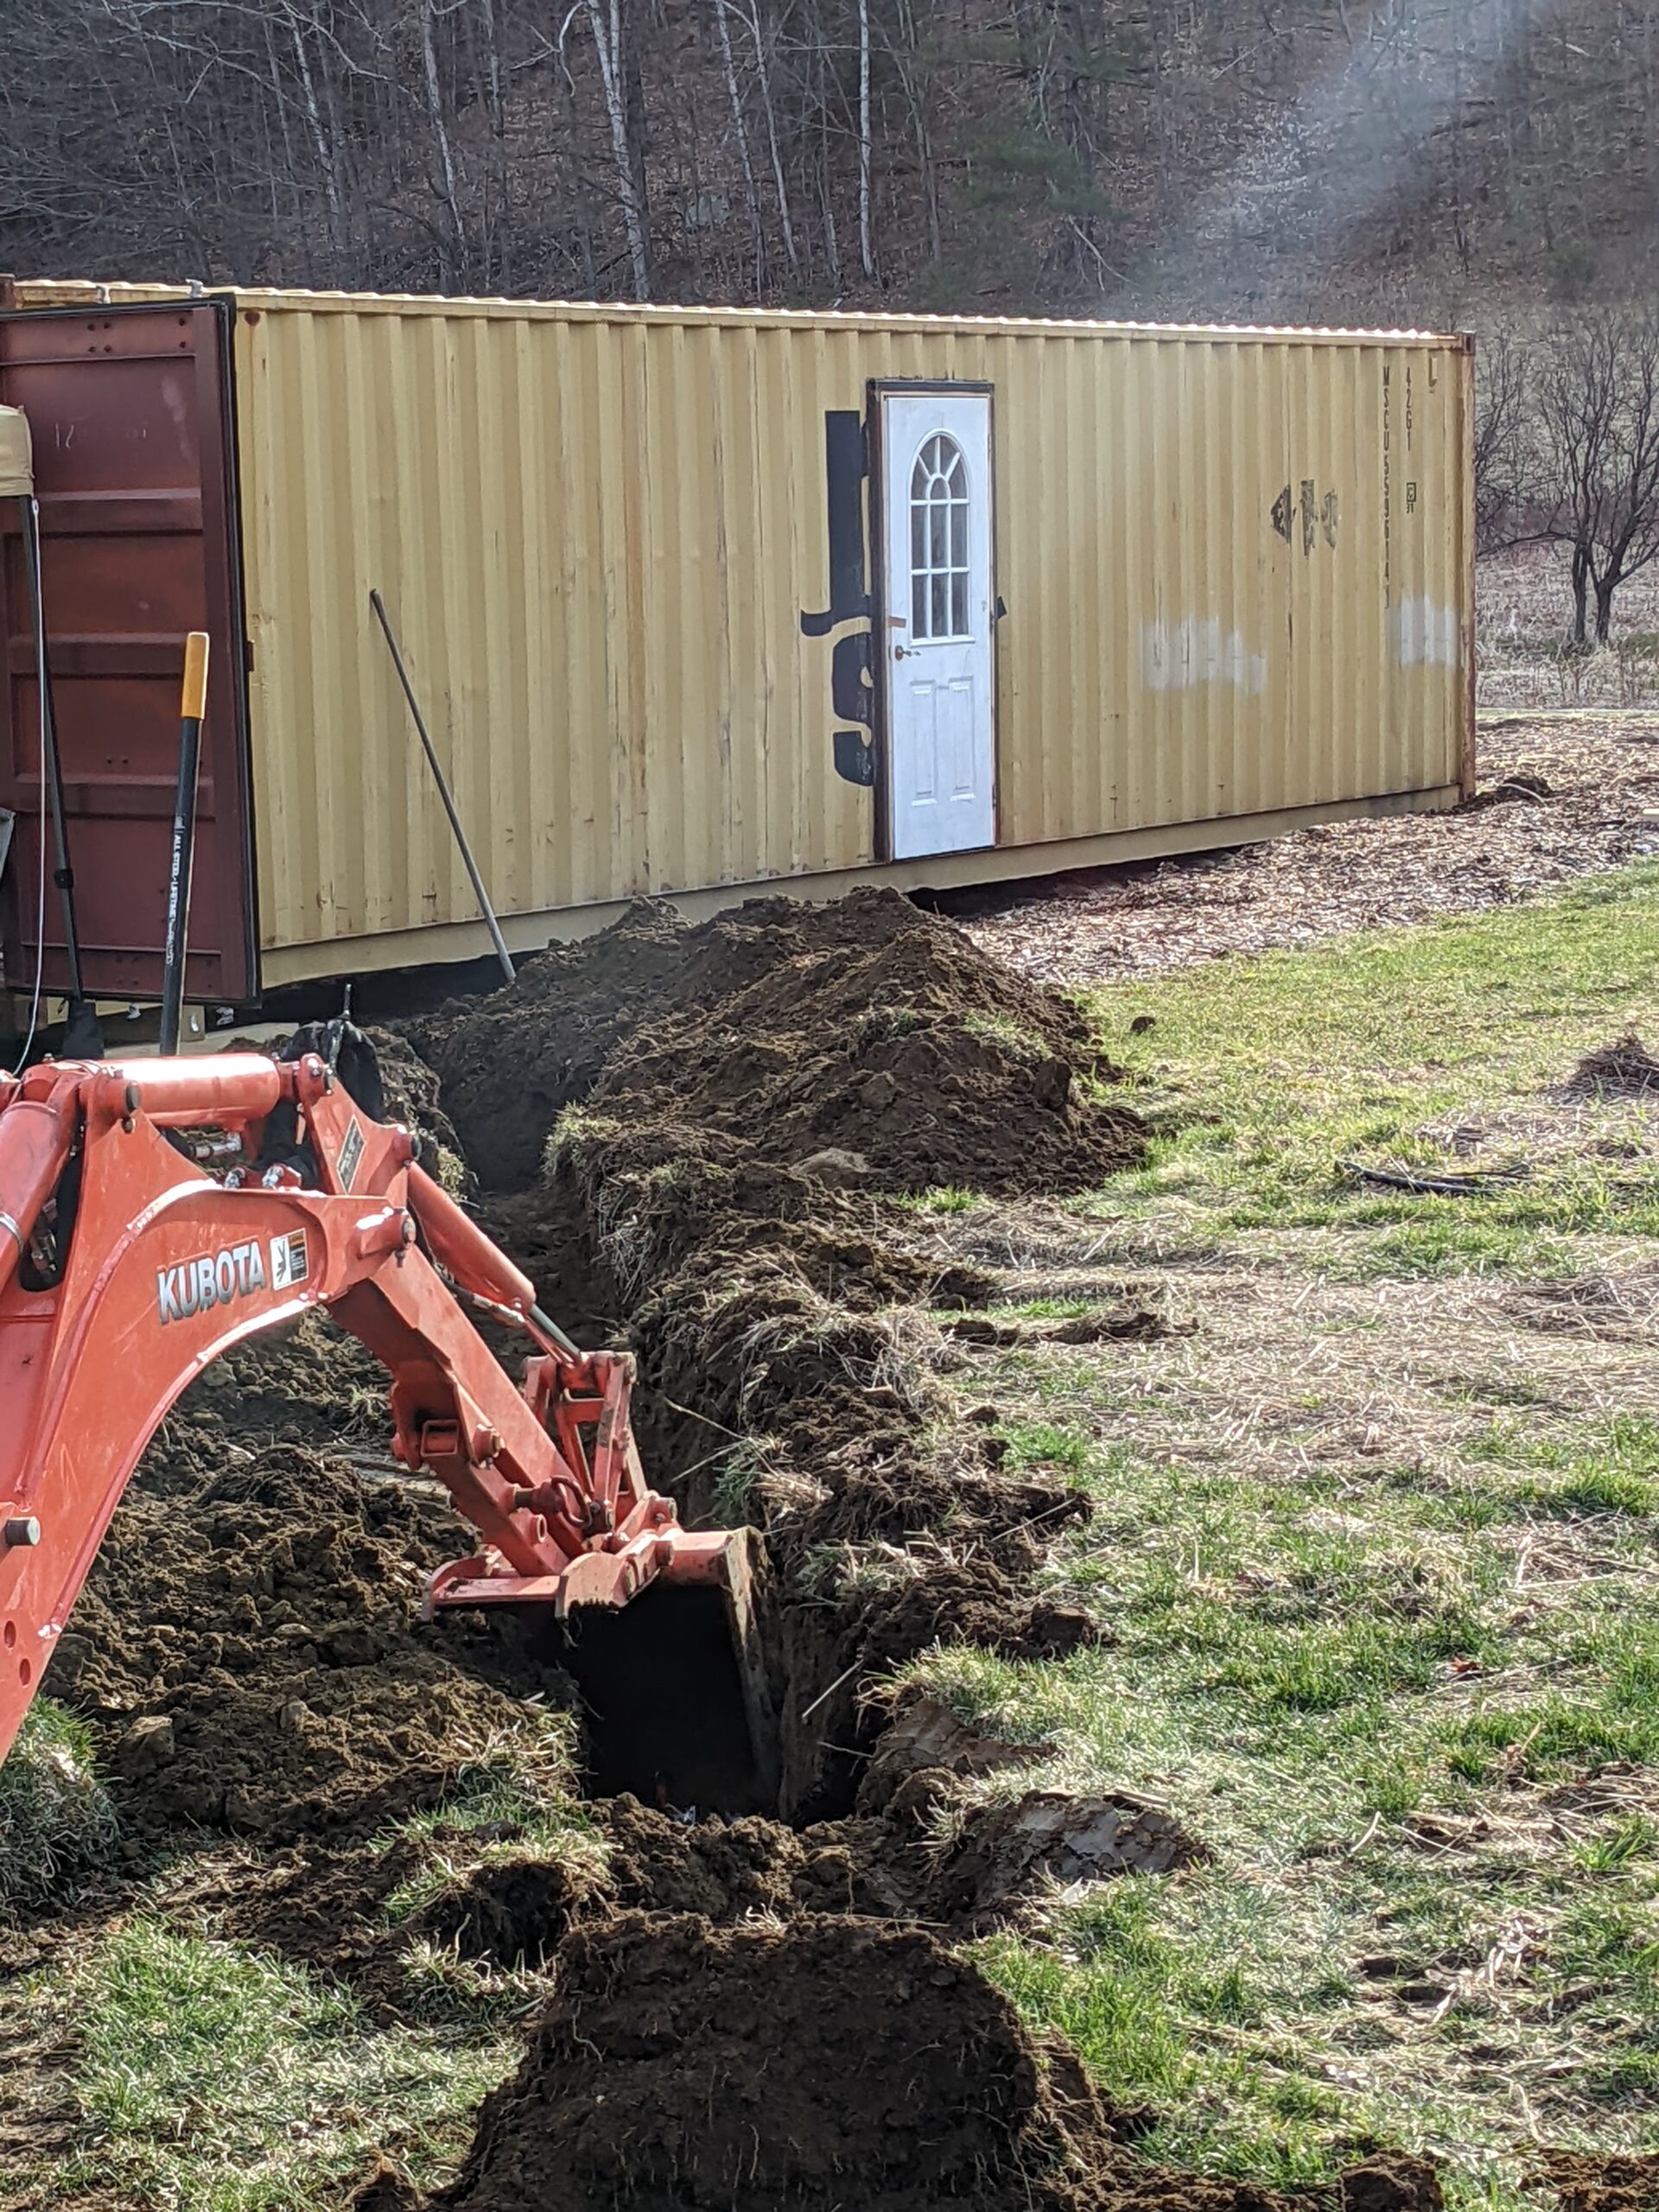
This project was a great skill building activity which included renting a mini excavator for water supply, drainage, and learning to weld. It took a little extra time, but these are lifelong skills that will be handy in the future and this was a good, low risk project to practice on.
“You have to be pretty creative to use residential doors and windows on a shipping container, you have to be a little crafty and adaptive to the situation.”
Oliver
There are many things that were included in this project that were “nice to have features,” Lauren recalls. You don’t have to paint it, or have lights, you don’t need a window, you don’t have to use spray foam (one could use rigid board). But all these upgrades helped to make a useful and enjoyable space where they work day in and day out.
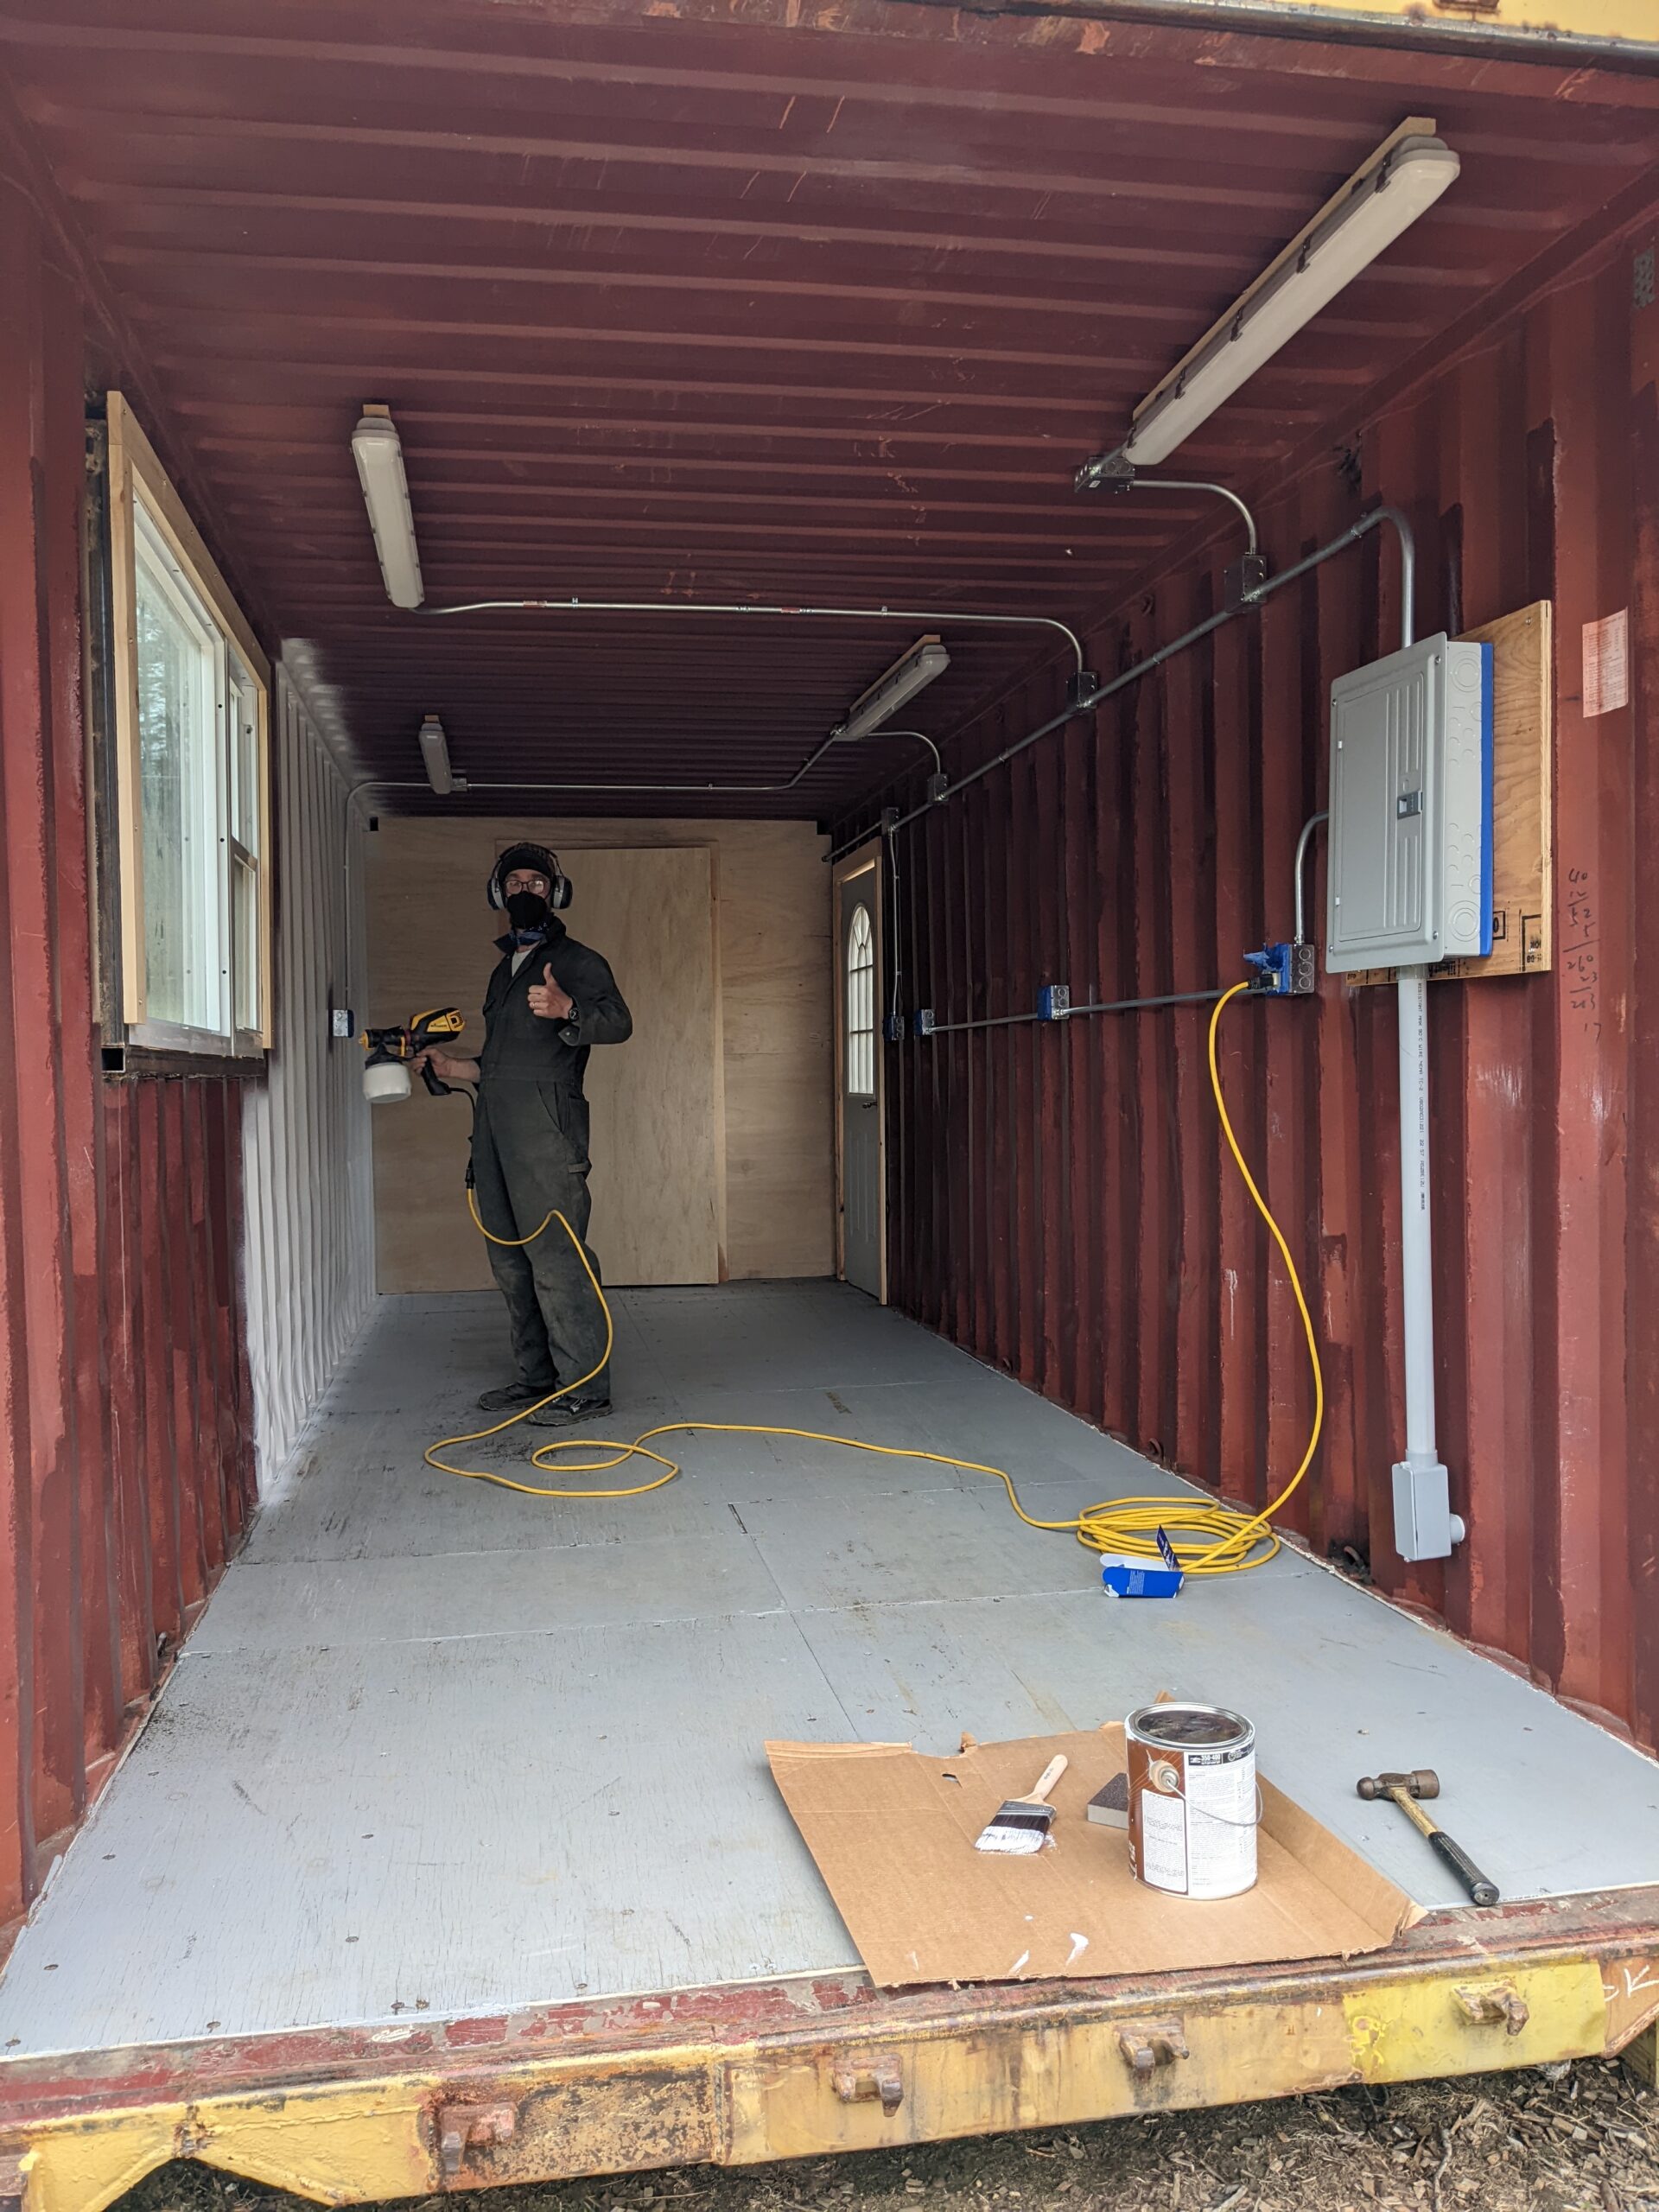
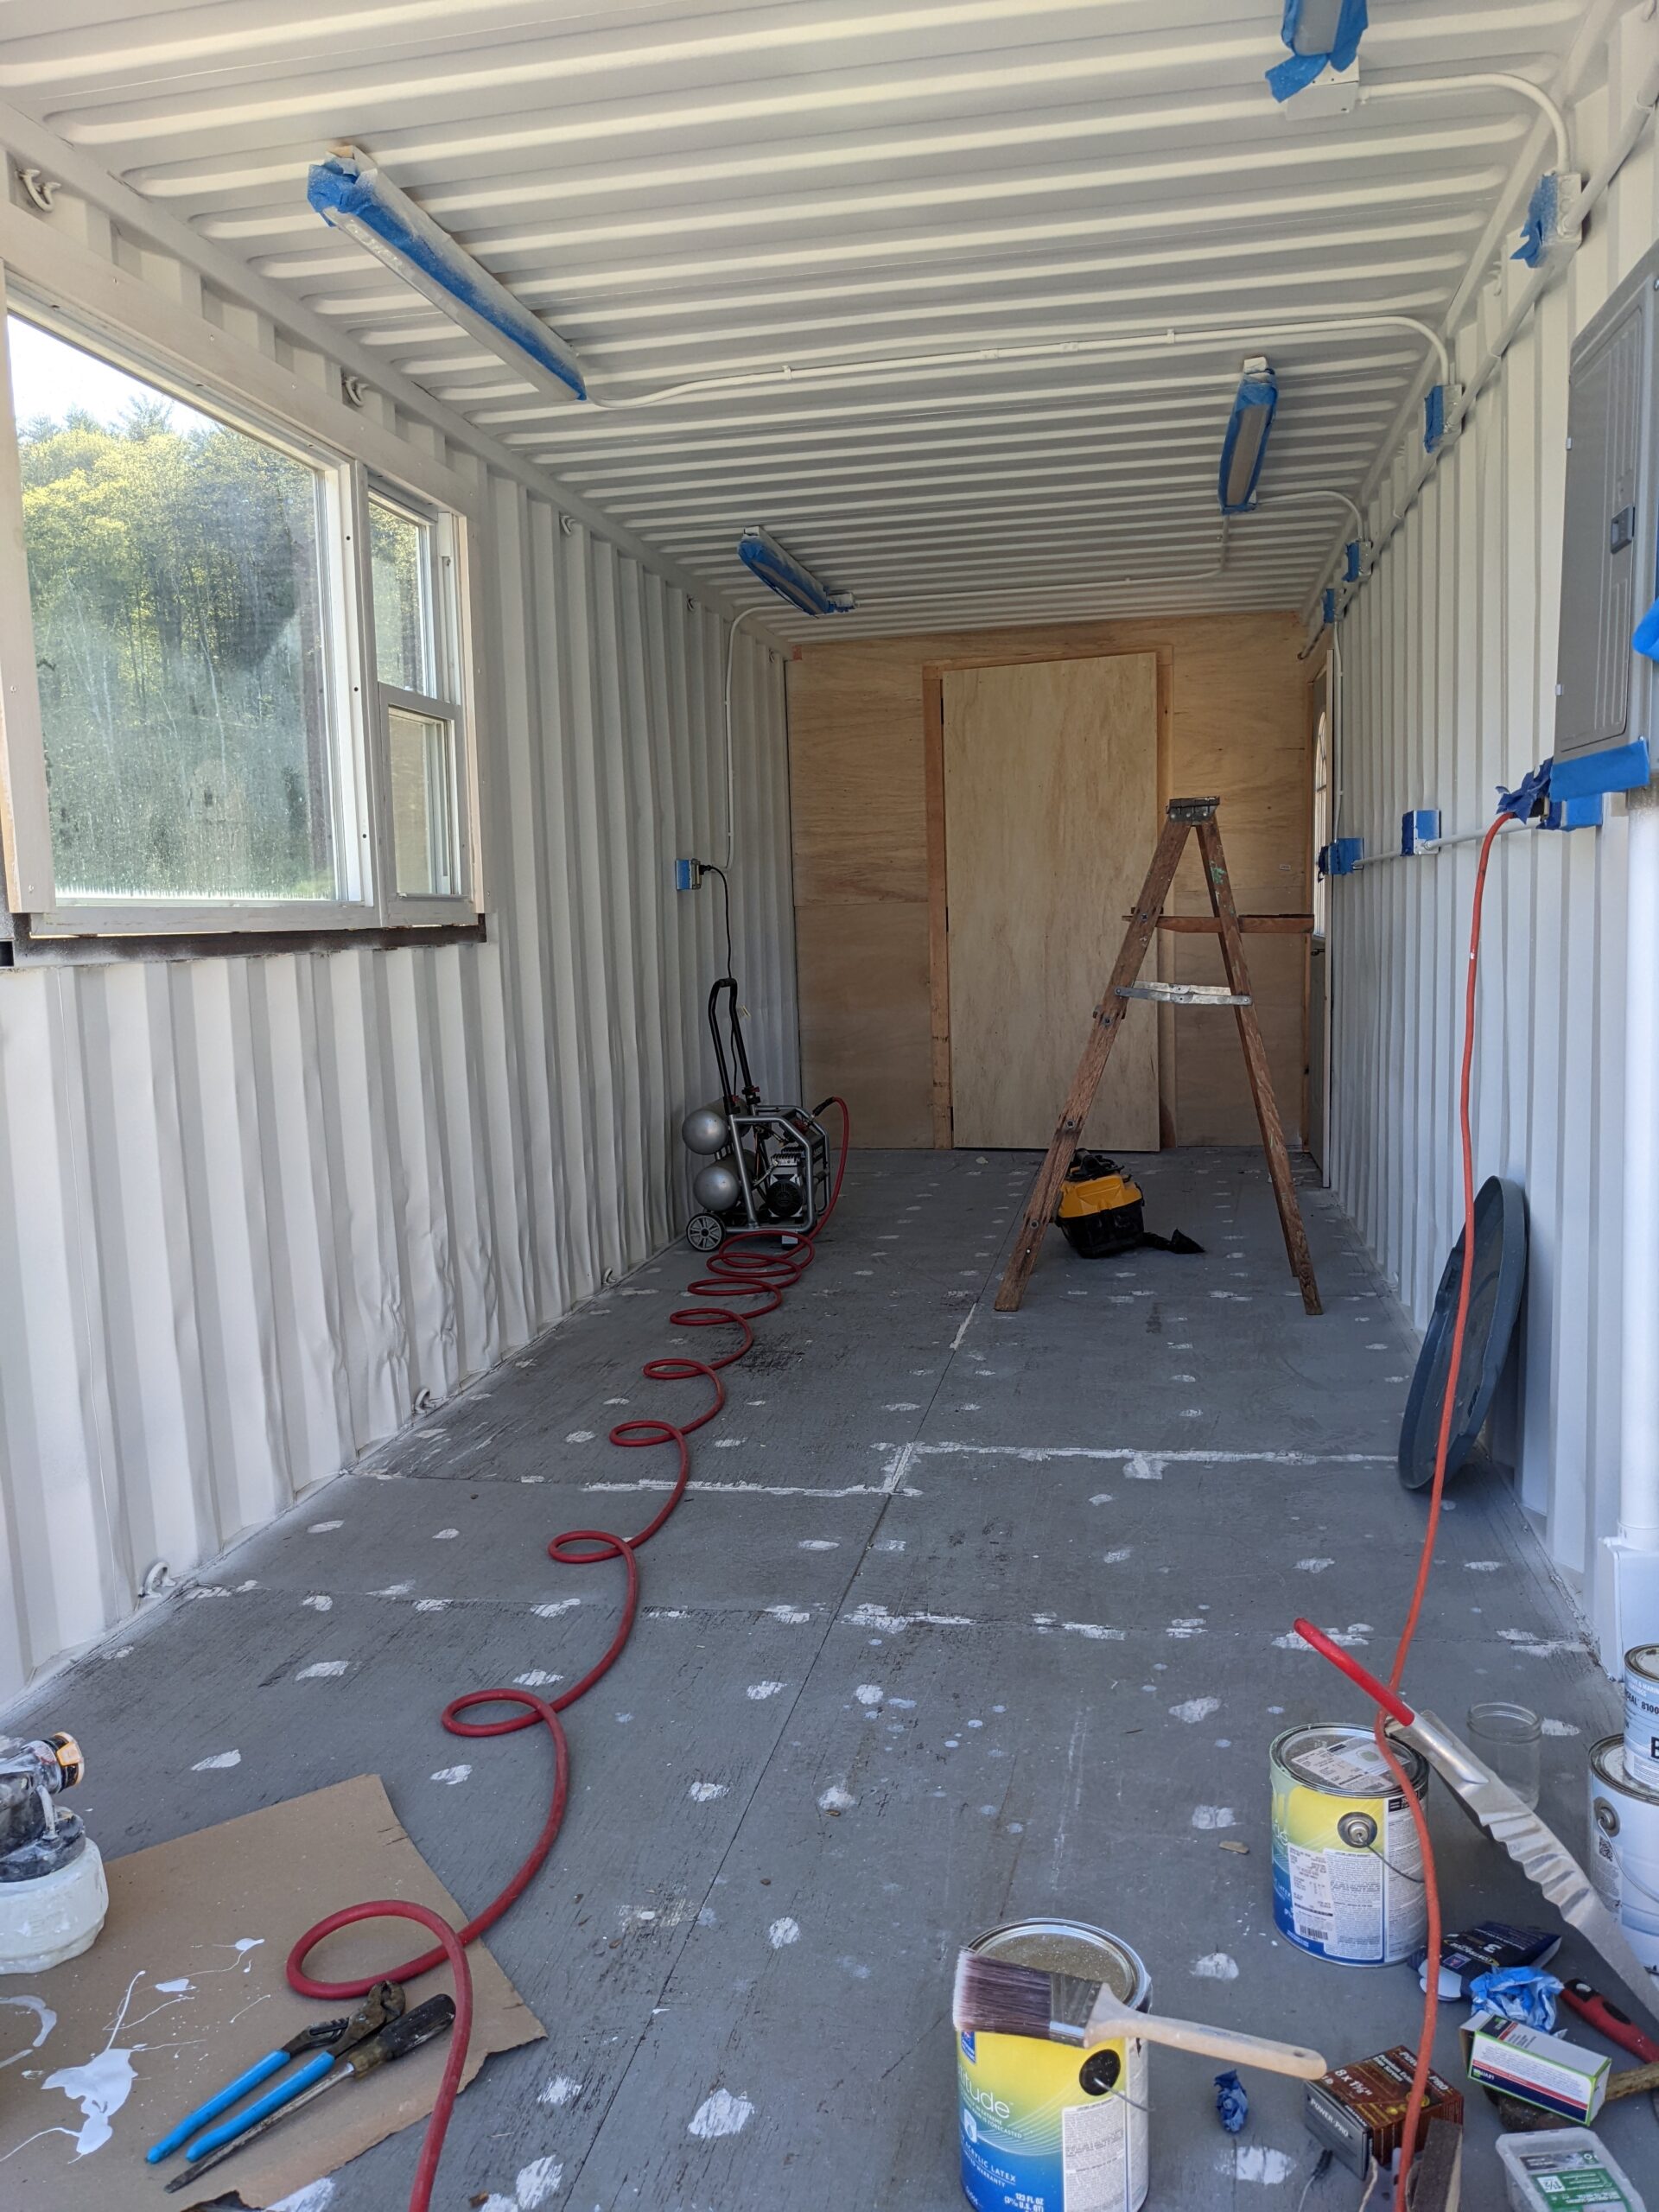
Good lighting is important, so painted the interior white and added LED lights. (They staggered the lights for better coverage and fewer shadows. They painted the roof glossy white to reflect the light and heat.
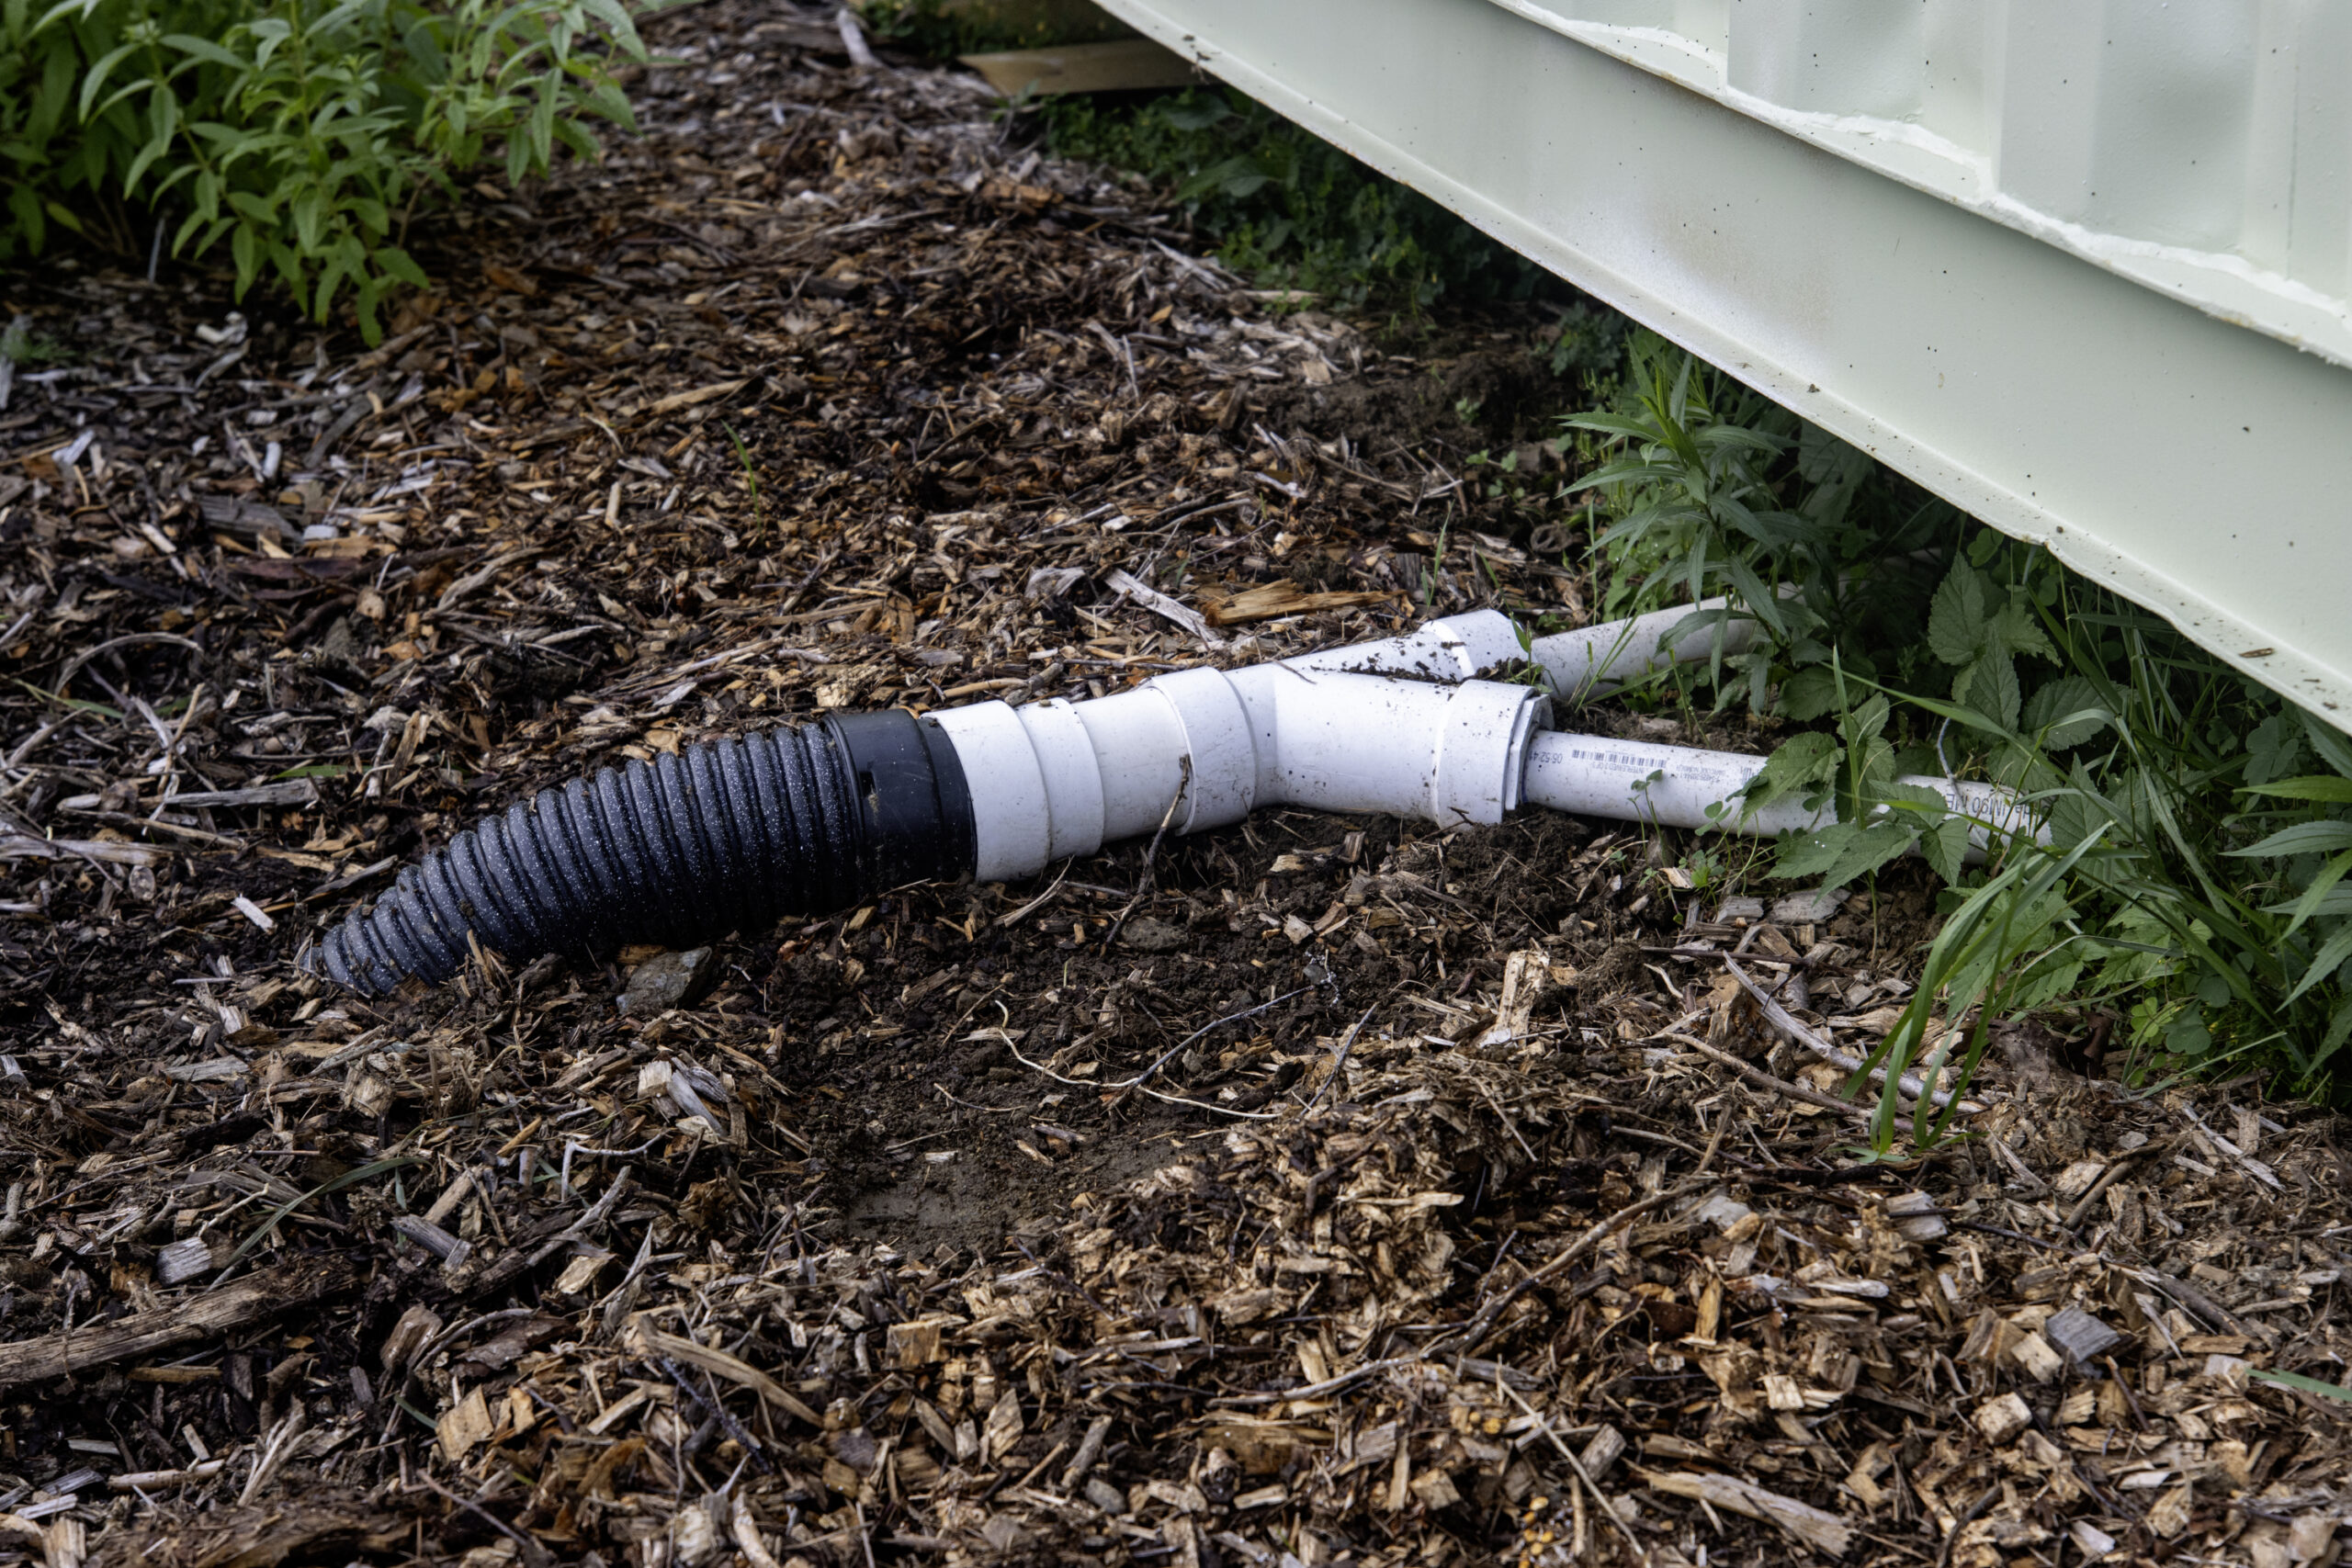
Framing the door was a challenge, and it was a learning curve welding the doors into place. It’s important to keep water out of it and use foam or calking where needed. The container sits on a footing of two stacked 6×6’s.
Overall this project came out very well and there are just a few things Lauren and Oliver would change. There are some future upgrades that have crossed their minds, like installing a bigger roof, which would increase the covered outdoor space, adding some ergo mats, and other finishing touches.


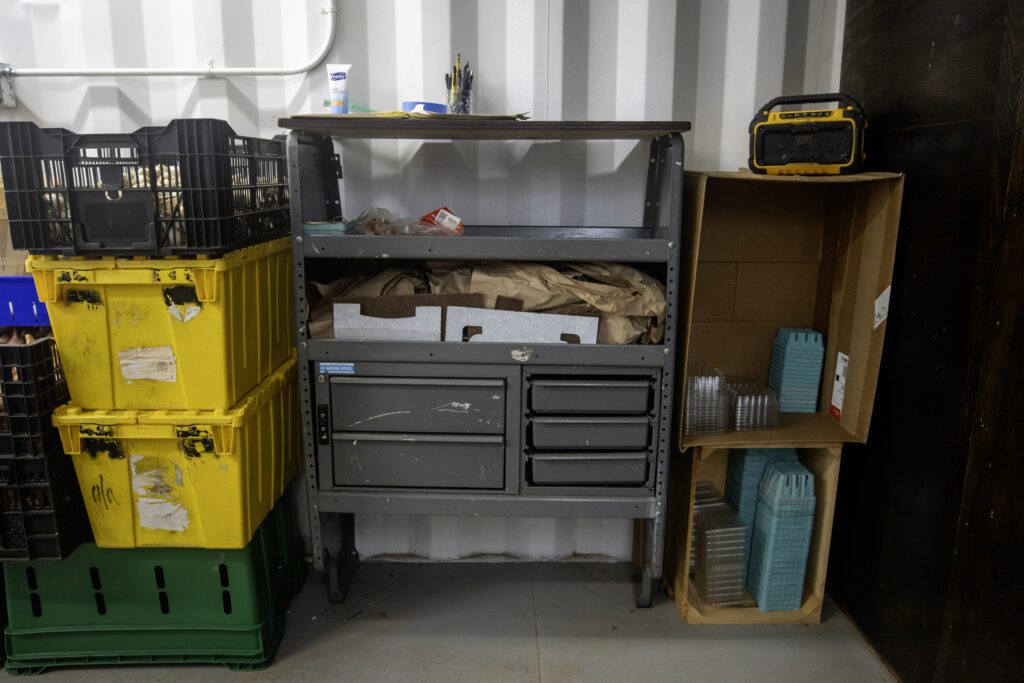
This shelving unit came out of their delivery van.
It holds:
- Harvest knives
- Scissors
- Scissors and twine
- Rubber bands
- Record keeping papers
DIY Spray Table
Watch The Interview
Walking Tour of the Shipping Container
Virtual Tour
Before construction Lauren wanted to get a feel for the space so she used an online, free design software to test layouts in the space which is more graphic than graph paper and easier to get a feel for the space. Now we’ve created a virtual experience for you to see how it all came out in the end.
Share This Post
Looking for more?
See additional Post Harvest Case Studies from farms of various sizes and applications.
Acknowledgements
Oliver and Lauren are thankful for UVM Extension Ag Engineering who helped guide projects on their farm and thankful to have the skills to pull off a project like this. We are thankful to them for sharing their project and experiences for others to learn from!
This project was supported by the Food and Drug Administration (FDA) of the U.S. Department of Health and Human Services (HHS) as part of a financial assistance award 02200-FSMA-24-01 totaling $30,000 with 100 percent funded by FDA/HHS. The contents are those of the author(s) and do not necessarily represent the official views of, nor an endorsement, by FDA/HHS, or the U.S. Government.