If you’re migrating from the classic UVM WordPress theme to the new block-based system, one of the biggest changes you’ll notice is how navigation menus work.
In this guide, you’ll learn how to recreate your site navigation using WordPress blocks—and why this step is required.
Watch the full video tutorial
(soft music)
0:08
– Let’s take a moment to review site navigation
0:11
and what to expect when you’re migrating
0:14
from the old UVM WordPress theme to the new.
0:18
Here is an existing site using the older WordPress theme,
0:23
and if you remember, the menu is launched by a menu button
0:28
and slides out on the left and there’s dropdowns.
0:34
This is the classic menu, and unfortunately,
0:38
WordPress has changed how menus are created.
0:42
They are no longer using the classic menu system
0:45
and they’ve switched to a block-based approach.
0:49
This means, unfortunately,
0:50
that your menu will not automatically come over
0:53
and will need to be rebuilt.
0:57
I know it’s a drag, but it’s not that big a deal, really.
1:01
I’m gonna show you how to recreate your navigation
1:03
in the new WordPress, but this is really important.
1:06
Make sure that you start with a screen grab
1:09
of your existing navigation so that you have a record
1:12
of something to work from.
1:14
On Macintosh, you bring up your navigation
1:17
and it’s Command + Shift + 4,
1:19
box off that area to make a screen grab.
1:22
And on Windows, it’s the Print Screen button
1:26
on your keyboard.
1:31
This is how you have always done your menu in WordPress.
1:37
You have a list of pages on your site on the left.
1:41
You click on something to add to the menu.
1:43
You add it to the menu, it shows up at the bottom,
1:46
and then you drag it where you want,
1:49
save, and you have it.
1:52
Okay, that is not how this is gonna happen now.
1:55
Let me change back.
1:56
I’m gonna change back to the theme.
1:59
Switch to the new Catamount theme.
2:02
I’m gonna show you what happens.
2:05
View the site, click on the hamburger icon,
2:08
and the navigation is not there.
2:14
Okay, expected that. It’s unfortunate.
2:19
Let’s make a new menu together.
2:23
Okay, so go into your dashboard of your site,
2:28
navigate to Appearance, Editor, Patterns.
2:34
Pick your header.
2:35
The navigation is attached now to the header.
2:38
Click on the header.
2:41
And mine’s a little different.
2:43
I believe that you’re gonna see a white box here
2:46
that says your navigation’s missing,
2:50
and it will give you the option
2:52
to make a new navigation menu.
2:56
So, click yes. Make sure you click yes.
2:59
It will show up here on the right.
3:00
It will be called Menu by default.
3:04
I am going to slide this over
3:08
because this is the most important part
3:10
of this entire tutorial.
3:12
Make sure you have made a screen grab
3:17
of your old site navigation
3:19
so that you can work like this.
3:21
Old site navigation on the left, new is on the right.
3:26
We’re just gonna use it as a reference.
3:28
Click the plus button here
3:31
and type in the first thing on our navigation.
3:35
So, Vermont Climate Assessment.
3:39
I have a typo.
3:42
Annoying.
3:44
There. It shows up.
3:46
You click on it, add it.
3:49
I’m gonna go right to the parent,
3:51
Executive Summary,
3:54
there that is, click that page.
3:56
I wanna show you how to make a child
3:58
so that you get this parent-child relationship here.
4:03
So, type in the first one,
4:06
Climate Change in Vermont,
4:09
and then to make the child, you just grab it,
4:15
hover over the parent, and it indents it.
4:19
It’s really easy.
4:21
Now, I went ahead and created this menu already,
4:23
so I’m going to select that.
4:26
All of those pages are now reflected in the nav and save it.
4:32
And let’s see what that looks like.
4:35
View site.
4:38
Under the hamburger. So, there we go.
4:40
So, it really wasn’t so hard to do.
4:44
It doesn’t even take a long time.
4:47
And the good news is that it is a one step process
4:51
when moving to the new WordPress system.
4:53
You’re not gonna have to do this twice.
4:57
If you need help with it, check in to help hours,
5:00
and I’ll help you build your navigation.
5:02
(soft music)
Overview: What changed with navigation?
In the classic WordPress experience, menus were created using the Menu tool. If you remember, it went like this:
- Add pages from a list
- Drag and drop to reorder
- Use dropdowns for hierarchy
In the new block-based system:
- Navigation is built inside the Site Editor
- Menus are part of your header
- You use blocks instead of the classic menu builder
⚠️ Important: Your old menu will NOT migrate automatically—you must rebuild it.
Step 1: Capture your existing navigation
Before doing anything, take a screenshot of your current menu. You’ll use this as your reference.
Before doing anything, take a screenshot of your current menu. You’ll use this as your reference.
Mac: Command + Shift + 4
Windows: Print Screen
[SCREEN GRAB: Old site navigation expanded (classic theme)]
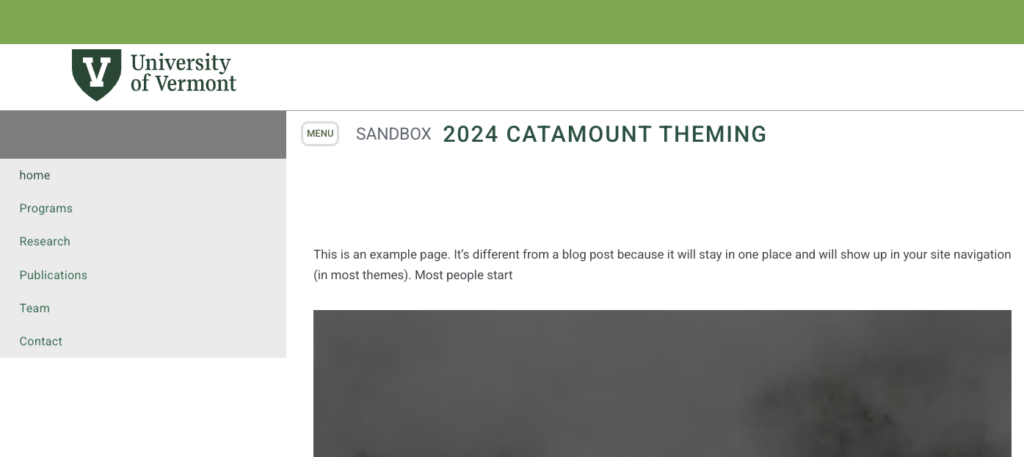
💡 Tip: Keep this screenshot open on one side of your screen while rebuilding your menu.
Step 2: Confirm your old menu (for context)
This is what you may be used to in the classic system:
[SCREEN GRAB: WordPress classic menu interface showing page list and drag/drop menu]
- Select pages on the left
- Add them to the menu
- Drag to arrange and nest items
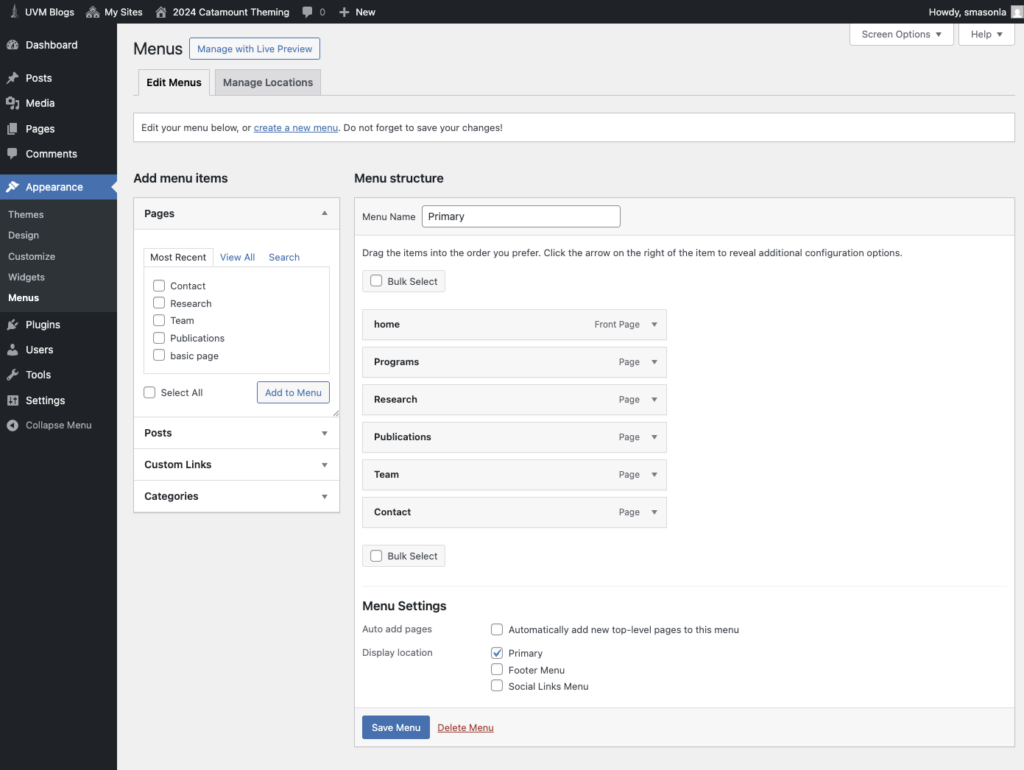
✅ This interface no longer applies in block themes.
Step 3: Switch to the new theme
After activating the new Catamount theme:
- Visit your site
- Click the hamburger menu icon
[SCREEN GRAB: New site header with empty or missing navigation]
You’ll notice:
- Navigation is missing (this is expected)
Step 4: Open the site editor
- From your dashboard:
- Go to Appearance
- Select Editor
- Click Patterns
- Choose your Header
In the new WordPress, navigation is now tied to the header template and created using WordPress Blocks.
Step 5: Create a new navigation menu
When you open the header:
- You’ll likely see a message saying your navigation is missing
- You’ll be prompted to create a new one
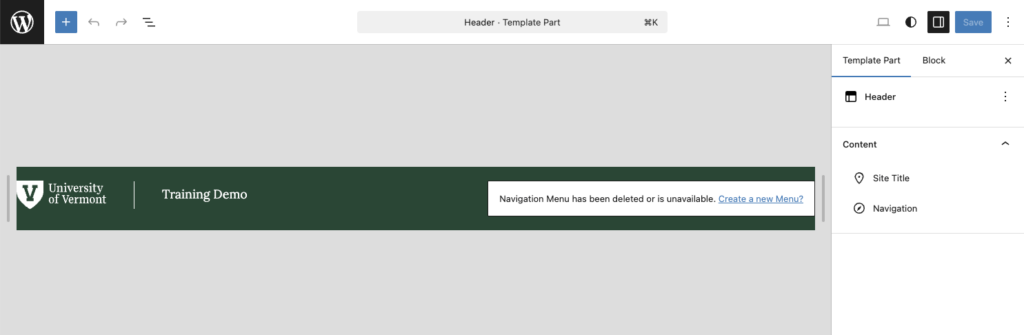
- Click Create a new Menu
- A menu (usually named “Menu”) appears in the right panel
Step 6: Build your menu using blocks
Now you’ll recreate your menu using your screenshot as a reference.
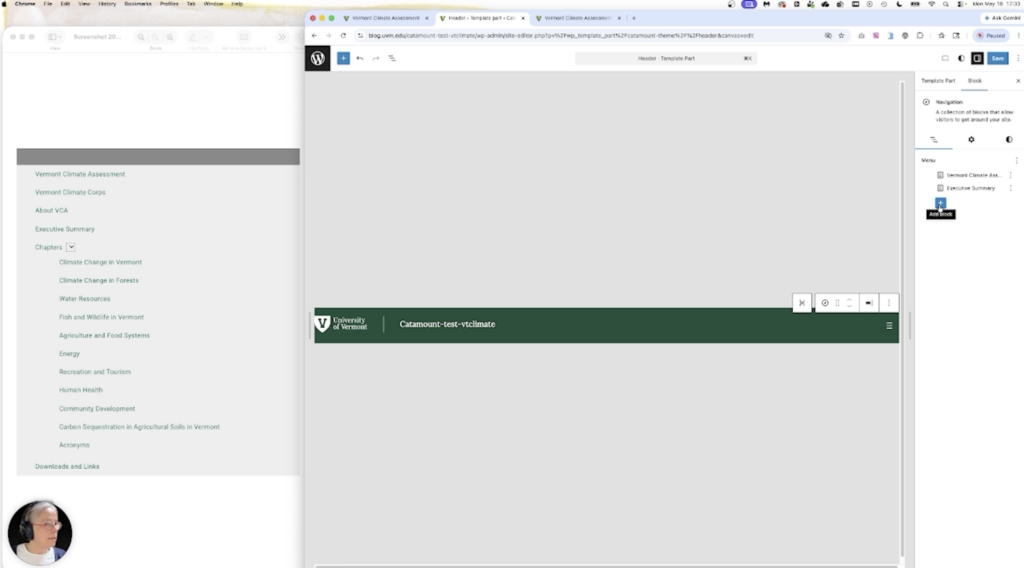
[SCREEN GRAB: Split view – old navigation (left) and new editor (right)]
Add a top-level item
- Click the + (Add block) button
- Type the name of a page (e.g., Vermont Climate Assessment)
- Select the page from results
Step 7: Create dropdown (parent-child) items
To nest pages:
- Add another page
- Click and drag it under the parent item
- Slightly hover to the right until it indents
✔️ That indentation creates the dropdown relationship.
Step 8: Continue building your menu
Repeat:
- Add items
- Reorder as needed
- Nest child pages
💡 This process replaces the old drag-and-drop interface.
Step 9: Save your navigation
When done:
- Click Save
- Confirm your changes
Step 10: Preview your menu on the site
- Visit your site
- Click the hamburger menu
You should now see:
- Your full navigation
- Proper dropdown hierarchy
Final thoughts
Rebuilding your navigation may feel inconvenient, but:
✔️ It’s quick once you get started
✔️ It only needs to be done once
✔️ The new system is more flexible moving forward