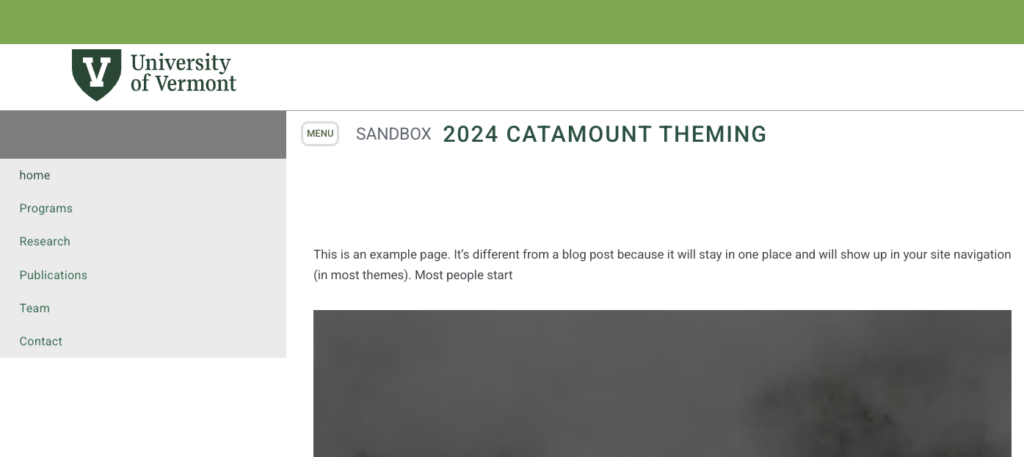
Migrating to the new UVM Catamount WordPress theme involves a few important steps—but the process is straightforward if you tackle it systematically.
This guide walks you through all 10 steps to successfully migrate your site.
Watch the full video tutorial
Overview: What to expect
During migration, you will:
- Export your existing content
- Create a new WordPress site
- Import content
- Apply the Catamount theme
- Rebuild navigation and layouts
- Launch your new site
Step 1: Capture your existing navigation
Before starting, take a screenshot of your current navigation so you can rebuild it later.
How:
- Open your current site
- Click the menu button to expand navigation
- Take a screenshot
Mac: Command + Shift + 4
Windows: Print Screen
💡 You’ll use this as your reference when rebuilding navigation later.
Step 2: Export your site content
Next, export all content from your existing site.
- Go to your Dashboard
- Navigate to Tools → Export
- Select All Content
- Click Download Export File
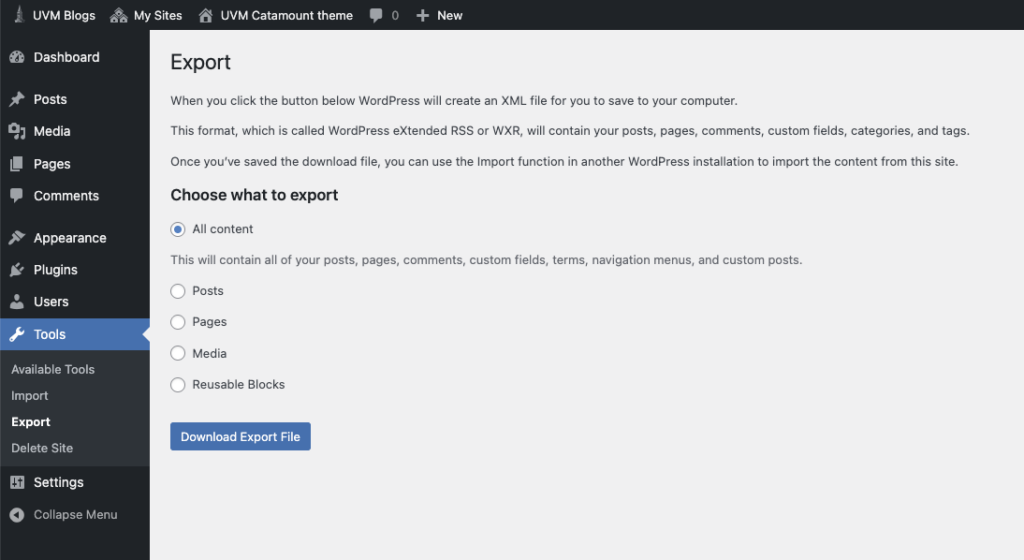
✔️ This downloads an XML file to your computer.
Step 3: Create a new WordPress site
You’ll now create a fresh site where your content will go.
- Go to blog.uvm.edu
- Look for Create a Site
- Follow the steps to set up your new site
[SCREEN GRAB: blog.uvm.edu homepage with “Create a Site” option]
💡 The interface may look slightly different, but the process is simple and guided.
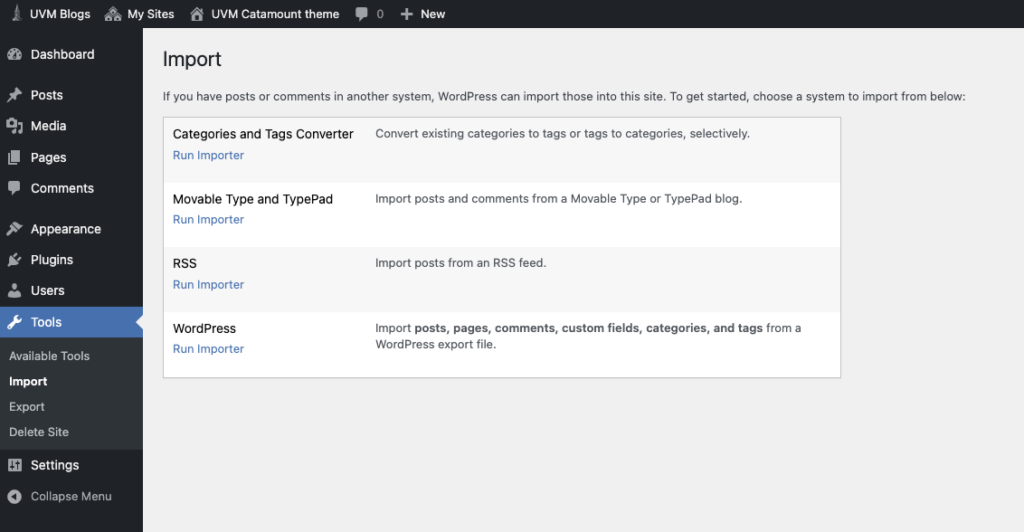
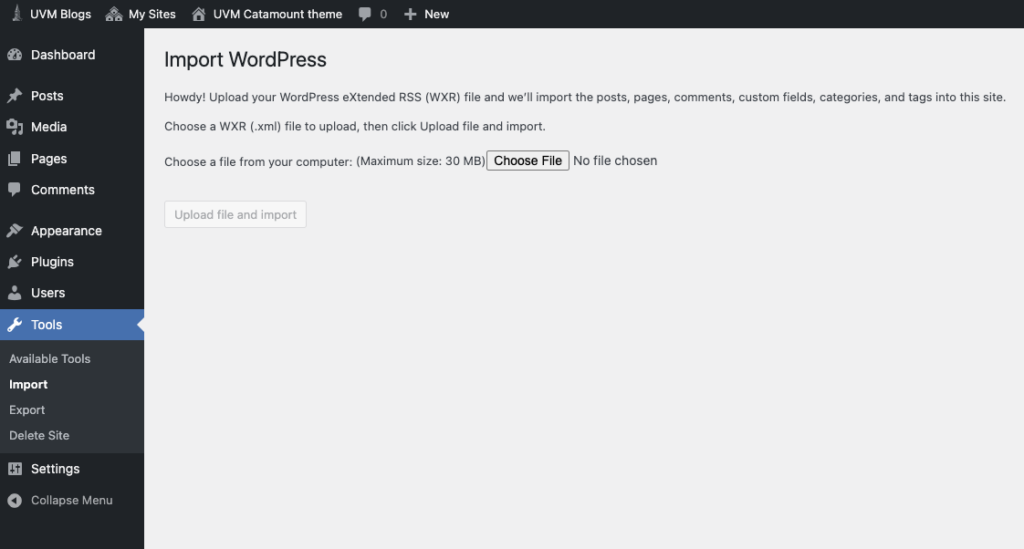
Step 4: Import your content
Now bring your exported content into the new site.
- Go to Dashboard → Tools → Import
- Run the WordPress Importer
- Click Choose File
- Select your XML file
- Click Upload file and import
[SCREEN GRAB: Import screen with file selected]
Map authors
During import:
- Assign content to a user (usually yourself)
[SCREEN GRAB: Author mapping screen]
Click Submit to complete the import.
✔️ You may see minor errors—this is normal.
Step 5: Request the Catamount theme
The new theme must be added by ETS (Enterprise Technology Services).
- Contact ETS
- Request the Catamount WordPress theme for your new site
💡 The theme will be installed for you—but not automatically activated.
Step 6: Activate the Catamount theme
Once the theme is available:
- Go to Dashboard → Appearance → Themes
- Locate Catamount
- Click Activate
Step 7: Verify the new theme
After activation:
- View your site
You’ll notice:
- New green header
- Updated typography
- New footer design

✔️ This confirms the new theme is active.
Step 8: Rebuild your navigation
Navigation will not carry over from the old site.
This is because:
- Old system = Classic menus
- New system = Block-based navigation
👉 You must rebuild it manually.

📌 Follow the dedicated navigation tutorial to complete this step.
Step 9: Fix layouts (especially Atomic Blocks)
If your site used:
- Accordions
- Multi-column layouts
- Atomic Blocks (AB Blocks)
⚠️ These are no longer supported
You’ll need to:
- Rebuild layouts using modern blocks
- Adjust designs case-by-case
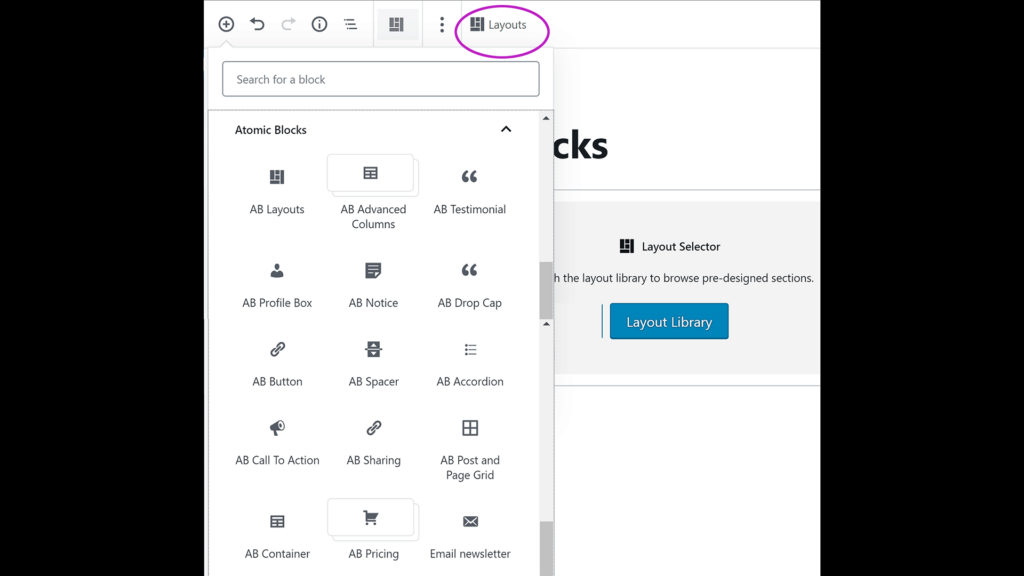
💡 There’s no one-size solution—review each page individually.
Step 10: Launch your new site
When everything looks correct:
- Contact ETS
- Provide:
- Your old site URL
- Your new site URL
They will:
- Point your domain to the new site
Step 11: Enable search indexing
After launch:
- Go to Settings → Reading
- Ensure Search engine visibility is enabled
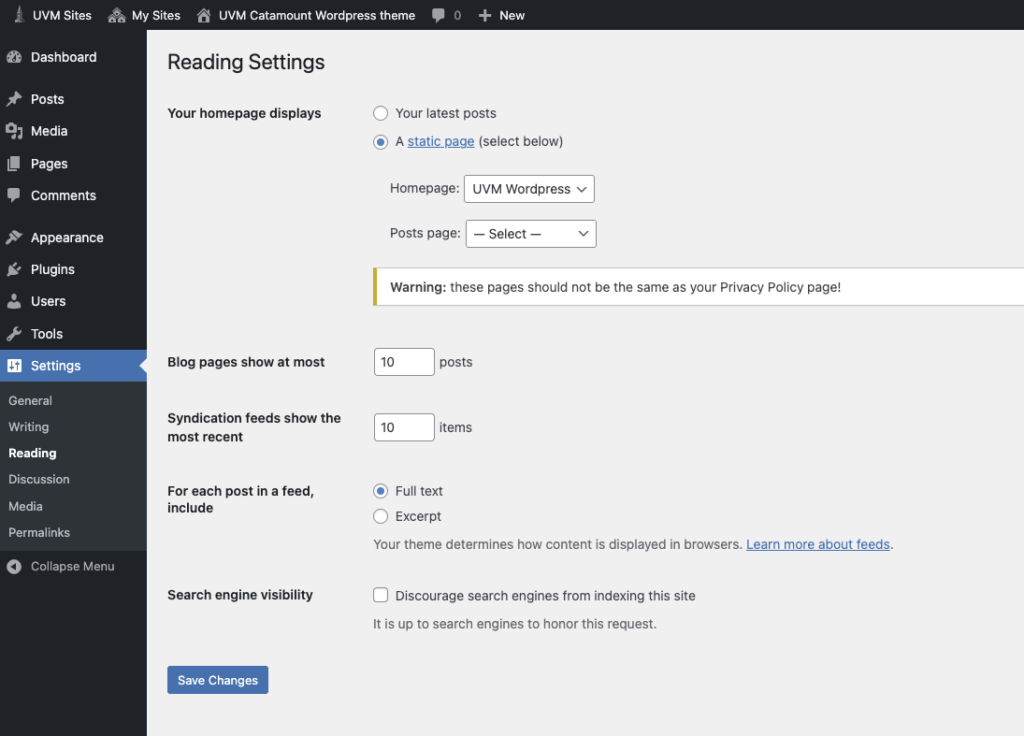
✔️ This allows search engines to index your new site.
Step 12: Retire the old site
Once the new site is live:
- Your old site is no longer needed
- ETS can help retire it safely
Final thoughts
Migrating to the Catamount theme requires a few manual steps, but:
✔️ It’s a one-time process
✔️ It gives you a modern, flexible site
✔️ Most steps are quick and straightforward
Need help?
If you run into issues at any stage:
- Attend WordPress help hours
- Get guidance on layouts, navigation, or content