Inhibiting weed growth

Mo in a face off with some crabgrass, a type of weed.

Today’s Mo Monday blog focuses on another barrier to mowing lawns to 3″ that was expressed by some who completed the survey carried out as the #RaiseTheBlade campaign was being developed. That barrier is that maintaining grass to longer heights could allow weeds to take over the lawn.

In fact, the opposite is true, at least in places where cool season grasses are grown – such as here in the Lake Champlain basin. Kentucky bluegrass and various varieties of fescues maintained to higher heights have been demonstrated to support fewer crabgrasses. This was reported in a 2003 review of research studies by Philip Busey. In addition, according to Minnesota Extension, long grass shades weed seeds, preventing them from germinating. Conversely, shorter grass provides weed seeds additional light, enhancing the probability they will germinate and grow successfully.

A mostly non-weedy lawn.

You might wonder then, what does cause your lawn to be weedy? Weed growth is influenced by a variety of factors, including drought, insect predation, and diseases, all of which cause injury to grass plants, allowing weeds to become established (Busey 2003). For example, one study cited by Busey found that tall fescues were quite sensitive to spring drought, which resulted in those grass stands becoming weedy without use of herbicides.

A great way to combat weeds is to plant grass in a manner that allows it to become quickly established and provide good ground coverage – keeping those pesky weeds from having space to become established.

Newly-planted grass with a bare area near the photographer.

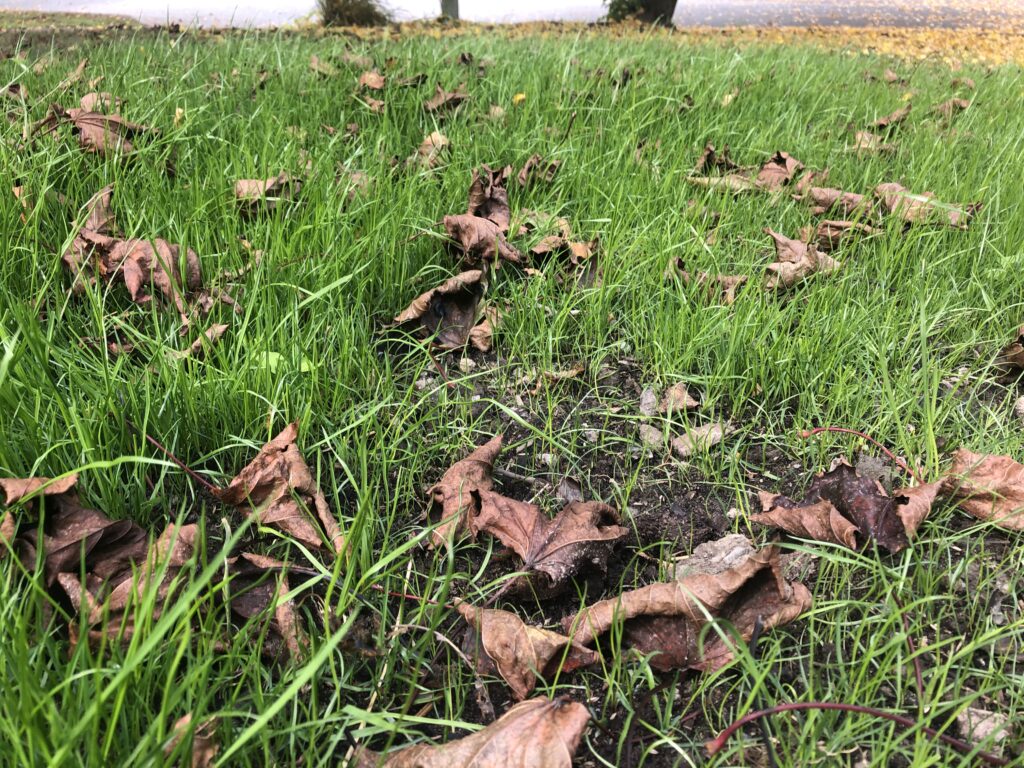
The newly-planted grass shown at the left came in well except in one area near the photographer. As a result, that area is susceptible to future weed growth.

Four tips (all from Busey’s paper) to allow grass to become quickly-established with extensive ground coverage are:

  1. Select a grass variety that is suitable to your climate and the types of weeds in your yard. While the tall fescues mentioned above allowed more growth of crabgrass after spring drought, blue fescues and hard fescues were observed to host fewer weeds even without use of herbicides.
  2. Plant grass seeds densely. An example provided reported that Kentucky bluegrass planted at about 80 pounds/acre instead of 40 lbs/ac reduced weed coverage by about 20%.
  3. When you initially plant your lawn, keep the soil moist to prevent evaporation from the soil. This can be done using some types of mulch, alfalfa hay or even grass clippings.
  4. Plant a grass mixture that includes quick growing perennial or annual ryegrass, and then initially mow short a few days to a week after initial sowing to promote growth of the Kentucky bluegrass or tall fescue in the mixture. This gives you grass coverage early on and continuing in time to keep the weeds at bay.

Getting stuck

It doesn’t happen all the time, but Mo does have run-ins with various things around the yard (as you’ve seen in some past Mo Monday blog posts). Mo usually gets caught up in something we moved or put in his way. Today, I’ll simply share a few more of the challenges he has faced while just trying to do his job.

Mo hitting a pile of onions.
A few weeks ago, I harvested our onions. As I was washing them, I saw him making his way to his robot house. He was clearly destined for failure with this heap of onions in his path. Wanting to save the onions from potential mowing, I grabbed a quick photo and helped Mo leap over the pile to get home.
 Mo stuck under a chair.
Another day we left this patio chair in the grass. Mo and chairs…they just don’t always get along.
Then there was that one time, in the front yard when I removed the wooden edge along the grass. Mo fell out of his mowing area, and got stuck in this plant trying to get back to work.
While working in the front yard, we had used our edging tool to create a nice edge along our sidewalk. However, something like 30 years of sedimentation resulted in creating quite a drop off between the grass and the sidewalk. We have discovered that, when Mo hits it straight on, it can be very challenging.
To be fair, Mo generally has success with the edge–so long as he takes it at a slight angle. This video is from soon after we did the edging.

Don’t forget! The Raise The Blade planning team is looking for people (ages 18+ who live in the Lake Champlain basin) to share #RaiseTheBlade photos and stories via social media, and to enter for a chance to win an electric mulching mower. The drawing will take place on Labor Day 2020! Learn more at lawntolake.org.

Win a mulching mower, and more Mo antics

Mo meets an adirondack chair
Yes, this did actually happen.

This Mo Monday, we’d like to mention a very important topic! That is, the Raise the Blade team is running a contest this summer. People over 18 who live in the Lake Champlain basin can enter for a chance to win a mulching mower! The idea is to help one lucky winner implement the recommended Raise the Blade lawn care practices, while getting to see many people’s ongoing actions to Raise The Blade.

You might wonder how a mulching mower could help someone to implement the Raise the Blade best practices. Since a mulching mower cuts lawn clippings into very small pieces and leaves them in place to decompose, they are easily broken down by soil microorganisms and add nutrients right back to the soil. This adds organic matter to the soil, which helps it to hold more water. Soils that can hold more water help limit the amount of stormwater runoff that leaves a yard, and that’s the ultimate goal of the Raise the Blade campaign.

To enter the contest, simply enter your contact information here, and share a photo of you or someone else following Raise the Blade recommended practices, or showing your grass cut to 3″ in height. You can share your photo via email by sending it to seagrant@uvm.edu or via social media by posting it to Twitter and tagging @lakechamp or to Instagram, tagging @lakechamplainbasinprogram and using the hashtag #RaiseTheBlade. The drawing will be held on Labor Day 2020.

Now, about Mo and that Adirondack chair…my husband finished building this and another chair a few weeks ago, and we placed them in the yard in a nice shady spot for some summertime reading and relaxation. We knew Mo would bump into the chairs, but watched him carefully the first time he approached them. I even recorded it, not knowing what might result. Things went perfectly smoothly, which you can see in the video below.

Mo meets the Adirondack chair – the first time.

However, as you can see from the photo at the top, Mo’s second meeting with one of the chairs didn’t go as smoothly. That, or maybe he was trying his hand at being Atlas?

Mo and the milkweed

Robotic mower drives up a milkweed plant
Mo had a run-in with a large milkweed.
Photo of a dog and a robotic mower.

Last Mo Monday, I mentioned some small milkweeds in a photo comparing our yard to our neighbors. One thing we have observed is that Mo isn’t great at mowing things that are not grass. That’s good in some cases (e.g., my sister’s dog didn’t seem to mind when Mo bounced off of her during his workday while she was visiting – his blades shut off immediately if he hits anything, so she wasn’t at risk).

It is not-so-good in other cases. Case in point, Mo seems to simply pass over milkweed, leaving it untouched by his blades. This might be a lesson to us that it is time to replace his blades. It’s also good for monarch butterflies, of course, but not always the look one wants in their yard.

WORX Landroid upside down, getting ready for a blade change.

So, here is a quick lesson in changing Mo’s blades; it’s quite simple, really. First, unplug the system, so there’s no chance you will turn it on accidentally while changing the blades. Then, flip the unit upside down to expose its three blades.

Screwing in a new blade to a WORX Landroid robotic mower.

Next, carefully unscrew each blade, and either turn it around to use an unused cutting edge of the blade (though, notice that the new style replacement blades are not set up for this) or change to a new blade.

Three new mower blades on the WORX Landroid.

And, voila, you’re done! Flip him upright, plug the system back in, and off he goes.

Robotic mower hung up on a large milkweed plant

About that giant milkweed that Mo tangled with above…that occurred after we had shut Mo down for several weeks last summer. The milkweed grew along his boundary wire. When he didn’t show up back at his base station on the day we set him back out in the yard to mow, we went looking for him. We found him almost entirely vertical, having driven up the milkweed stem while diligently trying to make his way home. Or maybe he was trying to do the Mobot?

Saving time, creating healthy lawns, and bringing peace

Map of the Lake Champlain basin.

There are several great things about robotic mowers like Mo. First, they save you time, which we know is important to landowners in the Lake Champlain basin when it comes to lawn mowing.

As we started the Raise the Blade project, we surveyed people around the Lake Champlain basin to understand their lawn care practices and motivations to potentially mow their grass no shorter than 3″ in length if they were not doing so already. (Check out this Lake Champlain Basin Program map that you can zoom in on to see if your town lies within this drainage basin).

Infographic of Lake Champlain basin survey results. PDF available at: https://lawntolake.org/wp-content/uploads/2019/10/HealthySoilsSurveyInfographic_RevisedApril2018.pdf

More than 1000 people from 56 towns across the Lake Champlain basin answered our survey. (Thank you all!)

We learned that almost 90% of homeowners mow their lawns (rather than having someone else do it), and on average, 75% cut their lawns shorter than 3″. We also learned that homeowners in the basin would be motivated to cut their grass to the recommended 3″ length for three main reasons:

  • If the lawn was healthier as a result
  • If mowing it to that length was good for the environment
  • If they had to mow less often

The first two are absolutely true, and therefore make our job of marketing these best practices to the majority of people who cut their lawns to 2-3″ pretty easy. Unfortunately, cutting your lawn following the three recommended practices (i.e., cutting the grass no shorter than 3″ in height; cutting only 1/3 of the length of the grass blades in any one cutting, and leaving the clippings in place to decompose) doesn’t result in less time mowing, unless you either get someone else to mow it for you or get something else to mow it for you. There’s where Mo comes in. We have him programmed to mow every week day for several hours. That frees up time for us to do other things besides mowing the lawn on our weekends or weeknights.

Having said that, it occurs to me that I should mention that robotic mowers like Mo don’t have blades like your traditional gas-powered mower. Instead they have just three 1″ razor blades.

Rather than cut every blade of grass they go over, Mo and his fellow robots rely upon lots of time spent out doing their job, and many passes over the same spot to ensure every blade of grass is cut.

Close up image of Mo's blade with a dime for size comparison.
Here’s a close up of one of Mo’s blades with the dime for size comparison.

Additional benefits of using a robotic mower are that it can be programmed to — or it automatically follows — all three recommended grass-cutting practices. This helps to boost your lawn’s health, soil health, and ultimately benefits water quality by minimizing the amount of stormwater that will run off from the yard. Specifically:

  • We set Mo to cut the grass to 3″ in length.
  • Each time Mo heads out in our yard to mow, he cuts only a small amount of the length of the grass blades.
  • Mo always leaves the clippings to decompose in place.
Photo of the inside of a robotic mower where the length of grass height to cut to is set by a dial.

Of the three practices, only setting the length to which Mo cuts the grass needs to be done manually, and this is easily done by turning a dial under the main cover on the body of the mower.

Photo of a bird through a window screen.

One further benefit of robotic mowers is that they are beautifully quiet. Being electric, most of the sound we hear from Mo’s direction is a slight hum and a kind of scissor-like sound of the grass blades being cut. For all intents and purposes though, Mo is silent in comparison to a traditional gas-powered mower. So, we feel good about not contributing to noise pollution in our neighborhood. All the more time to listen to the birds.

Installation day!

Mo (the lawnmower's) components for installation (e.g., instruction book, stakes)
Mo’s stakes needed to be prepared for installing.

It took us about 3 hours (including a break and a trip to the store for more wire) to install Mo’s boundary wire in our 1/3 acre yard. It was a fairly simple process, aided significantly by a measuring tool my husband crafted part way through the installation. We also got into a rhythm with assigned roles between the two of us. So, it went more quickly as the time passed.

The boundary wire is like an invisible dog fence. Mo follows it to get “home” when it’s time for a recharge (more about this another time), and he uses it to know where he should and shouldn’t mow.

If you will be doing this, the main things to know to install the wire are to:

This shows the grass burnt where it was cut short to ease the wire installation.
  • ignore Raise the Blade lawn mowing best practices for the day, and cut the grass quite short with a regular mower along the path where you will lay the wire. This eases the wire installation process.
Mower with two wheels on the driveway
  • plan to place the wire 14″ from edges you want the mower to avoid, and place the wire closer to edges where the mower can safely operate off of the grass. For instance, Mo can happily move along with two wheels on our driveway and two in the grass. That saves us time weed whacking along the driveway.)
  • plan to make corners into curves with the wire, as Mo (and his cousins) cannot make 90 degree turns.
  • Position the base so the mower can enter it in a counter-clockwise direction (that is, it will be moving from right to left to enter the base).
Tools for the installation include a hammer or rubber mallet, wire, stakes, and some way to measure 14" and 24".

Here is what was needed for the wire installation:

  • a hammer or rubber mallet
  • the stakes
  • wire
  • a way to measure 14″ and 24″ (the recommended distance between stakes)
Shows a person's knee with a knee pad, plus a hammer, a stake and the wire.

I found that wearing knee pads really helped my ability to crawl along the ground for the time it took to do the installation.

Overhead picture of a piece of wood and a measuring tape measuring 14" and 24" , respectively.

We originally used a measuring tape and a piece of wood to measure the 14″ and 24″, respectively. That was slow and cumbersome, however.

Shows a measuring tool in the shape of an L, with one length cut to 14" and the other to 24". This is used for positioning the wire.

At some point in the process, we advanced like ancient peoples discovering the wheel when my husband invented a tool specific to the task at hand. It measured 14″ inches wide and 24″ in length.

Shows a person's arms positioning the measuring tool on the grass with the wire aligned and one stake int he foreground.

Its size and L-shape allowed for the wire to be easily lined up at the correct distance from the edge of the grass, and for stakes to be placed 24″ apart.

Shows a person joining two wires.

Since we wanted Mo to do his job in both the front and back yards, we had to supplement the supplied wire with some from the local hardware store. We used wire cutters to strip the wire.

Shows a person twisting two wires together.

Then we simply twisted the two together, and sealed the connection point with electrical tape. (Note: We have had no issues with this junction or any others we have had to make for various reasons over the last few years. …Knock on wood I have not just blown our luck by saying that.)


Old dryer vent in house was where we ran the wire for the mower.

After the wire was installed, the installation was nearly complete! The last step was to install Mo’s home base where he returns to charge. The two ends of the wire simply connect to the base at provided connection points. Then the power cable on the base plugs into a standard outlet. We had an existing hole in our house from an old dryer vent, so we ran the power cable through that to reach an indoor outlet, and then sealed up around it.

Image from Mo Farah's Official website at http://www.mofarah.com/#images

That’s all there was to it! Below (if you click on the photo) is a link to a video of Mo’s maiden mowing expedition (which followed him taking one victory lap around the entire boundary wire in Sir Mo Farah-style). We didn’t see him doing the Mobot in celebration like Sir Mo in this photo I found on his official website, but we will keep our eyes peeled for that!

Click on the image above to view a video of Mo’s maiden voyage.