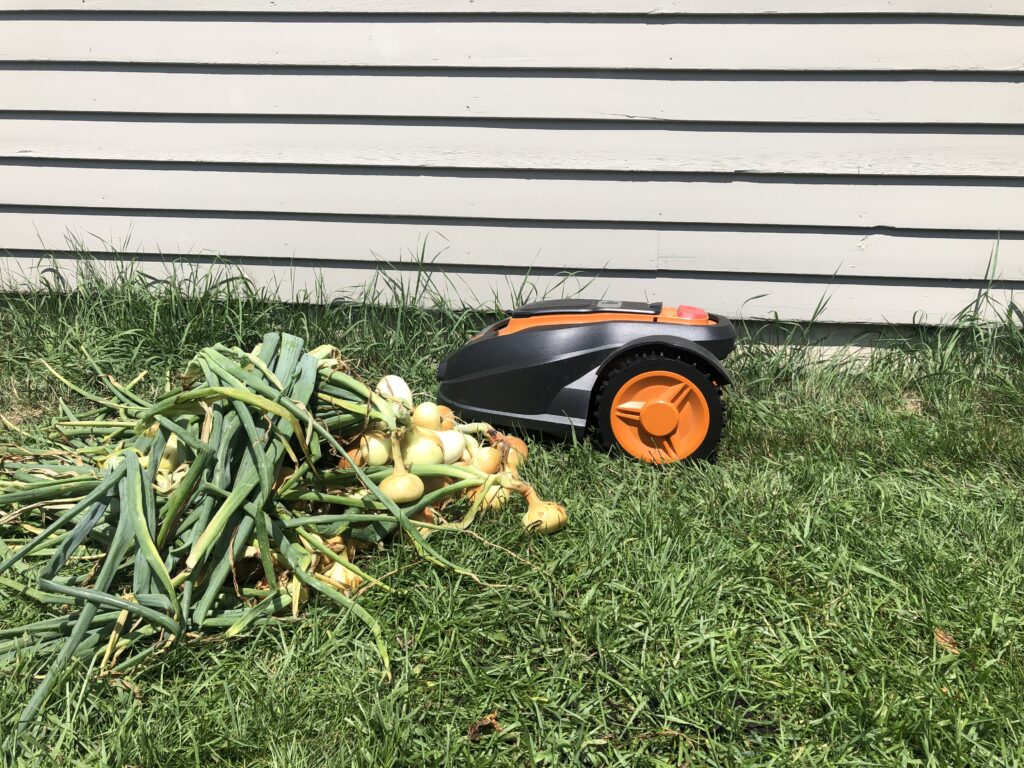
It doesn’t happen all the time, but Mo does have run-ins with various things around the yard (as you’ve seen in some past Mo Monday blog posts). Mo usually gets caught up in something we moved or put in his way. Today, I’ll simply share a few more of the challenges he has faced while just trying to do his job.
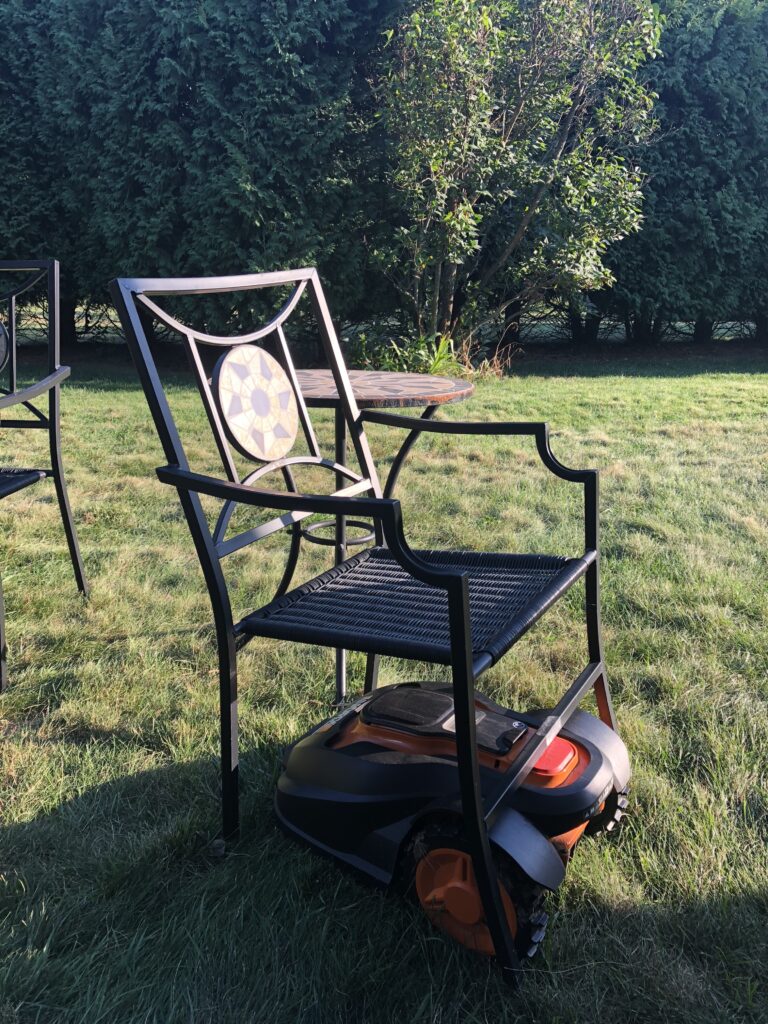
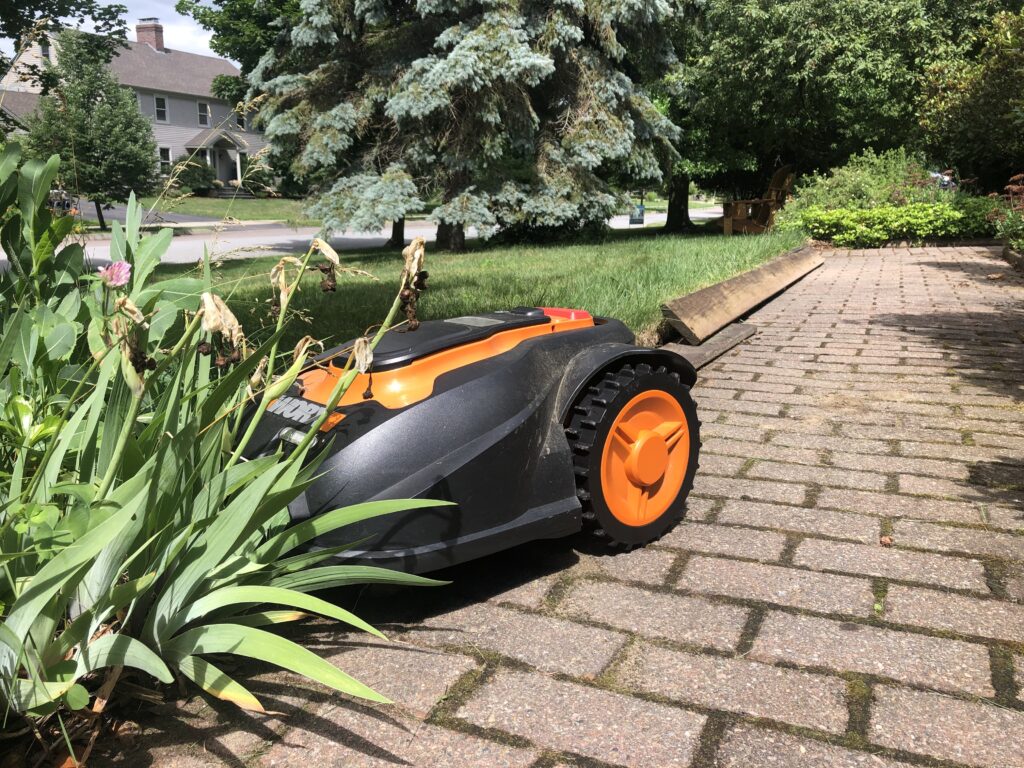
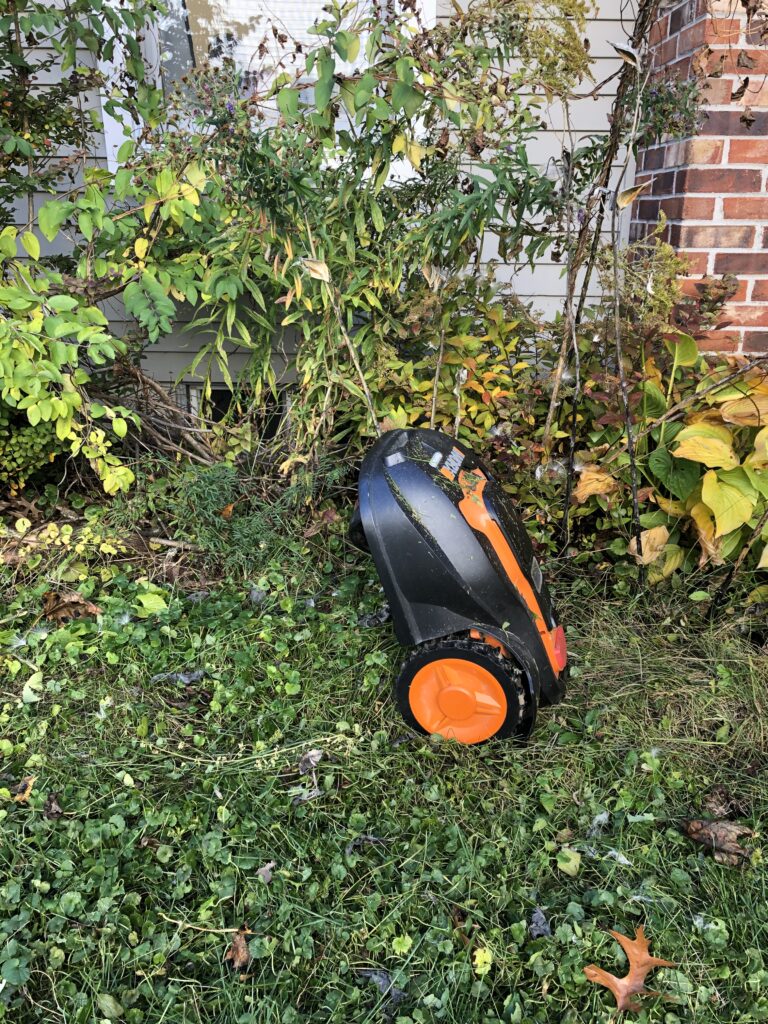
A few weeks ago, I harvested our onions. As I was washing them, I saw him making his way to his robot house. He was clearly destined for failure with this heap of onions in his path. Wanting to save the onions from potential mowing, I grabbed a quick photo and helped Mo leap over the pile to get home. Another day we left this patio chair in the grass. Mo and chairs…they just don’t always get along.Then there was that one time, in the front yard when I removed the wooden edge along the grass. Mo fell out of his mowing area, and got stuck in this plant trying to get back to work.
While working in the front yard, we had used our edging tool to create a nice edge along our sidewalk. However, something like 30 years of sedimentation resulted in creating quite a drop off between the grass and the sidewalk. We have discovered that, when Mo hits it straight on, it can be very challenging.
To be fair, Mo generally has success with the edge–so long as he takes it at a slight angle. This video is from soon after we did the edging.
Don’t forget! The Raise The Blade planning team is looking for people (ages 18+ who live in the Lake Champlain basin) to share #RaiseTheBlade photos and stories via social media, and to enter for a chance to win an electric mulching mower. The drawing will take place on Labor Day 2020! Learn more at lawntolake.org.
While Mo is great, and saves us a lot of time, my husband and I soon realized–as new homeowners–that a lush green grass isn’t guaranteed with only regular mowing and that other factors can impact grass health. In our case, creeping charlie, or ground ivy, crept in rather handily to one area of our lawn, and another area was damaged during a yard project. Since weeds can take over when a lawn is not healthy (which we suspected as a possible reason that creeping charlie was able to be so successful where it had come in) and to best prepare to re-establish the lawn in the damaged area, we knew that it was important to understand characteristics of our soil. This is true for anyone who wants to maintain a healthy lawn. Understanding the health of your soil can inform actions you take to keep your grass healthy.
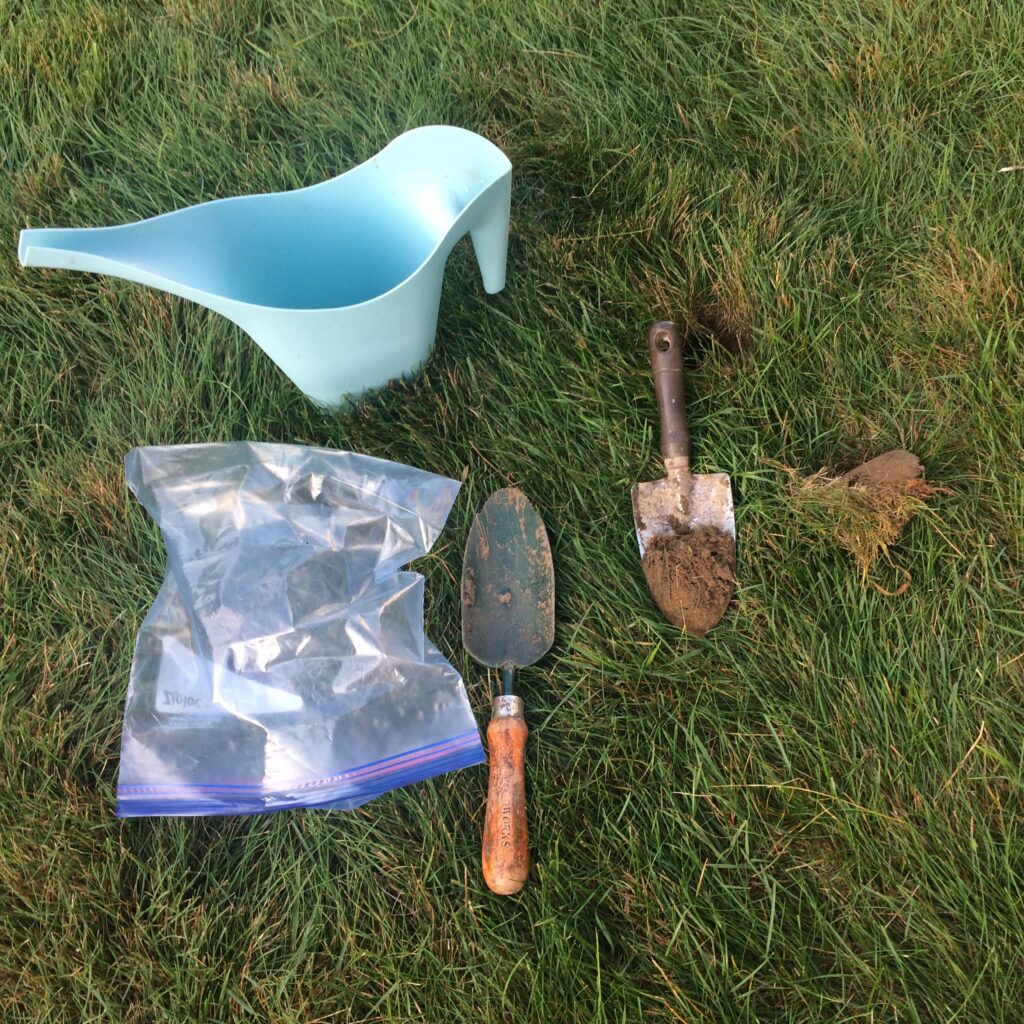
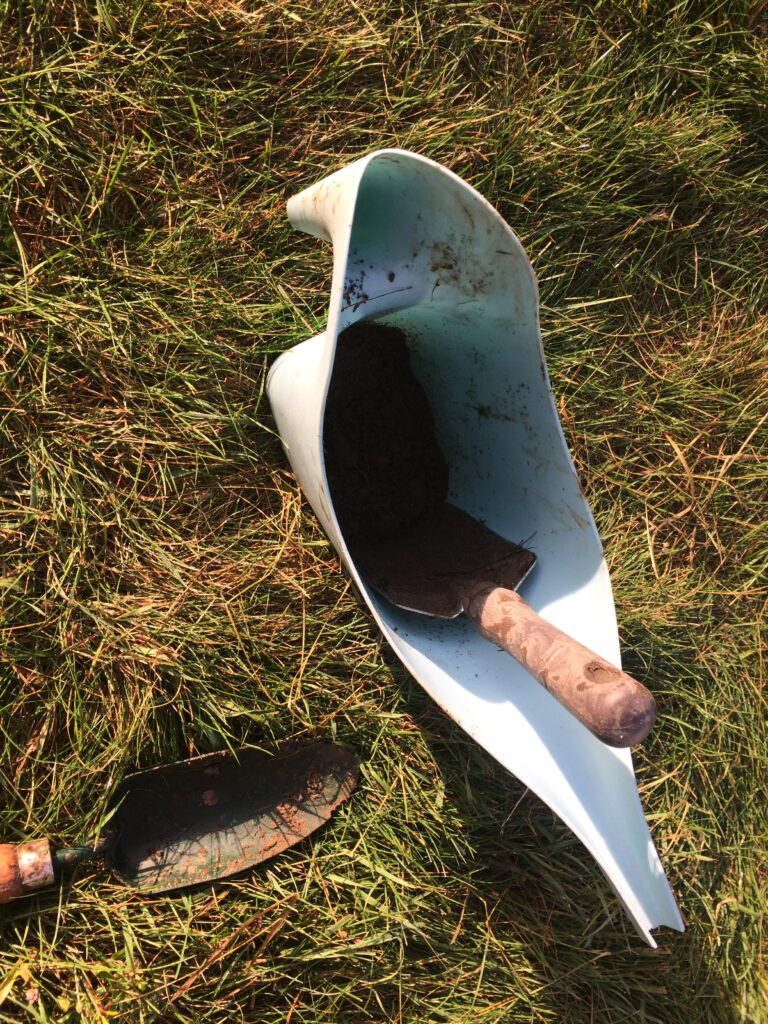
Soil sampling supplies if you do not have a soil probe.
Here in the Lake Champlain basin, the UVM Agricultural and Environmental Testing Laboratory is a valuable resource to guide landowners through the soil sampling process, and to analyze the sample once it is collected. They provide step-by-step guidance on how to collect a soil sample. For those without a soil probe, like us, you can sample using a trowel or shovel. I found it easiest to use two.
Their guidance explains that it is very important to sample from at least 10 locations in your yard (collected in a zig-zag pattern) and to combine those samples into one for analysis.
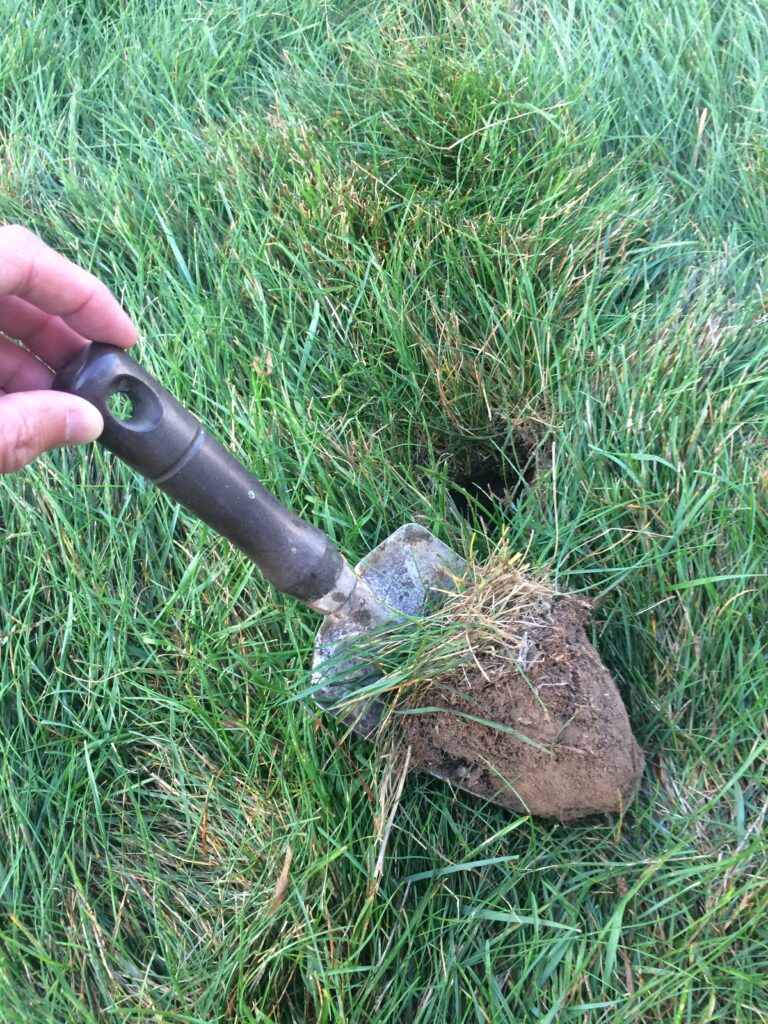
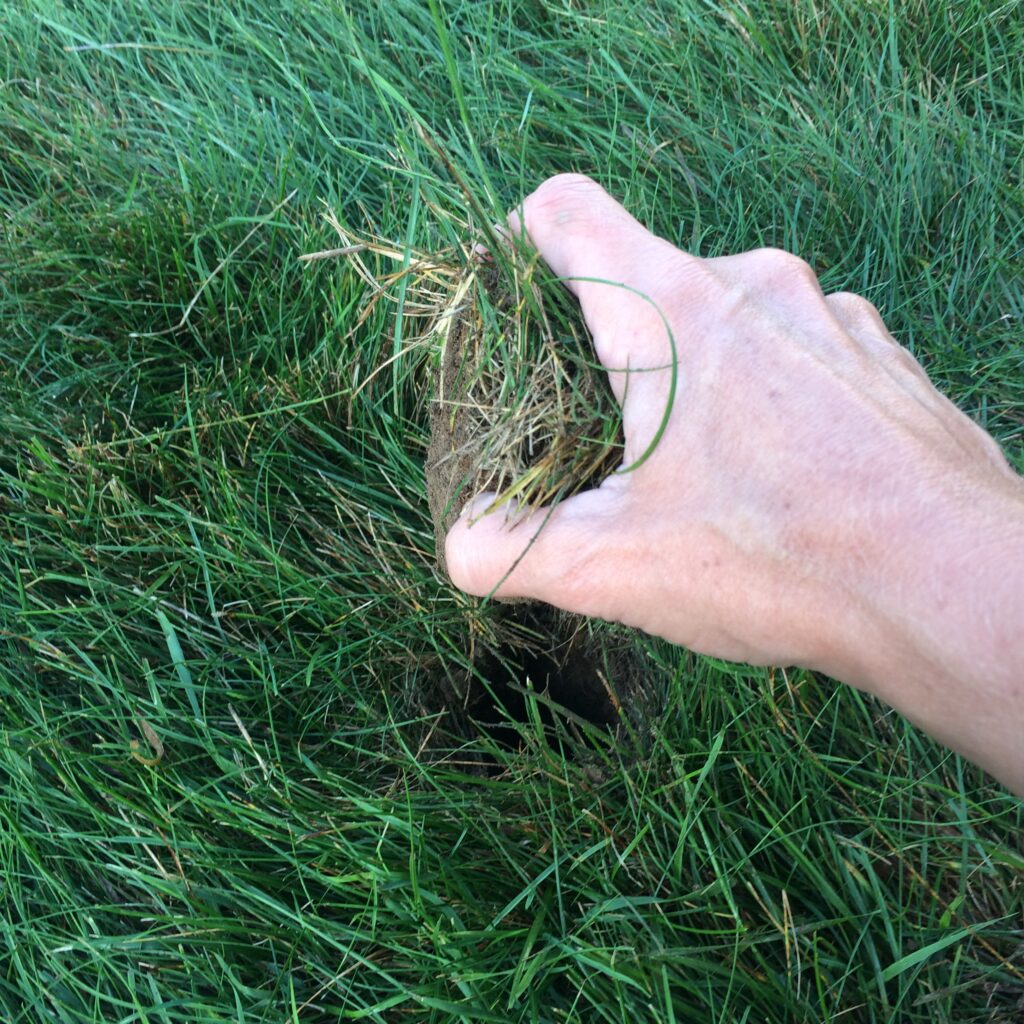
To sample, initially, push the trowel into the ground to a depth of about 4-6″, creating a triangle shape of ground to remove from the lawn. Set this aside, so you can later replace it to hide the location where you collected the soil sample.
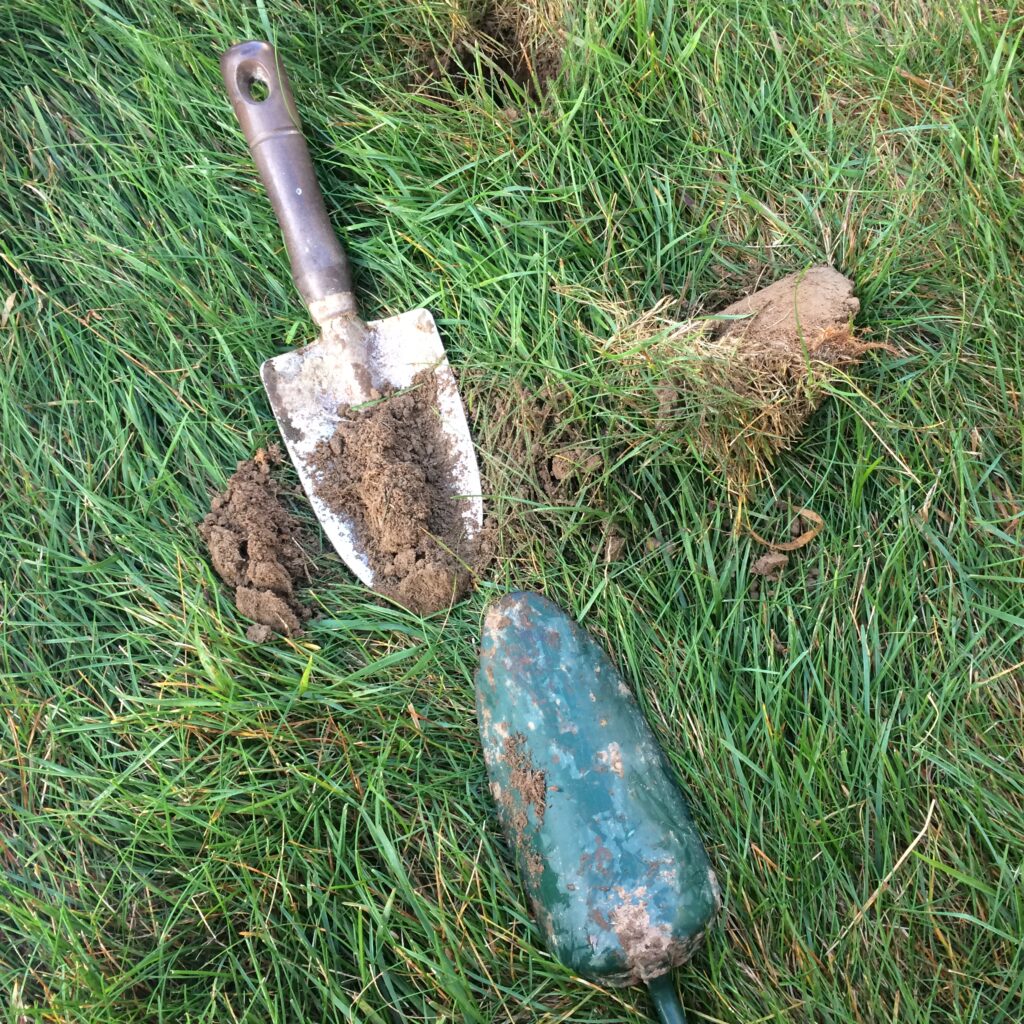
Next, re-insert the trowel into the open hole, cutting out a 1/2″ sliver of soil from one of the edges. Then cut away the edges of that sample, leaving about a 1″ mid-section of soil.
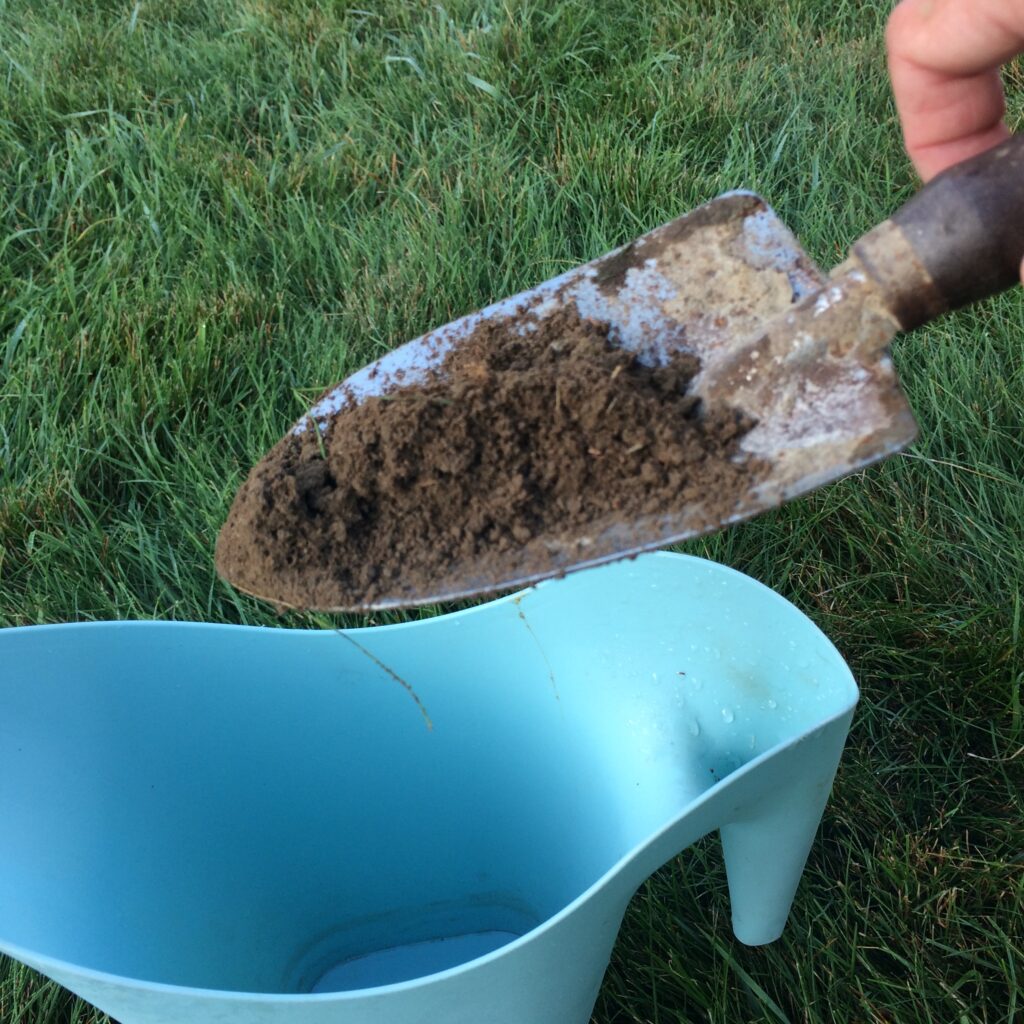
Add that sample to the container into which you are collecting samples.
Replace the triangle-shaped piece, and move to the next location to collect a sample.
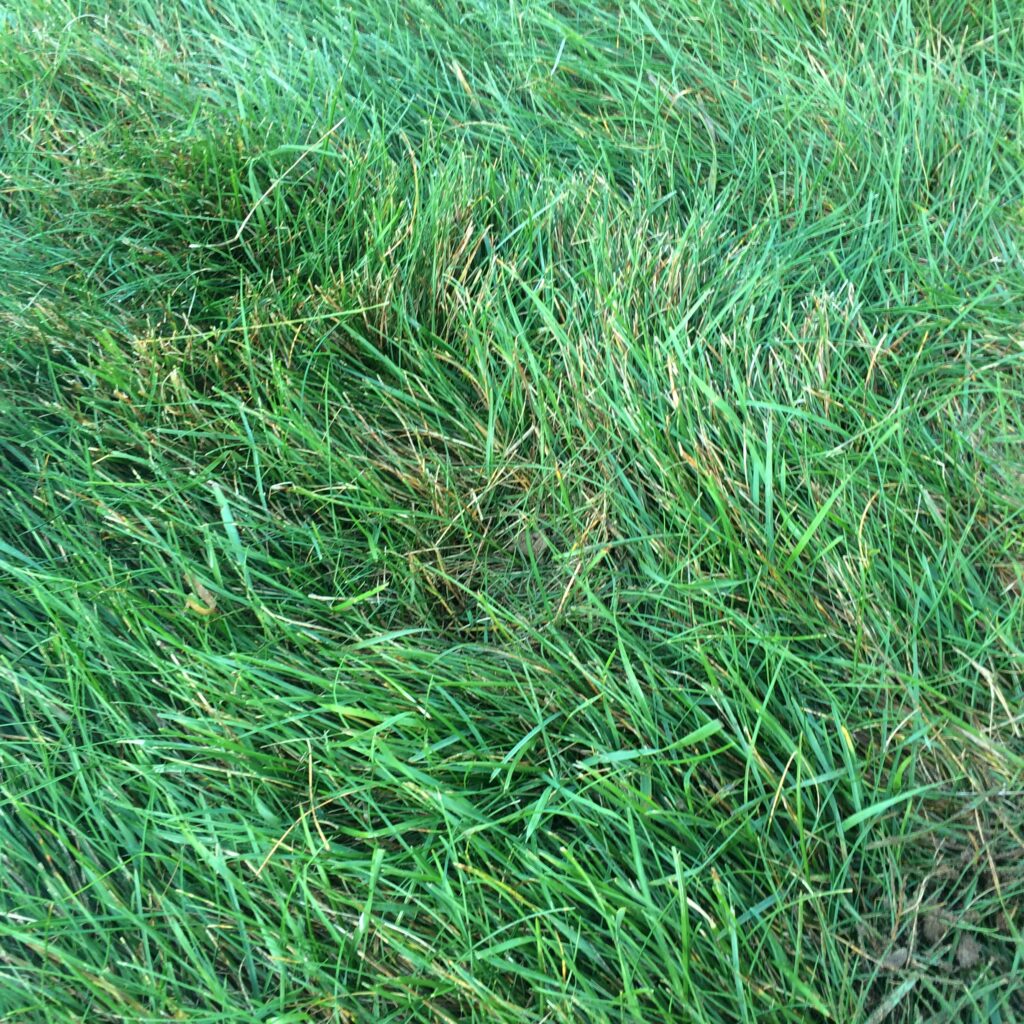
After you add the triangle piece back to the lawn, the spot from which you sampled is completely hidden.
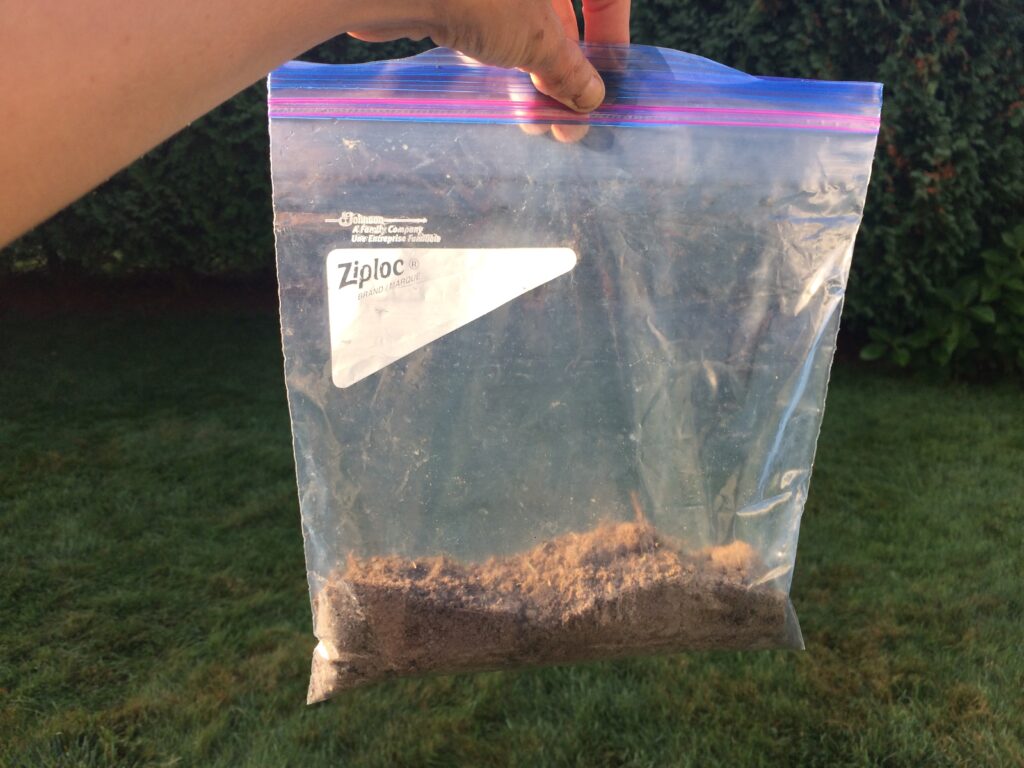
After you have collected the 10 samples, mix all of the soil in the container to create a uniform mixture.
Add this to your sample bag, complete the form that you can download from the lab’s website, and send the sample and payment to the lab. You can expect results in a few weeks (accounting for shipping time for your sample to reach them).
The results come with easy to understand guidance on how to interpret them, including recommendations on how much and which nutrients to apply based on your results.
We learned some useful information and good lessons as we collected the soil samples and took action to re-establish our lawn in the two troubled areas. These include:
Sampling the soil with the trowel was noteasy in our very clayey soil (which was sometimes overlaid with small rocks spilled there during the yard project). As a result, we may not have sampled quite deep enough. In the future, we will borrow or buy a soil probe to simplify the sampling process.
In Vermont and New York, fertilizers with phosphorus can only be used on lawns if a soil test confirms phosphorus is needed or when establishing a new lawn. You can learn more about these regulations and the reason why the simple message to remember is “Don’t P on your lawn” at the Lawn to Lake website. Since general fertilizing of lawn is recommended for early fall (and not during other times of the year), August is a great time to sample soil in preparation for fertilizing as is needed.
The creeping charlie in our yard was effectively killed by laying a large tarp on the infested area from early August through the winter until late April/early May. At that point, we removed the tarp, turned over the soil with a shovel, removed dead plant material that remained, fertilized (following guidance for establishing a new lawn), and re-seeded the area. We compacted it just by walking on it due to COVID business closures and inability to rent a roller.
To establish a new lawn, daily watering is critical. In the area that had been damaged during the yard work, we watered, but not as consistently as we might have. That resulted in numerous weeds sneaking in, which then had to be dealt with later.
In the area that had the creeping charlie (shown at left), we were very consistent in daily watering this spring and the grass thrived. (Note: creeping charlie has since developed in a ~10″ strip along one edge where the tarp didn’t quite cover. The plan is to place a tarp there to kill it in the next few weeks, and re-seed the area next spring.)
This Mo Monday, we’d like to mention a very important topic! That is, the Raise the Blade team is running a contest this summer. People over 18 who live in the Lake Champlain basin can enter for a chance to win a mulching mower! The idea is to help one lucky winner implement the recommended Raise the Blade lawn care practices, while getting to see many people’s ongoing actions to Raise The Blade.
You might wonder how a mulching mower could help someone to implement the Raise the Blade best practices. Since a mulching mower cuts lawn clippings into very small pieces and leaves them in place to decompose, they are easily broken down by soil microorganisms and add nutrients right back to the soil. This adds organic matter to the soil, which helps it to hold more water. Soils that can hold more water help limit the amount of stormwater runoff that leaves a yard, and that’s the ultimate goal of the Raise the Blade campaign.
To enter the contest, simply enter your contact information here, and share a photo of you or someone else following Raise the Blade recommended practices, or showing your grass cut to 3″ in height. You can share your photo via email by sending it to seagrant@uvm.edu or via social media by posting it to Twitter and tagging @lakechamp or to Instagram, tagging @lakechamplainbasinprogram and using the hashtag #RaiseTheBlade. The drawing will be held on Labor Day 2020.
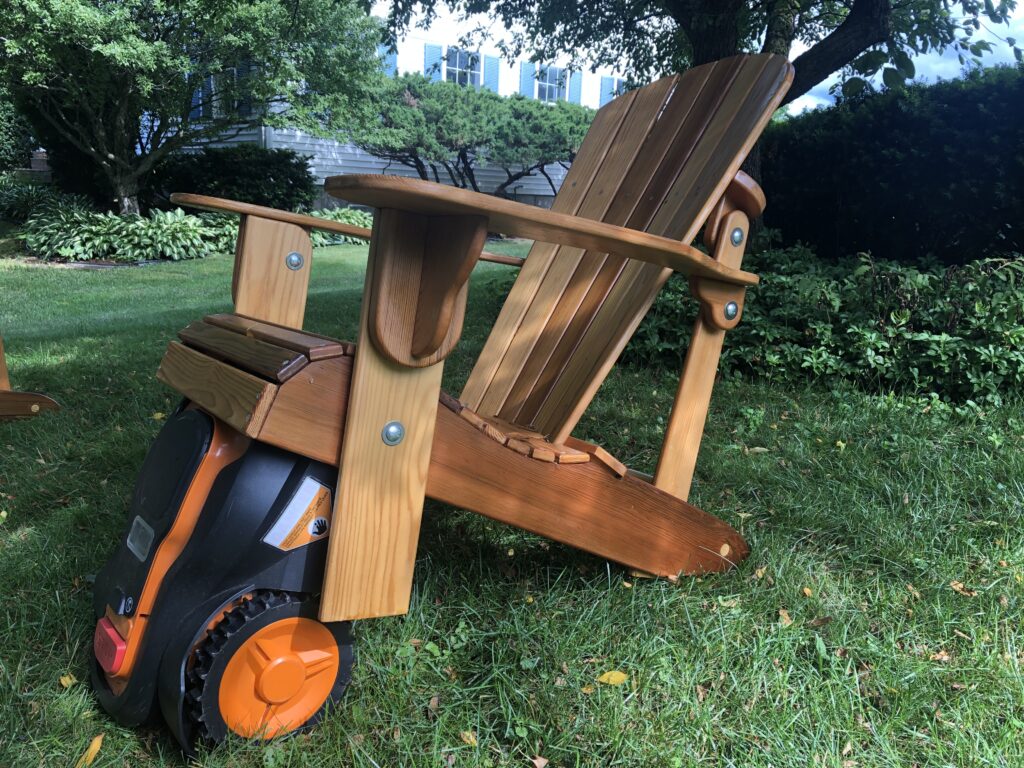
Now, about Mo and that Adirondack chair…my husband finished building this and another chair a few weeks ago, and we placed them in the yard in a nice shady spot for some summertime reading and relaxation. We knew Mo would bump into the chairs, but watched him carefully the first time he approached them. I even recorded it, not knowing what might result. Things went perfectly smoothly, which you can see in the video below.
Mo meets the Adirondack chair – the first time.
However, as you can see from the photo at the top, Mo’s second meeting with one of the chairs didn’t go as smoothly. That, or maybe he was trying his hand at being Atlas?
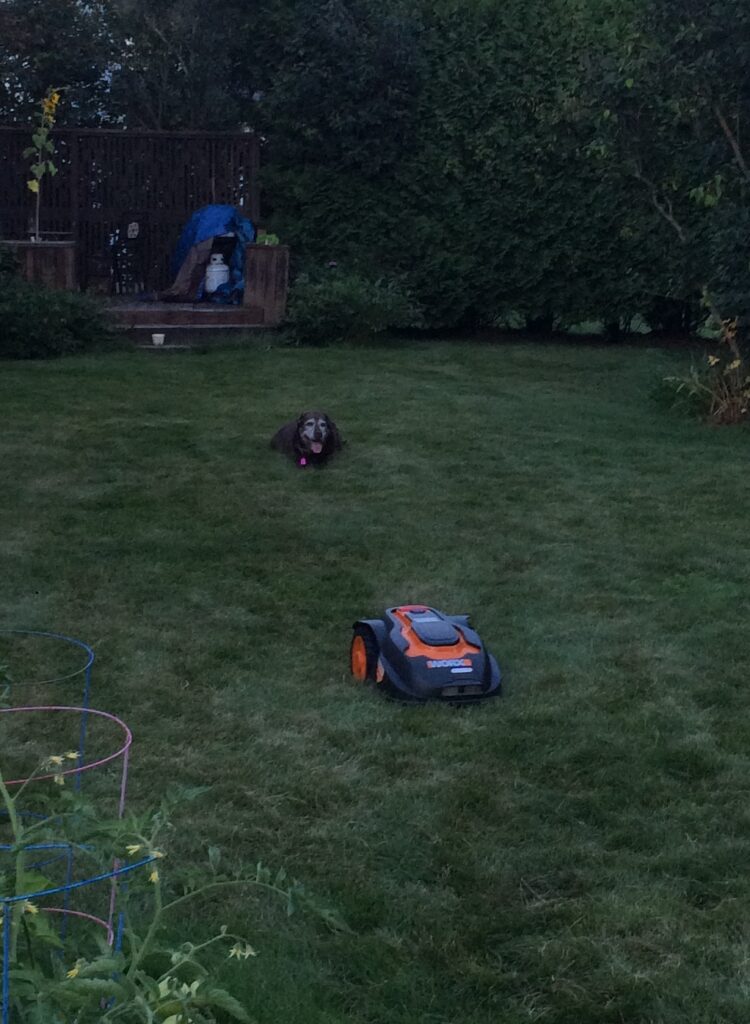
Last Mo Monday, I mentioned some small milkweeds in a photo comparing our yard to our neighbors. One thing we have observed is that Mo isn’t great at mowing things that are not grass. That’s good in some cases (e.g., my sister’s dog didn’t seem to mind when Mo bounced off of her during his workday while she was visiting – his blades shut off immediately if he hits anything, so she wasn’t at risk).
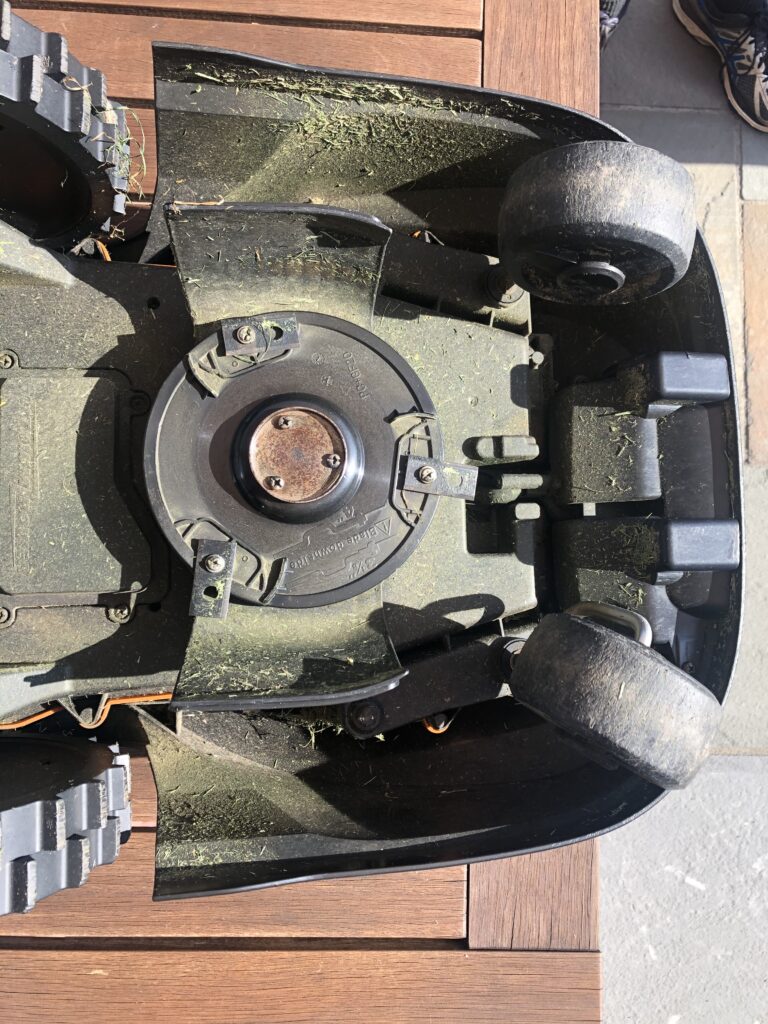
It is not-so-good in other cases. Case in point, Mo seems to simply pass over milkweed, leaving it untouched by his blades. This might be a lesson to us that it is time to replace his blades. It’s also good for monarch butterflies, of course, but not always the look one wants in their yard.
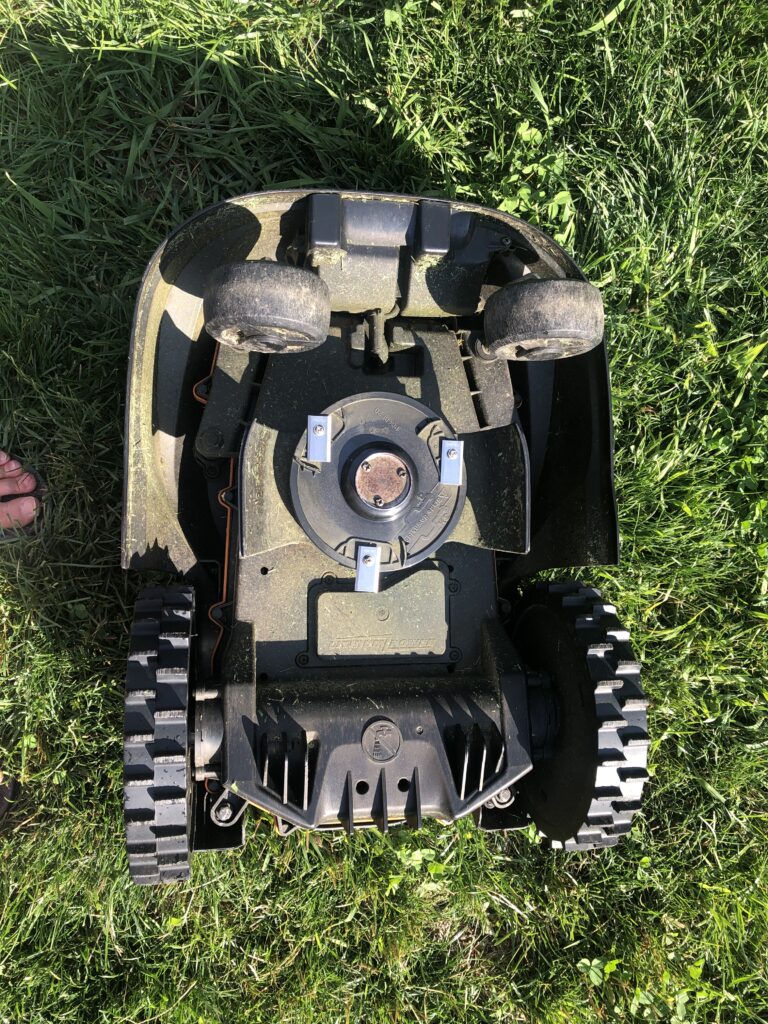
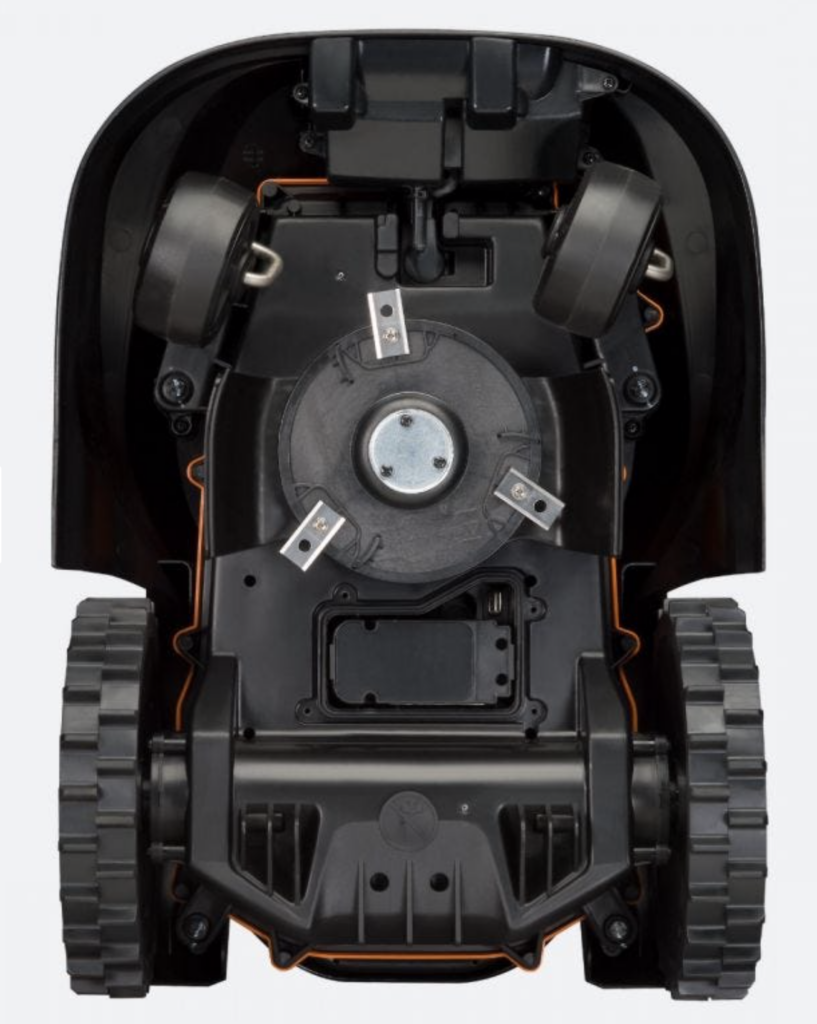
So, here is a quick lesson in changing Mo’s blades; it’s quite simple, really. First, unplug the system, so there’s no chance you will turn it on accidentally while changing the blades. Then, flip the unit upside down to expose its three blades.
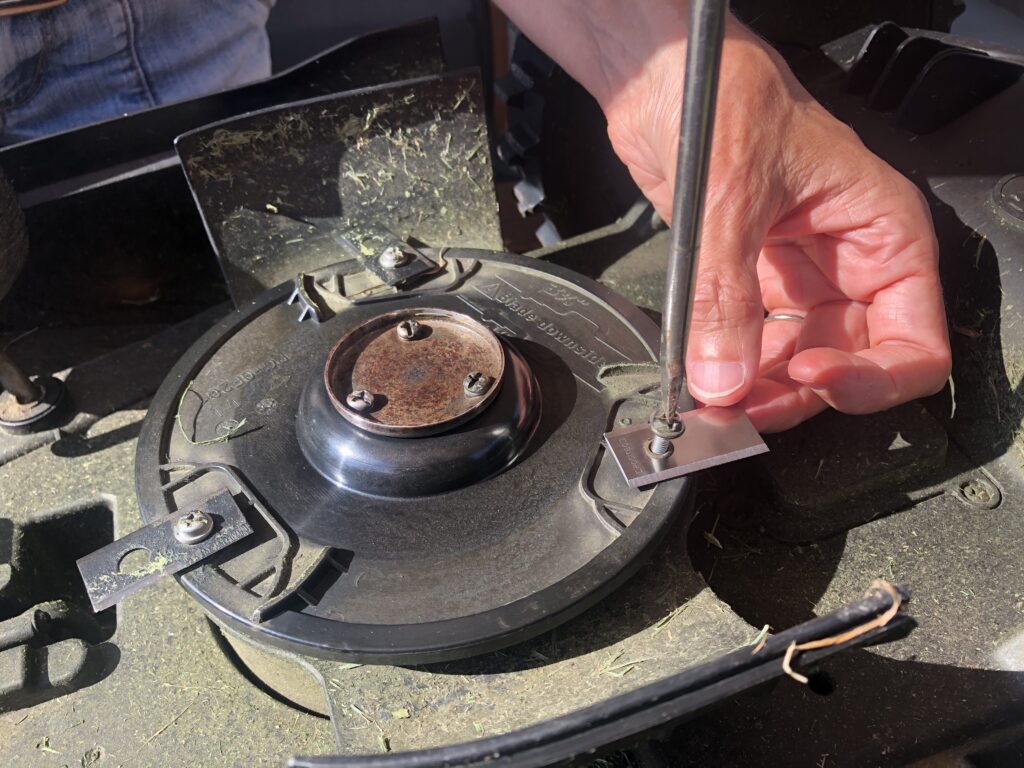
Next, carefully unscrew each blade, and either turn it around to use an unused cutting edge of the blade (though, notice that the new style replacement blades are not set up for this) or change to a new blade.
And, voila, you’re done! Flip him upright, plug the system back in, and off he goes.
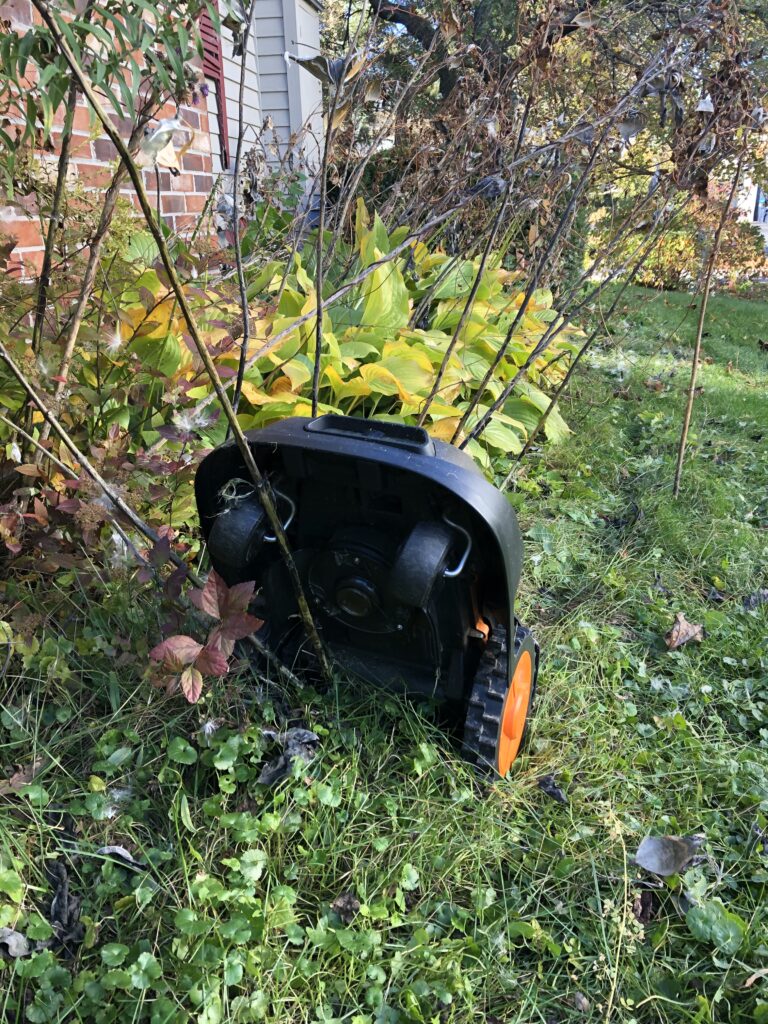
About that giant milkweed that Mo tangled with above…that occurred after we had shut Mo down for several weeks last summer. The milkweed grew along his boundary wire. When he didn’t show up back at his base station on the day we set him back out in the yard to mow, we went looking for him. We found him almost entirely vertical, having driven up the milkweed stem while diligently trying to make his way home. Or maybe he was trying to do the Mobot?
Comparison between 3″ mowing and 2″ mowing at Curtis Lumber, one of our business partners. Photo by Julia Szymanski
Moving down the road from Mo for the moment, as part of the Raise the Blade project, in 2017, we partnered with 10 Burlington area businesses to establish research plots where undergraduate interns would manage two grass plots at each business by mowing them to 3″ and 2″ in height, respectively.
We know from our basin-wide survey that, on average, 53% of Lake Champlain Basin homeowners maintain their grass to 2-3” in height. This group is motivated to potentially cut their grass to 3″ in length instead of shorter for reasons most often related to grass health and health of the environment, so we set out to use demonstration research sites at local businesses to see if cutting grass to 3″ would result in measurable differences in grass health over time as compared to cutting grass to 2″. (Peer-reviewed literature suggests it is, but research was generally conducted under different conditions than here in the Lake Champlain basin.)
The students would take a variety of measurements to assess grass and soil health over time. This was set up as a long-term (~10 year) experiment, as we hypothesized that changes in grass and soil health would be slow to develop, if any changes occurred at all.
In addition to collecting annual soil samples that are analyzed at the lab, weekly each summer and fall, the student researchers collect information such as percent grass cover, percent clover cover, and percent bare ground within a 1-meter square quadrat.
They also measure how long it takes for water to infiltrate into the ground and assess soil compaction.
In 2019, we ran analyses on a variety of parameters the students assess after collecting two years of data. We found no statistical differences between the 3″ and the 2″ research plots (as expected). However, as can be seen in the photo at business partner, Curtis Lumber, at the top of the page, visually, the grass cut to 3″ sometimes appears to be slightly more drought resistant than the grass cut to 2″.
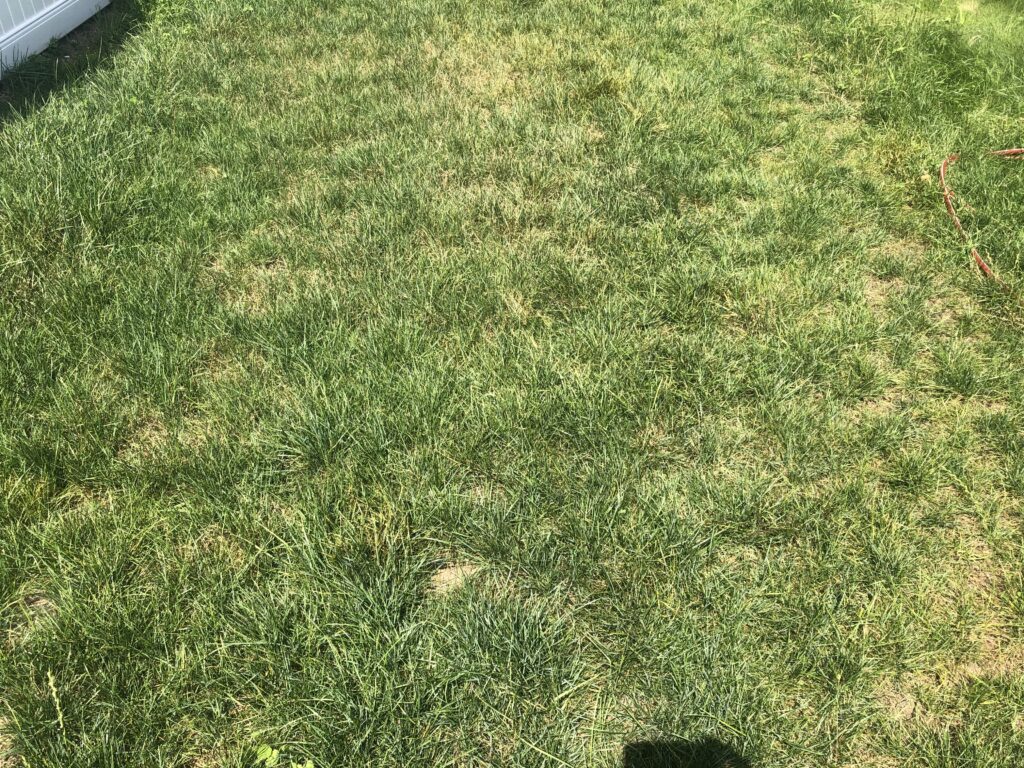
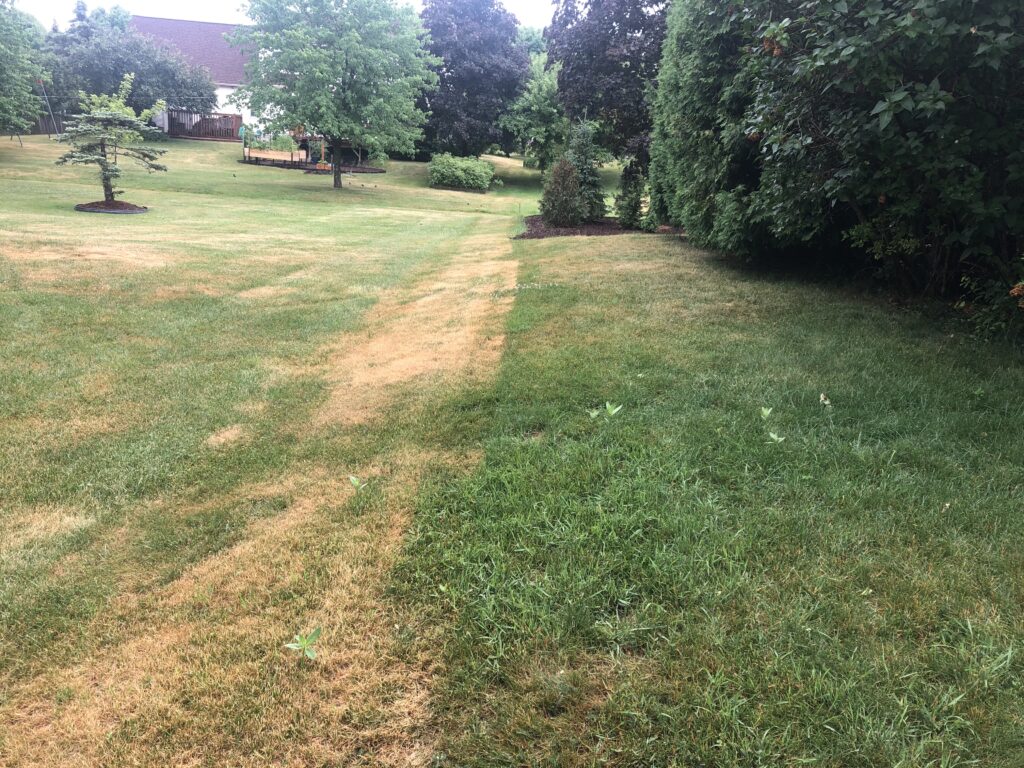
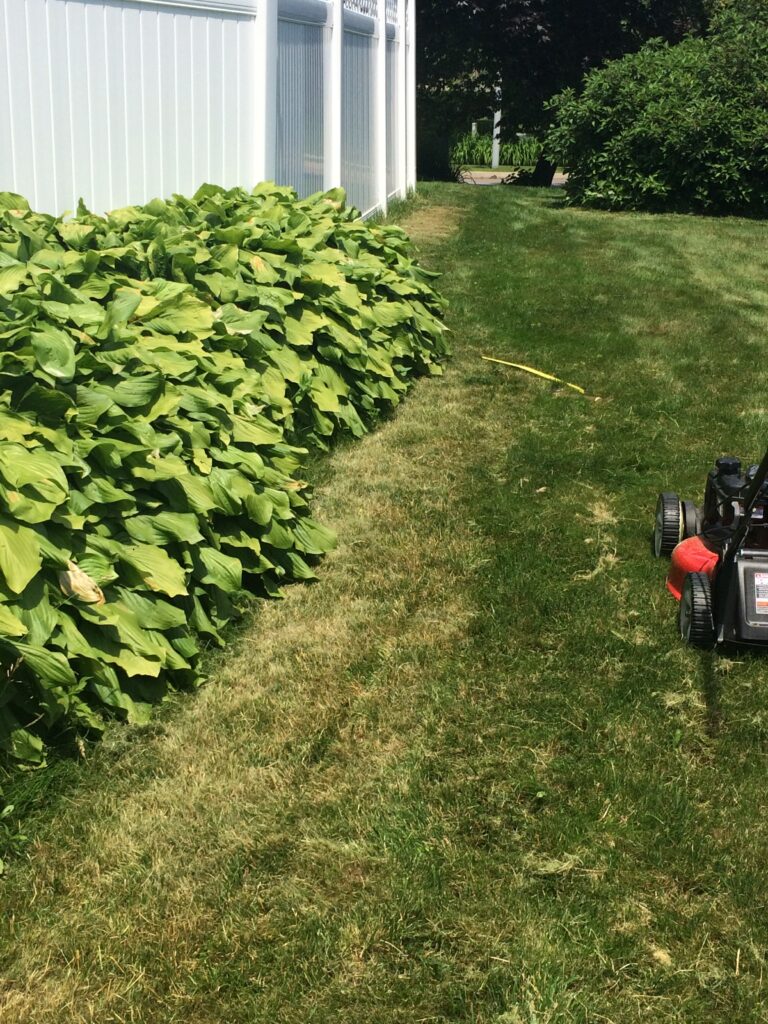
Back in our yard, when the neighbor’s landscaping company mows, they sometimes cut the grass very short along the boundary line between our yards. Initially, the difference between where Mo mows (on the right) and where the landscaping company mows is striking.
Our lawn is also stressed, but is not nearly as burnt as our neighbor’s. To be fully transparent about the site, our rain gutter empties near the front of the photo at the right–by the milkweeds. As such, that grass has an added source of water and is clearly more green than elsewhere. However, while the lawn towards the back of the photo is less green and obviously stressed, the grass is visibly more stressed in our neighbor’s yard than in our own. So, while the jury is still out on whether there are measurable differences between grass and soil health when grass is managed to 2″ vs. 3″, generally-speaking, grass cut very short is visibly less tolerant to drought and high temperatures than grass cut to 3″.
There are several great things about robotic mowers like Mo. First, they save you time, which we know is important to landowners in the Lake Champlain basin when it comes to lawn mowing.
As we started the Raise the Blade project, we surveyed people around the Lake Champlain basin to understand their lawn care practices and motivations to potentially mow their grass no shorter than 3″ in length if they were not doing so already. (Check out this Lake Champlain Basin Program map that you can zoom in on to see if your town lies within this drainage basin).
More than 1000 people from 56 towns across the Lake Champlain basin answered our survey. (Thank you all!)
We learned that almost 90% of homeowners mow their lawns (rather than having someone else do it), and on average, 75% cut their lawns shorter than 3″. We also learned that homeowners in the basin would be motivated to cut their grass to the recommended 3″ length for three main reasons:
If the lawn was healthier as a result
If mowing it to that length was good for the environment
If they had to mow less often
The first two are absolutely true, and therefore make our job of marketing these best practices to the majority of people who cut their lawns to 2-3″ pretty easy. Unfortunately, cutting your lawn following the three recommended practices (i.e., cutting the grass no shorter than 3″ in height; cutting only 1/3 of the length of the grass blades in any one cutting, and leaving the clippings in place to decompose) doesn’t result in less time mowing, unless you either get someone else to mow it for you or get something else to mow it for you. There’s where Mo comes in. We have him programmed to mow every week day for several hours. That frees up time for us to do other things besides mowing the lawn on our weekends or weeknights.
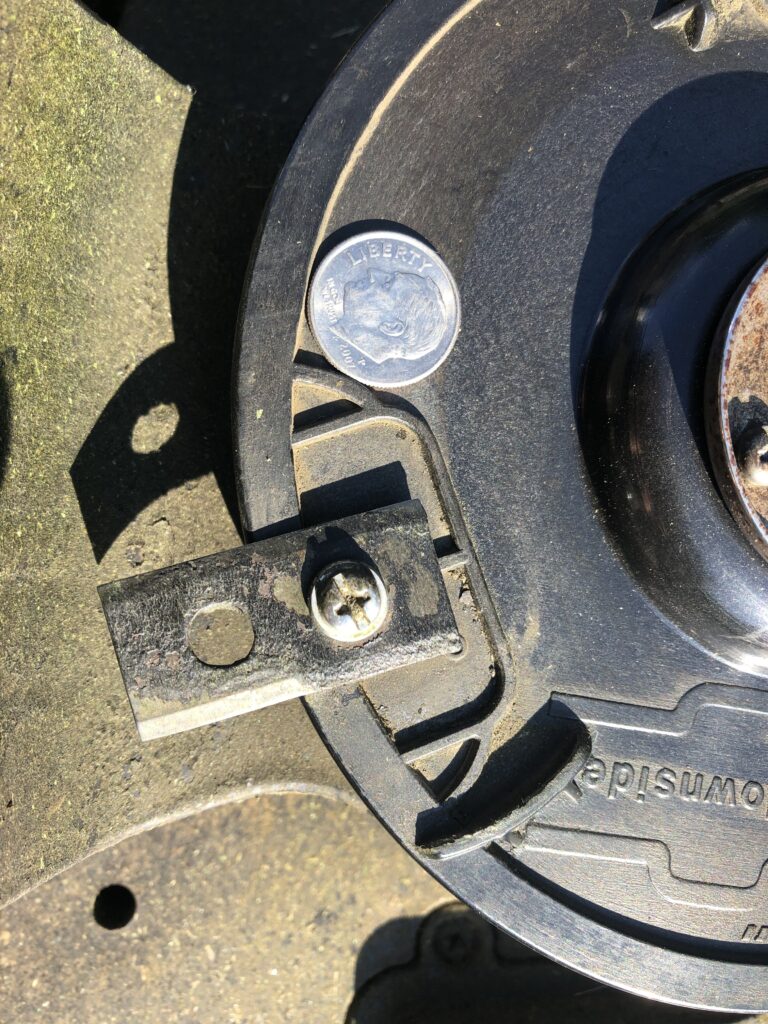
Having said that, it occurs to me that I should mention that robotic mowers like Mo don’t have blades like your traditional gas-powered mower. Instead they have just three 1″ razor blades.
Rather than cut every blade of grass they go over, Mo and his fellow robots rely upon lots of time spent out doing their job, and many passes over the same spot to ensure every blade of grass is cut.
Here’s a close up of one of Mo’s blades with the dime for size comparison.
Additional benefits of using a robotic mower are that it can be programmed to — or it automatically follows — all three recommended grass-cutting practices. This helps to boost your lawn’s health, soil health, and ultimately benefits water quality by minimizing the amount of stormwater that will run off from the yard. Specifically:
We set Mo to cut the grass to 3″ in length.
Each time Mo heads out in our yard to mow, he cuts only a small amount of the length of the grass blades.
Mo always leaves the clippings to decompose in place.
Of the three practices, only setting the length to which Mo cuts the grass needs to be done manually, and this is easily done by turning a dial under the main cover on the body of the mower.
One further benefit of robotic mowers is that they are beautifully quiet. Being electric, most of the sound we hear from Mo’s direction is a slight hum and a kind of scissor-like sound of the grass blades being cut. For all intents and purposes though, Mo is silent in comparison to a traditional gas-powered mower. So, we feel good about not contributing to noise pollution in our neighborhood. All the more time to listen to the birds.
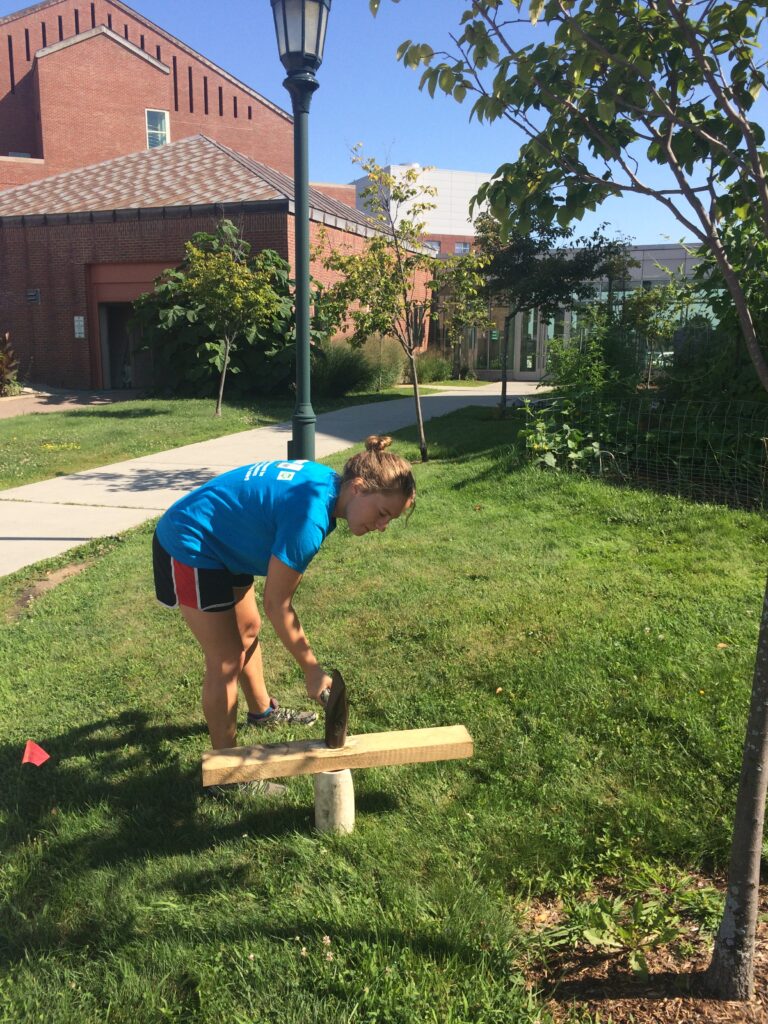
It took us about 3 hours (including a break and a trip to the store for more wire) to install Mo’s boundary wire in our 1/3 acre yard. It was a fairly simple process, aided significantly by a measuring tool my husband crafted part way through the installation. We also got into a rhythm with assigned roles between the two of us. So, it went more quickly as the time passed.
The boundary wire is like an invisible dog fence. Mo follows it to get “home” when it’s time for a recharge (more about this another time), and he uses it to know where he should and shouldn’t mow.
If you will be doing this, the main things to know to install the wire are to:
ignore Raise the Blade lawn mowing best practices for the day, and cut the grass quite short with a regular mower along the path where you will lay the wire. This eases the wire installation process.
plan to place the wire 14″ from edges you want the mower to avoid, and place the wire closer to edges where the mower can safely operate off of the grass. For instance, Mo can happily move along with two wheels on our driveway and two in the grass. That saves us time weed whacking along the driveway.)
plan to make corners into curves with the wire, as Mo (and his cousins) cannot make 90 degree turns.
Position the base so the mower can enter it in a counter-clockwise direction (that is, it will be moving from right to left to enter the base).
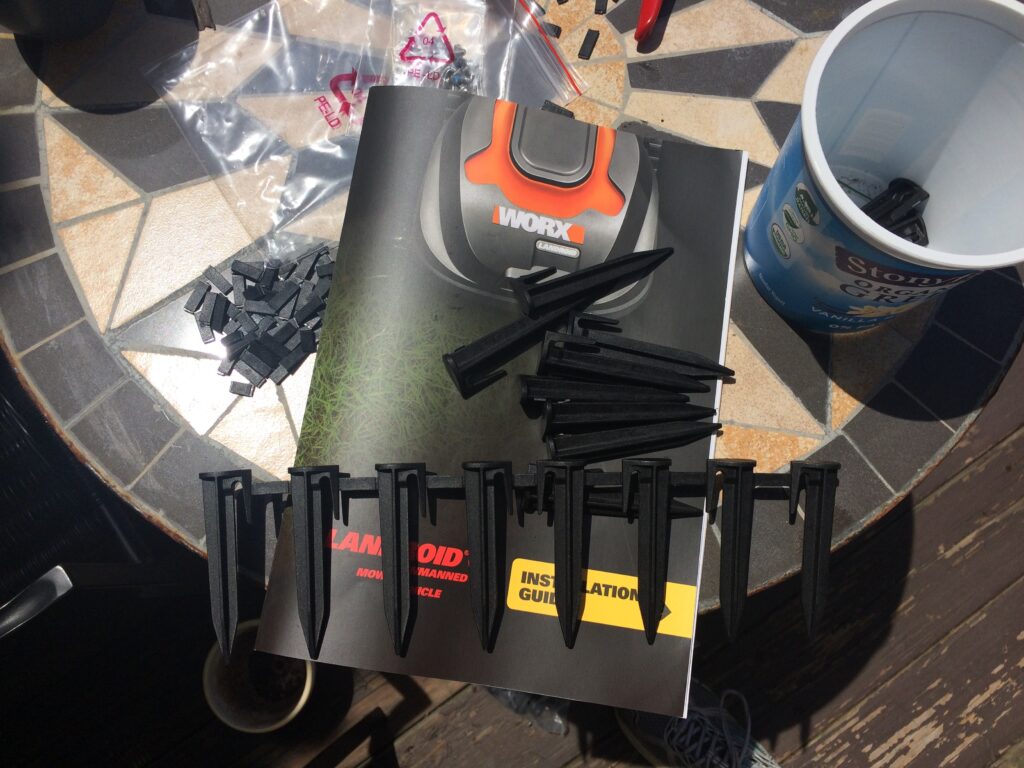
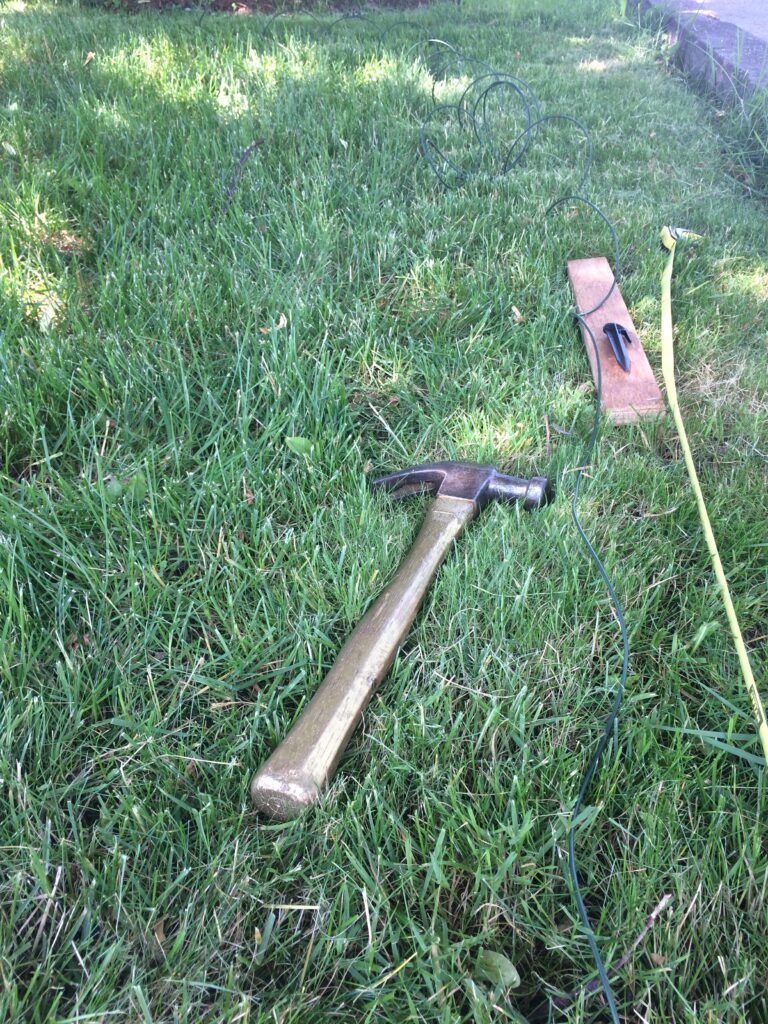
Here is what was needed for the wire installation:
a hammer or rubber mallet
the stakes
wire
a way to measure 14″ and 24″ (the recommended distance between stakes)
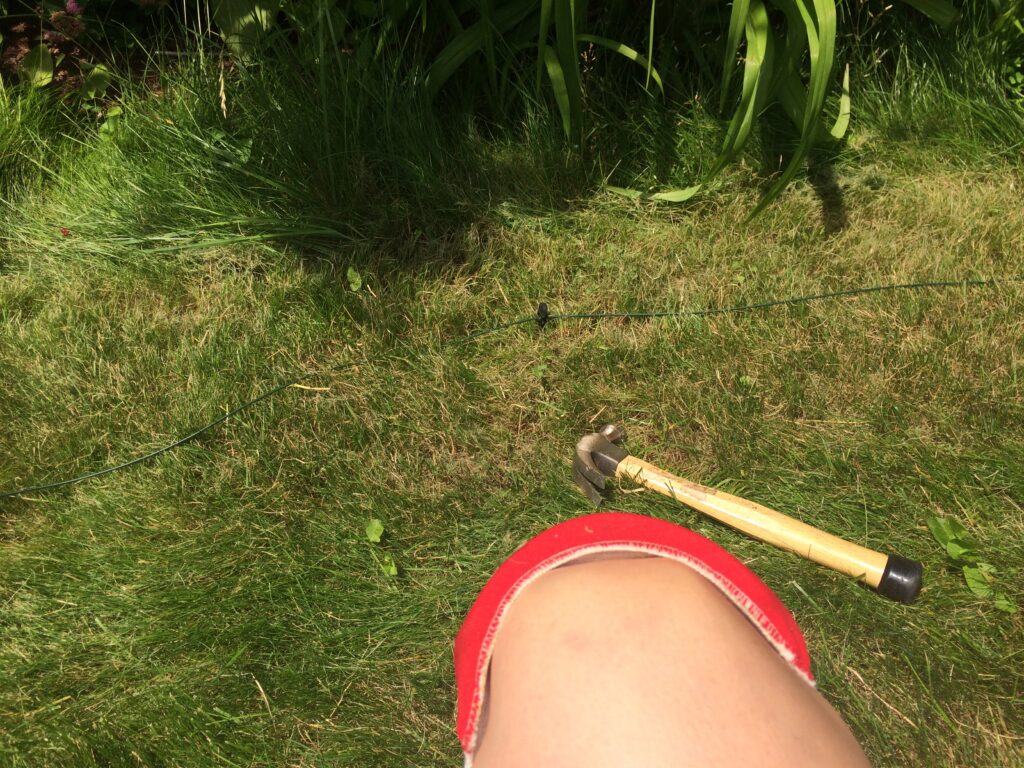
I found that wearing knee pads really helped my ability to crawl along the ground for the time it took to do the installation.
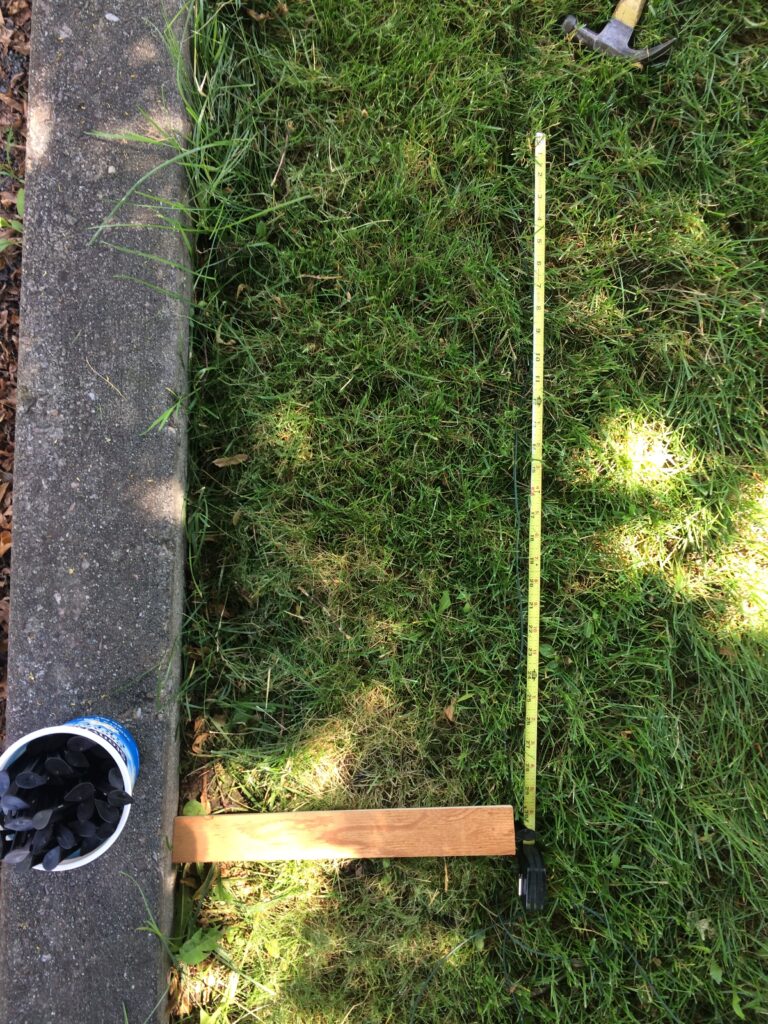
We originally used a measuring tape and a piece of wood to measure the 14″ and 24″, respectively. That was slow and cumbersome, however.
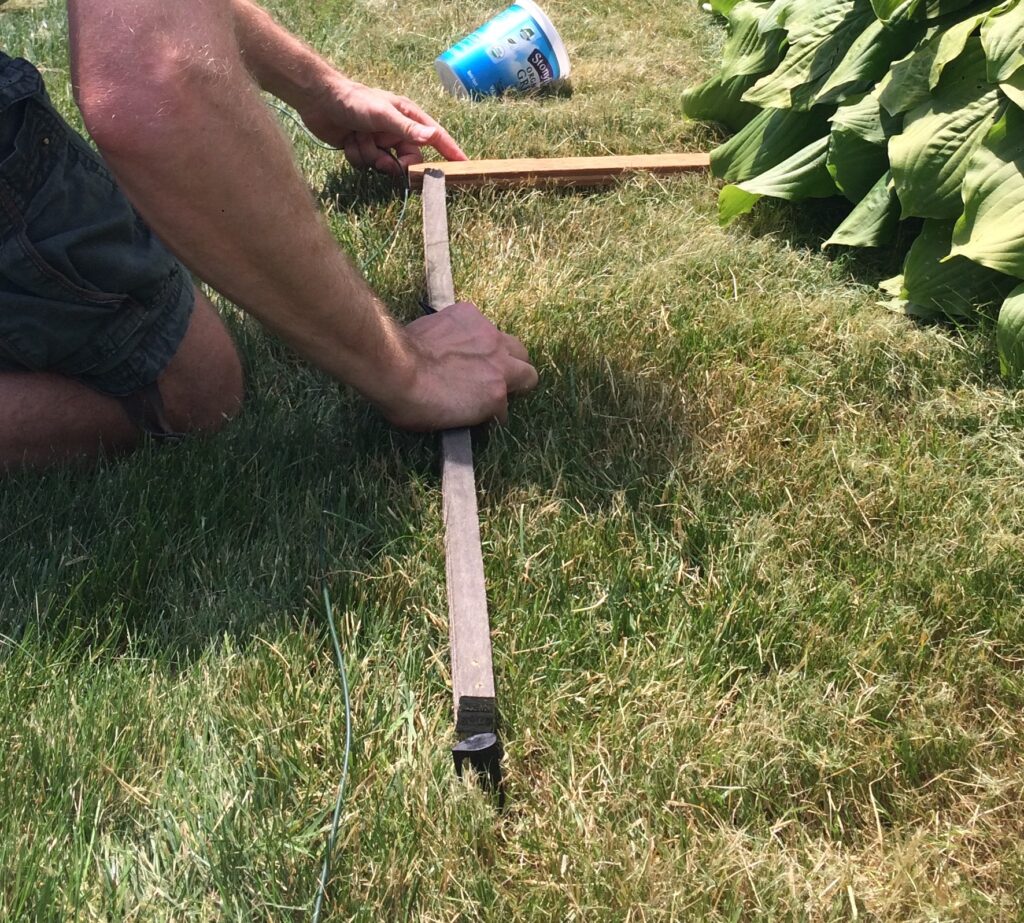
At some point in the process, we advanced like ancient peoples discovering the wheel when my husband invented a tool specific to the task at hand. It measured 14″ inches wide and 24″ in length.
Its size and L-shape allowed for the wire to be easily lined up at the correct distance from the edge of the grass, and for stakes to be placed 24″ apart.
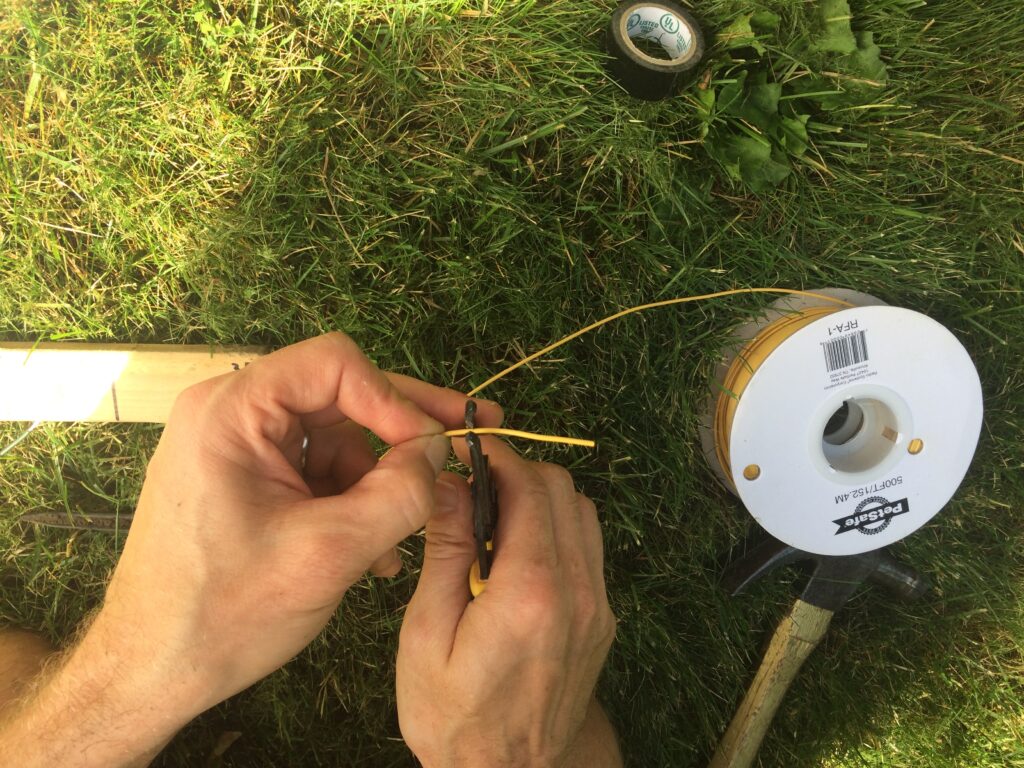
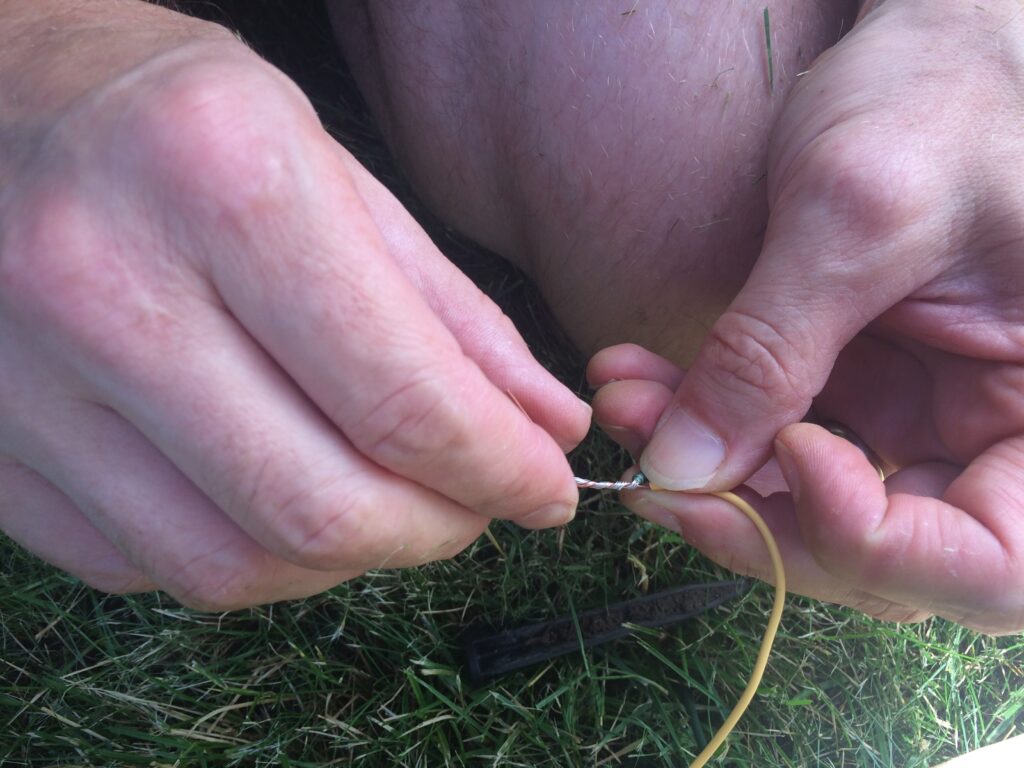
Since we wanted Mo to do his job in both the front and back yards, we had to supplement the supplied wire with some from the local hardware store. We used wire cutters to strip the wire.
Then we simply twisted the two together, and sealed the connection point with electrical tape. (Note: We have had no issues with this junction or any others we have had to make for various reasons over the last few years. …Knock on wood I have not just blown our luck by saying that.)
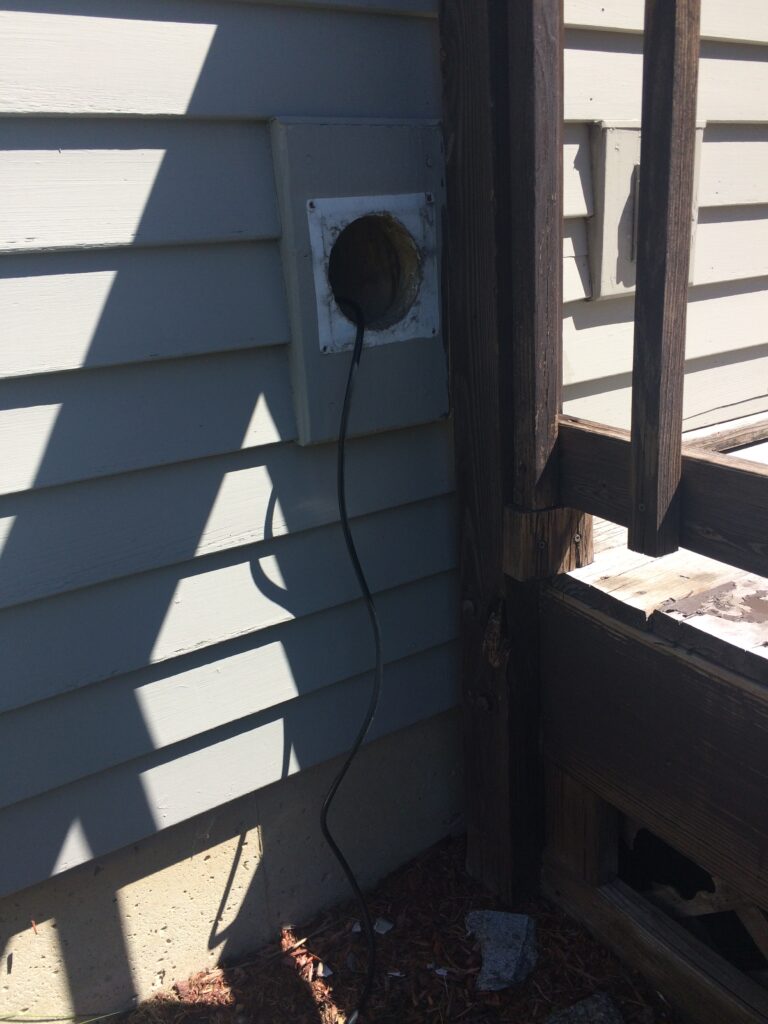
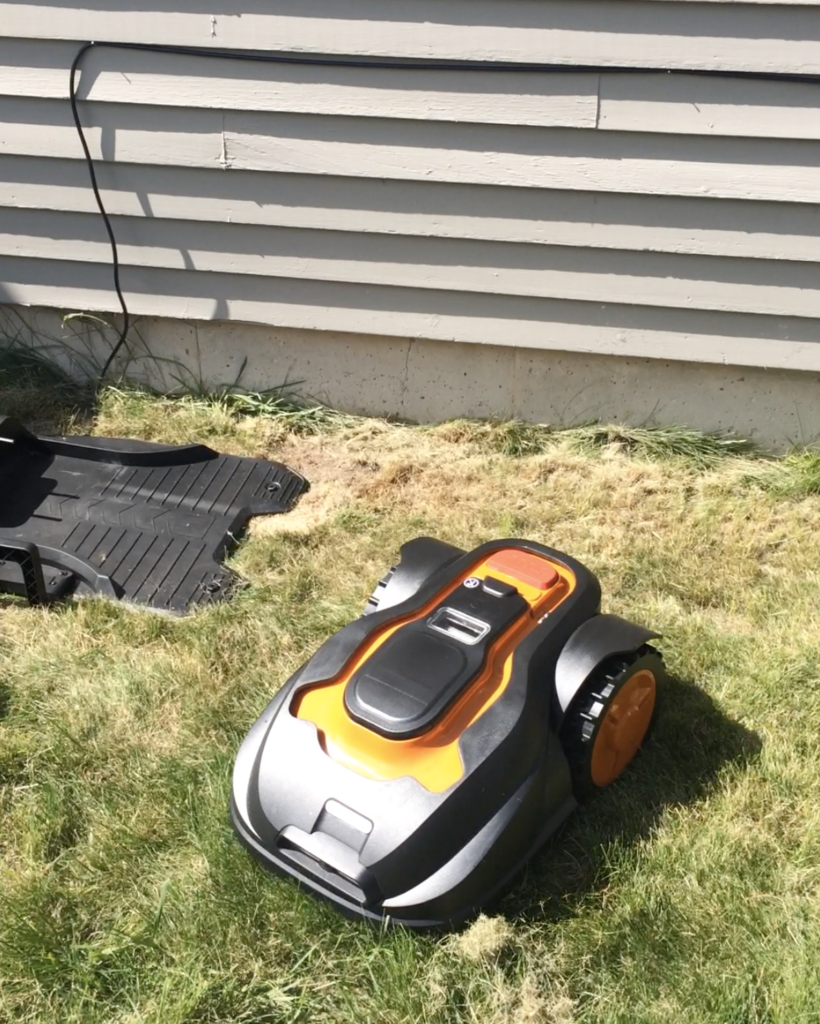
After the wire was installed, the installation was nearly complete! The last step was to install Mo’s home base where he returns to charge. The two ends of the wire simply connect to the base at provided connection points. Then the power cable on the base plugs into a standard outlet. We had an existing hole in our house from an old dryer vent, so we ran the power cable through that to reach an indoor outlet, and then sealed up around it.
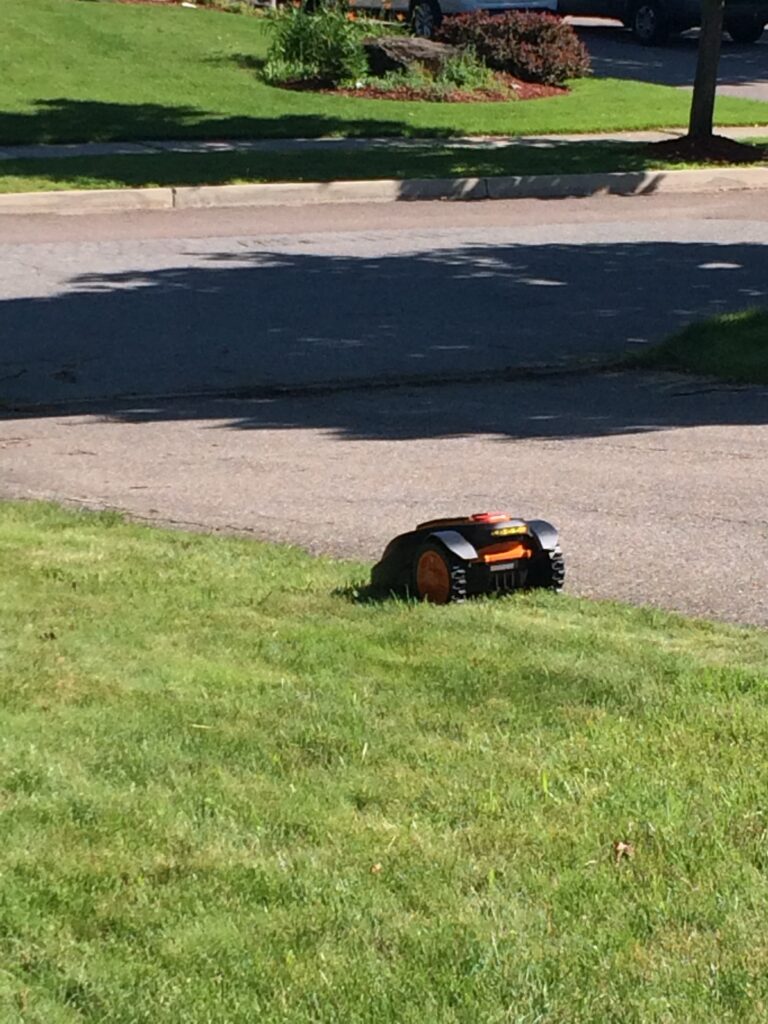
That’s all there was to it! Below (if you click on the photo) is a link to a video of Mo’s maiden mowing expedition (which followed him taking one victory lap around the entire boundary wire in Sir Mo Farah-style). We didn’t see him doing the Mobot in celebration like Sir Mo in this photo I found on his official website, but we will keep our eyes peeled for that!
Click on the image above to view a video of Mo’s maiden voyage.
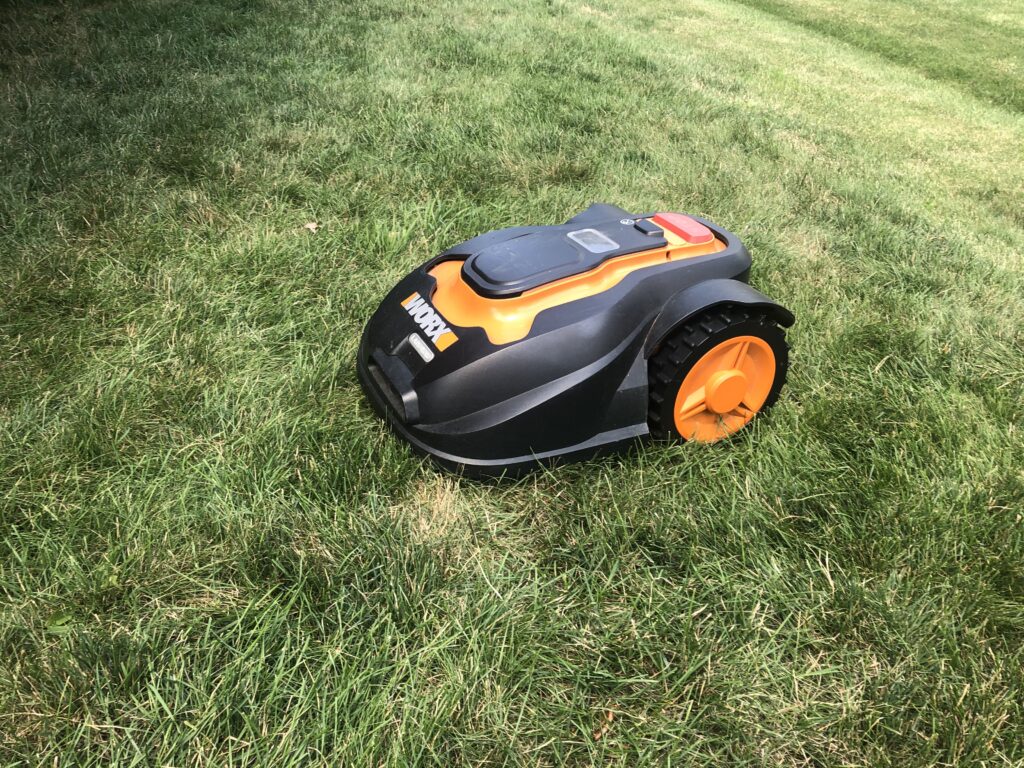
This is a blog about Mo, the things he does, and the reasons why those matter. Mo is actually obsolete, despite his blog just beginning. So it goes. Mo is affectionately named after the famous Mo Farah, the British distance runner, in part, due to my hopes and those of my husband about how great of a job he would do mowing our lawn (emulating Sir Farah in his excellence), and in part, due to his name being the right one for a robot that mows the lawn. (Here is an NBC video clip of Mo Farah winning Olympic gold in the 10,000m at the 2012 Olympics if you don’t know him. He’s amazing!)
Mo – the mower–nowhere near as fast as Sir Farah–is a WORX Landroid M WG794. He came about in our lives when we bought a house, owned no lawn mower, and I was (and actually I still am) working on a project to promote homeowners and businesses to cut their lawns following three key recommended practices that benefit both the grass and the environment: cut the lawn no shorter than 3″ in height; cut only 1/3 of the length of the blades during each cutting; and leave the clippings to decompose on the ground. This Raise the Blade project, as it is called, is part of a broader project called Lawn To Lake. This is a collaborative of organizations in the Lake Champlain Basin working to promote lawn care practices that help reduce polluted stormwater runoff from reaching Lake Champlain.
This blog will be updated weekly (on “Mo Mondays”) during the Mo-wing months to share information about how we installed Mo, how well he does his job, his antics, and the goals the Raise the Blade project aims to reach.