
Like most other public forums, it’s possible to have someone disrupt a Zoom event that’s meant to bring people together. Here are some tips from the Zoom blog for eliminating “Zoom Bombing.”

-
Recent Blog Posts
- Zoom Events: Keeping Out Party Crashers March 31, 2020
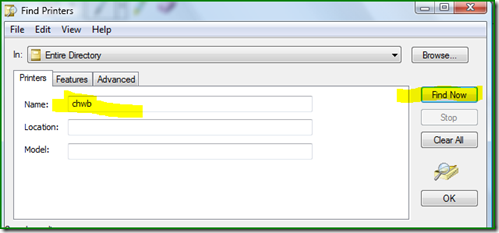
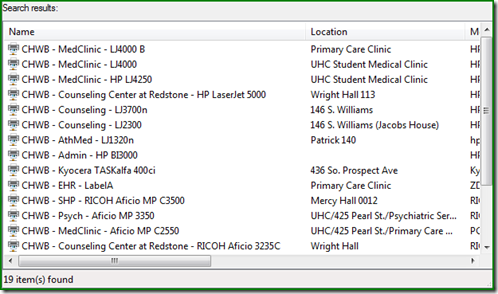
- Adding a Network Printer August 27, 2019
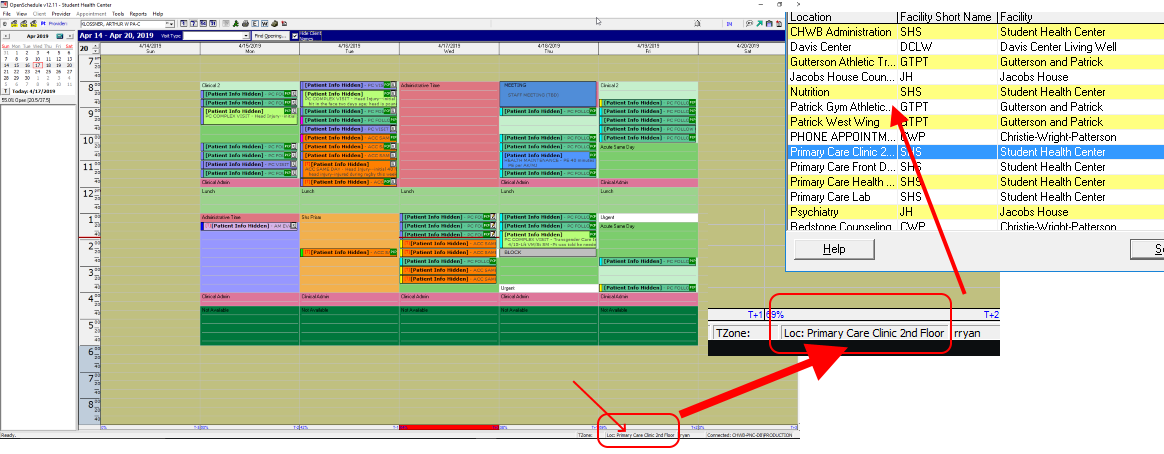
- How Do I Use PnC in a Different Clinical Location? April 17, 2019
- My computer won’t start or lost power: what do I do? April 17, 2019
- How to Change Your default Printer April 10, 2019
Topics
- Basic Computing (1)
- Email (7)
- Off-Campus Access (1)
- Point and Click (1)
- Printing (2)
- Security and Privacy (1)
- Tips and Tricks (8)
- Uncategorized (1)
- Video Conferencing (1)
- Windows (5)