Point and Click is pretty forgiving about users who split their time between more than one clinical location. But whenever you leave one location for a new one, it’s helpful to check a couple settings before jumping into appointments. The first step, of course, is to log on to the computer with your usual NetID and password.
You Need a Default Printer
PnC relies on the “default printer” for most printouts. Printer defaults are specific to each user on each computer. That is, if you have never logged on to a given computer before, you will likely need to set a default printer for yourself on that machine.
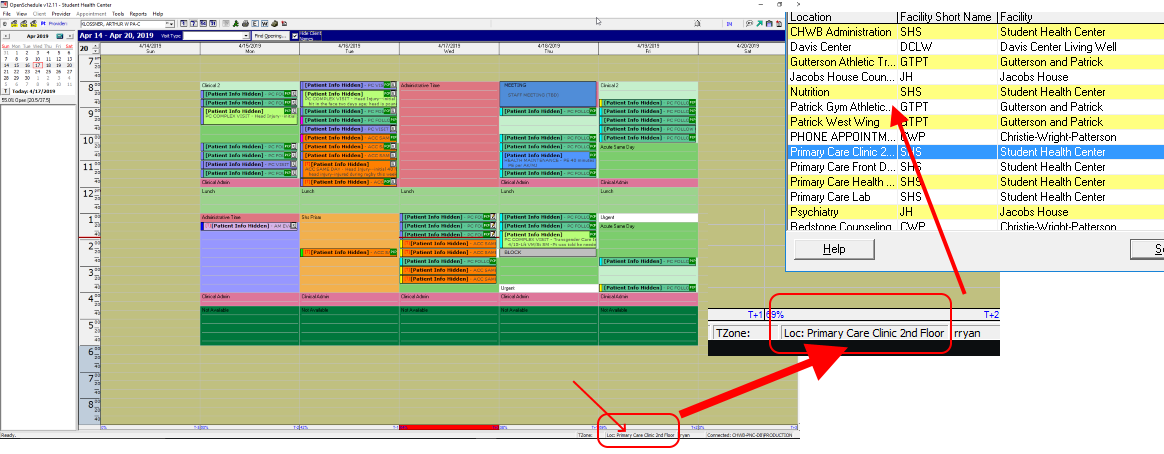
Set Your Location in PnC
Label printing and certain schedule display settings are determined by the location you set in OpenSchedule. If you typically work in the Primary Care 2nd Floor location, PnC will assume you are still there unless you tell it otherwise.
Change your location by pressing F2 or selecting “Set Current Location” from the File menu. You can also change it by right-clicking the location setting at the bottom of your schedule.