
Unlike printers that are directly connected to a computer, Network Printers need to be “added” by each user of a computer before they can be used. Here’s how to add a printer if you are using Windows 10.
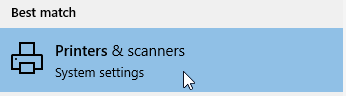
- Type the word “Printers” (without the quotes) in the search area just to the right of the Start button.

- Select “Printers and Scanners” from the search results.
- Select Add a Printer.
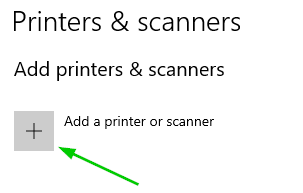
- Your computer will begin building a long list of available network printers. This may take a minute or two. When it is done, scroll through the list to find the printer you want (our printer names all start with “CHWB”). Select the printer and click Add device to install your new printer.
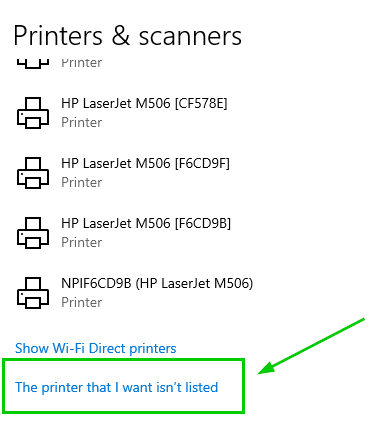
- If you don’t find your printer in the list, click the blue link near the bottom of the list that says “The printer I want isn’t listed.” (Hint: the link is above the printers that are already installed).
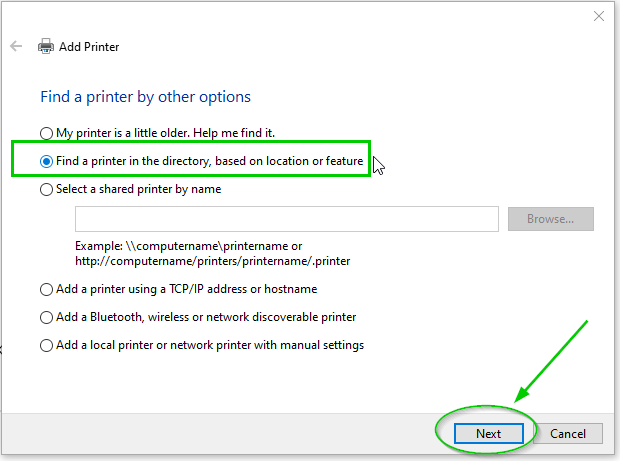
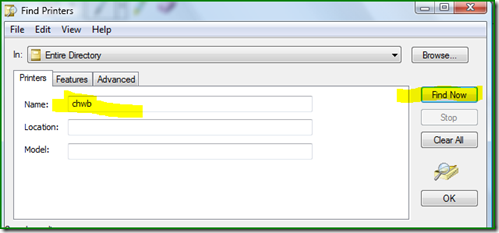
- Select “Find a printer in the directory based on location or feature” and click Next.
- In the Find Printers window, enter chwb in the Name field and click Find Now.
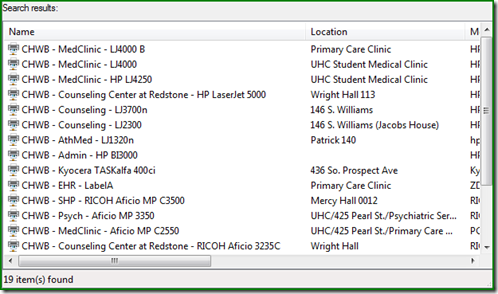
- You’ll see a list of all the networked CHWB printers. Clicking the top of the Name column sorts the list by the printer name, which might help you locate the printer you need.
- Select the printer you want to install and click OK. Once the printer software is installed you’ll have the options of setting the printer as a default printer and printing a test page.
See also:
How to change your default printer