RMA Agent Locator: https://www.rma.usda.gov/Information-Tools/Agent-Locator-Page
RMA webpage: https://www.rma.usda.gov/

RMA Agent Locator: https://www.rma.usda.gov/Information-Tools/Agent-Locator-Page
RMA webpage: https://www.rma.usda.gov/
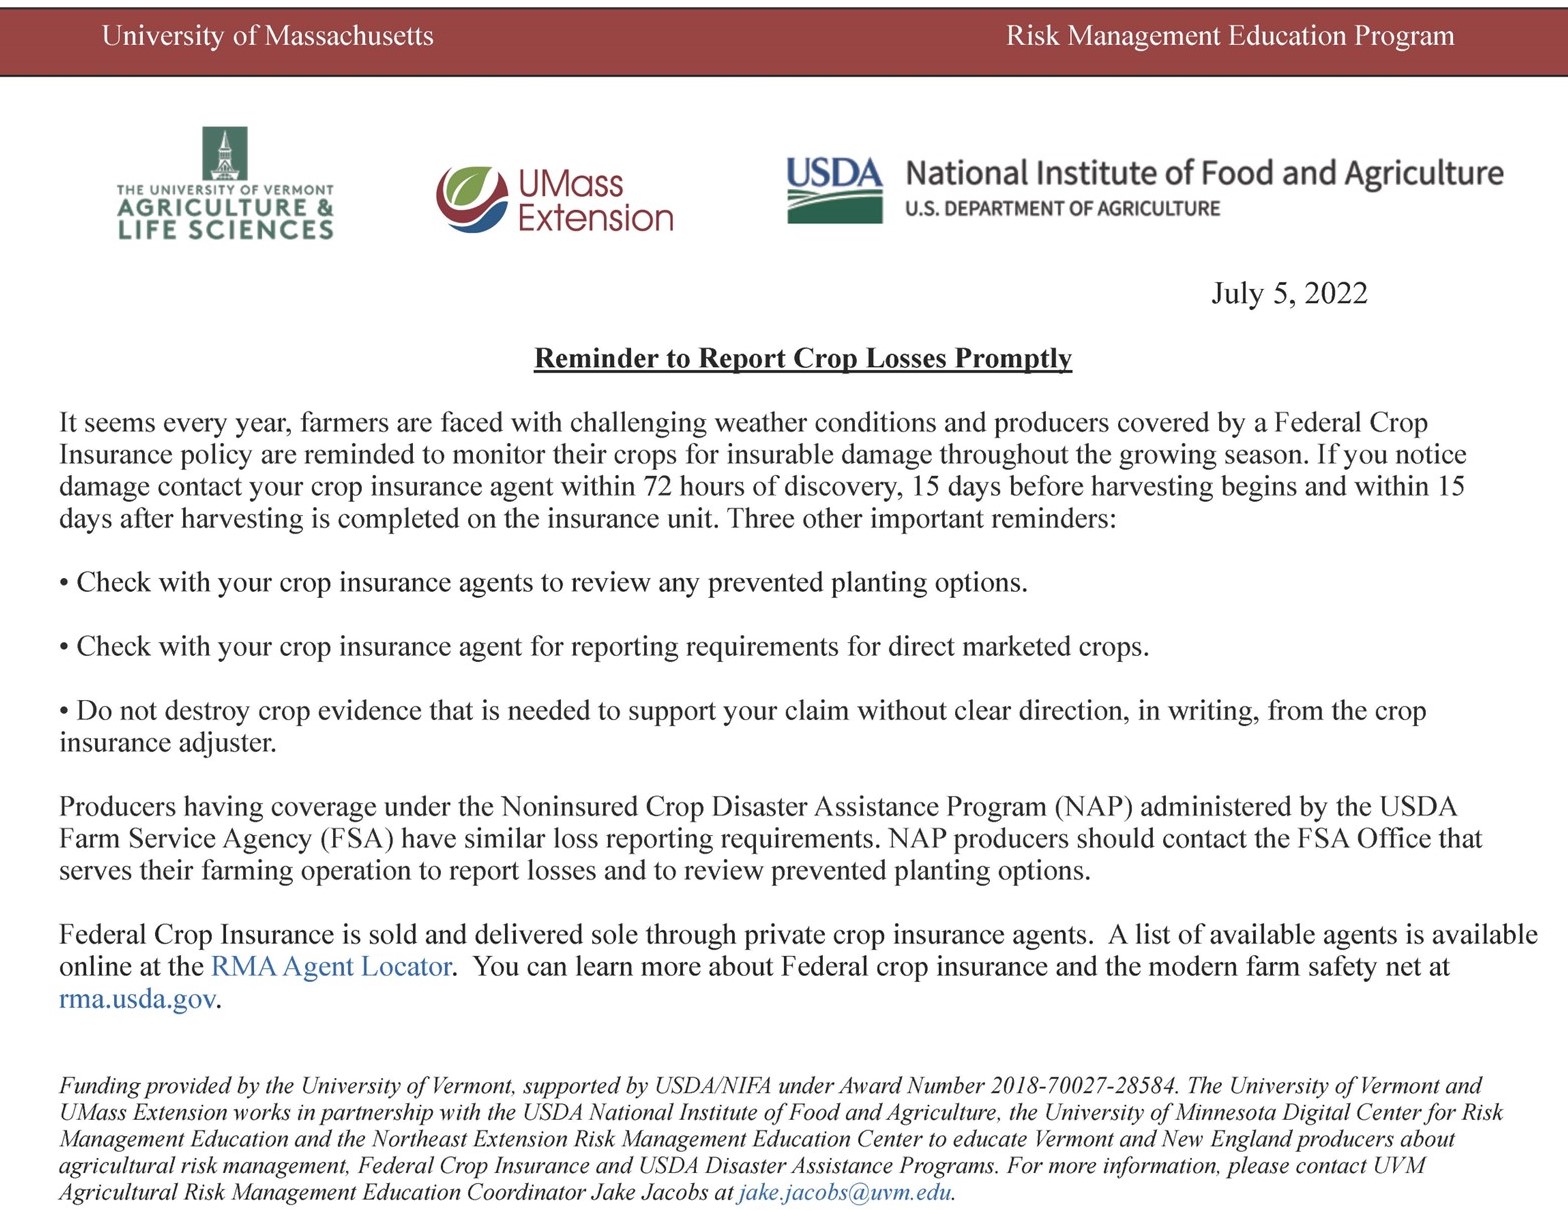
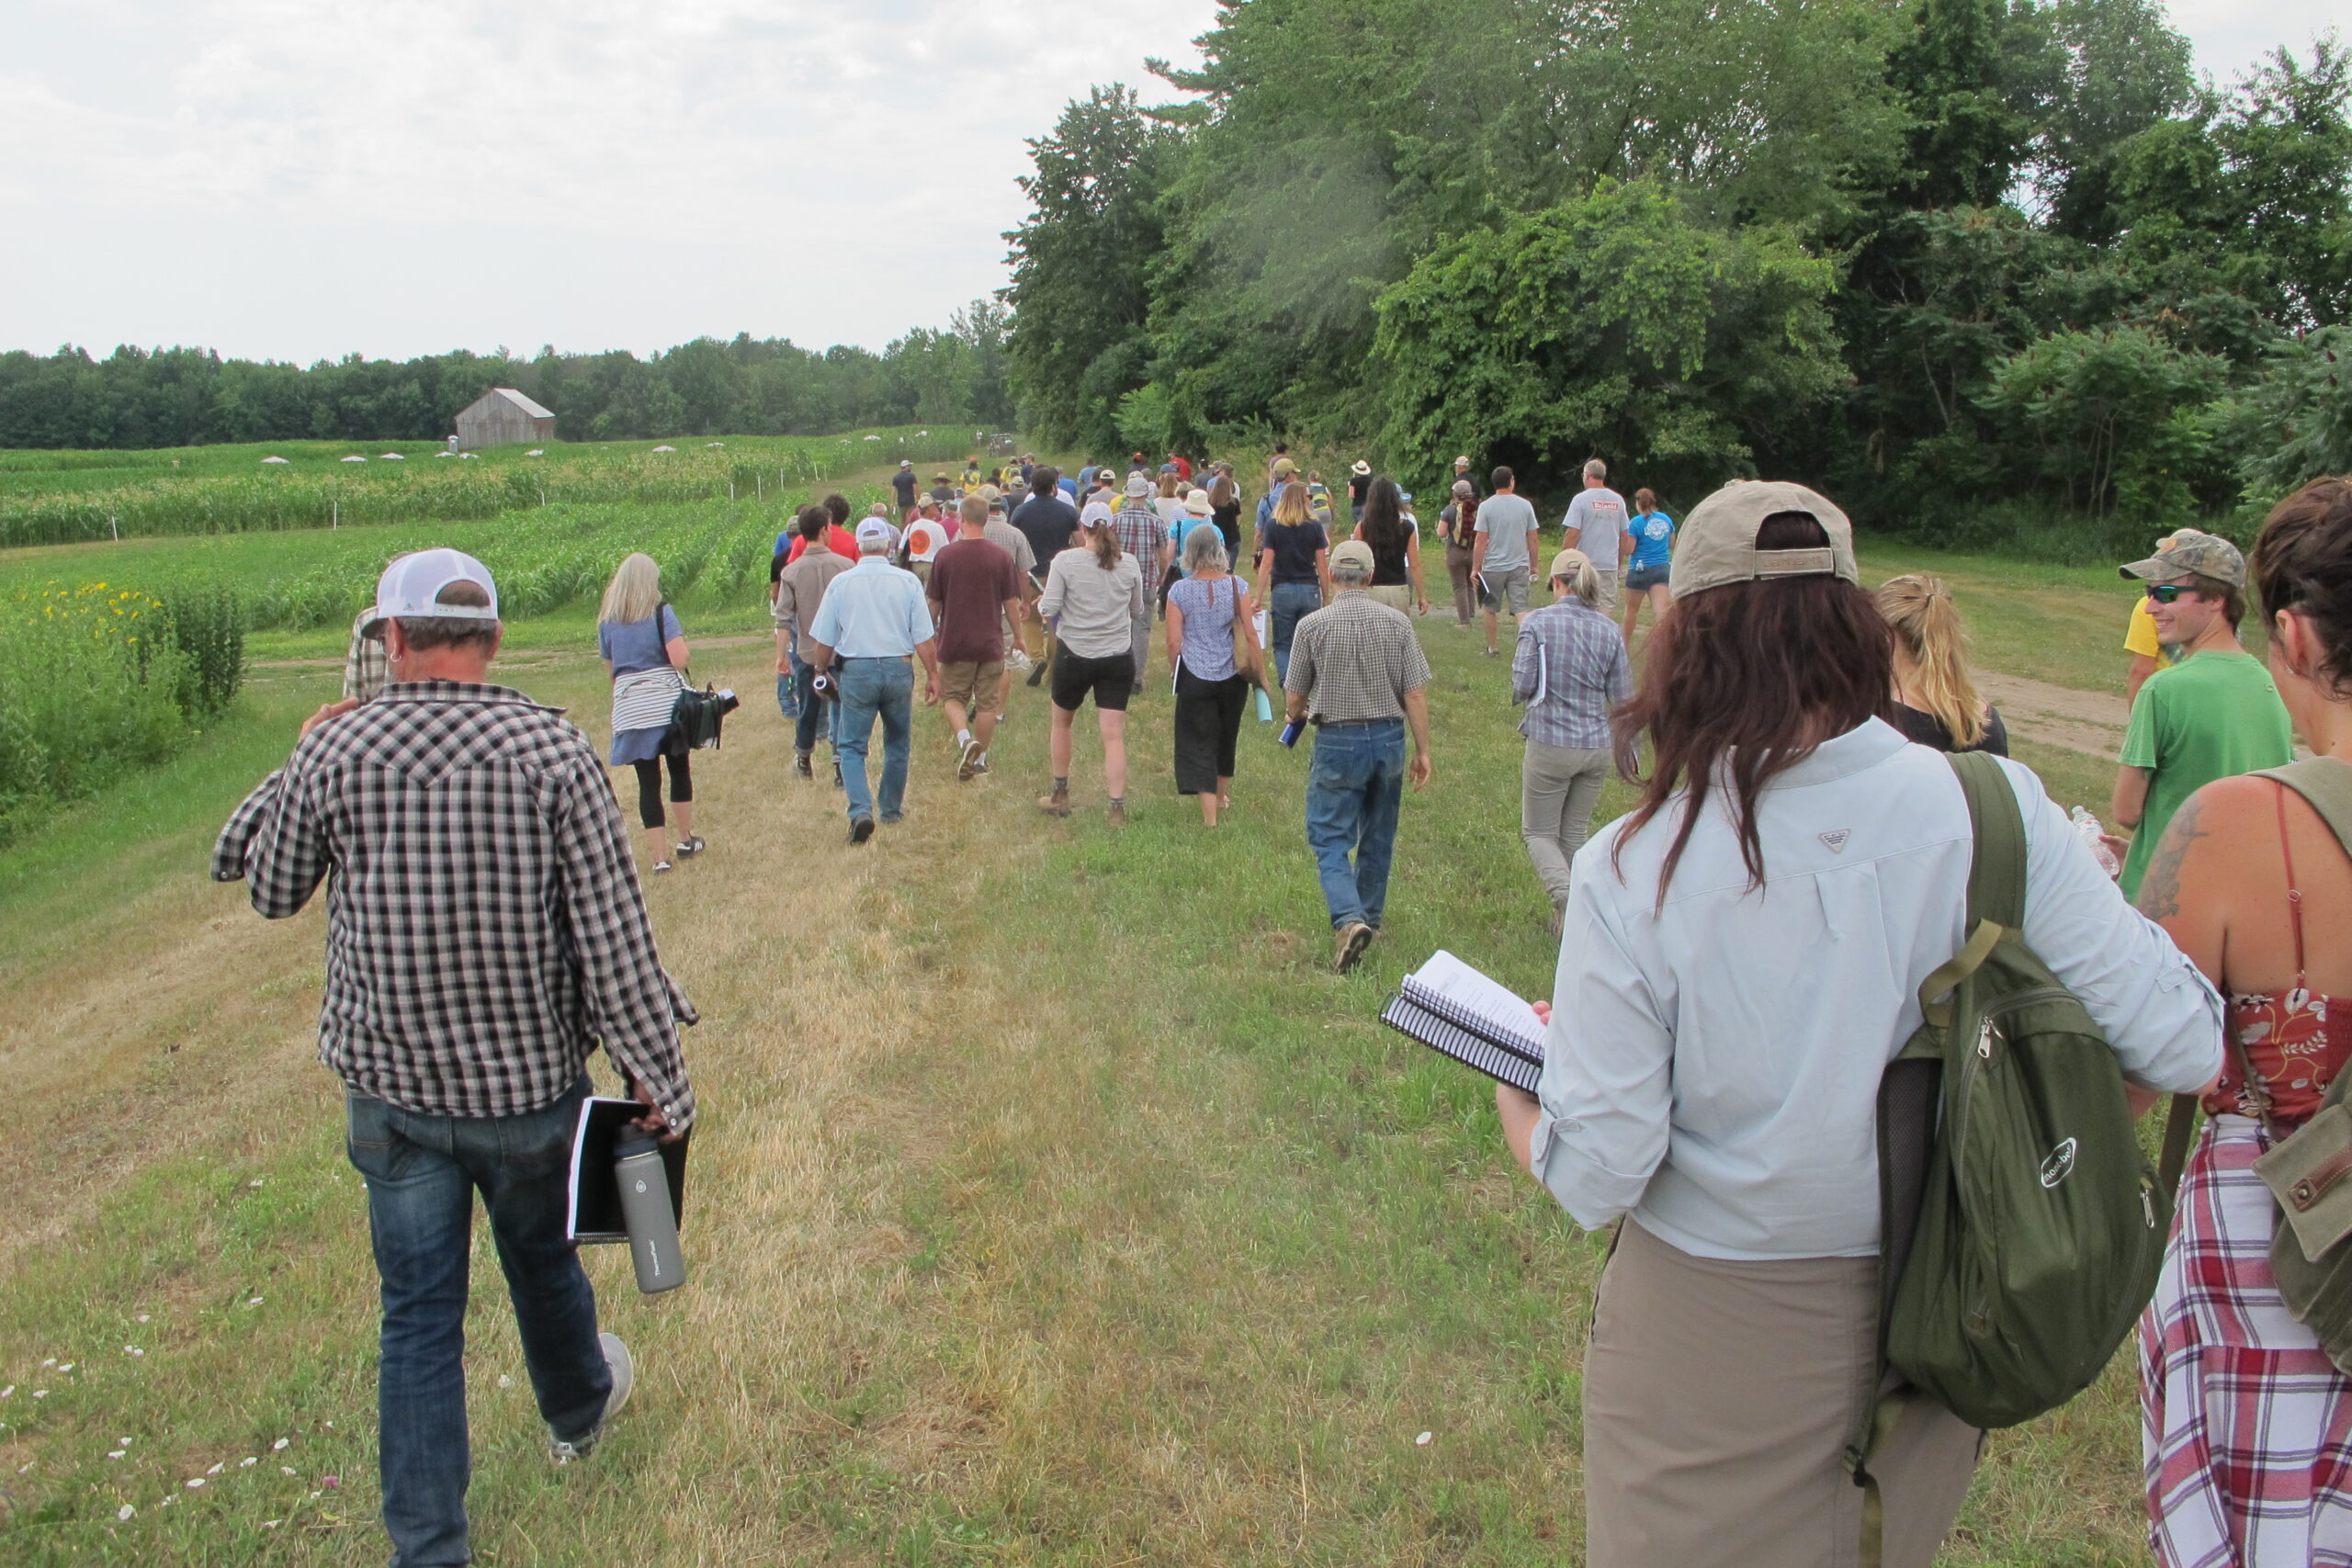
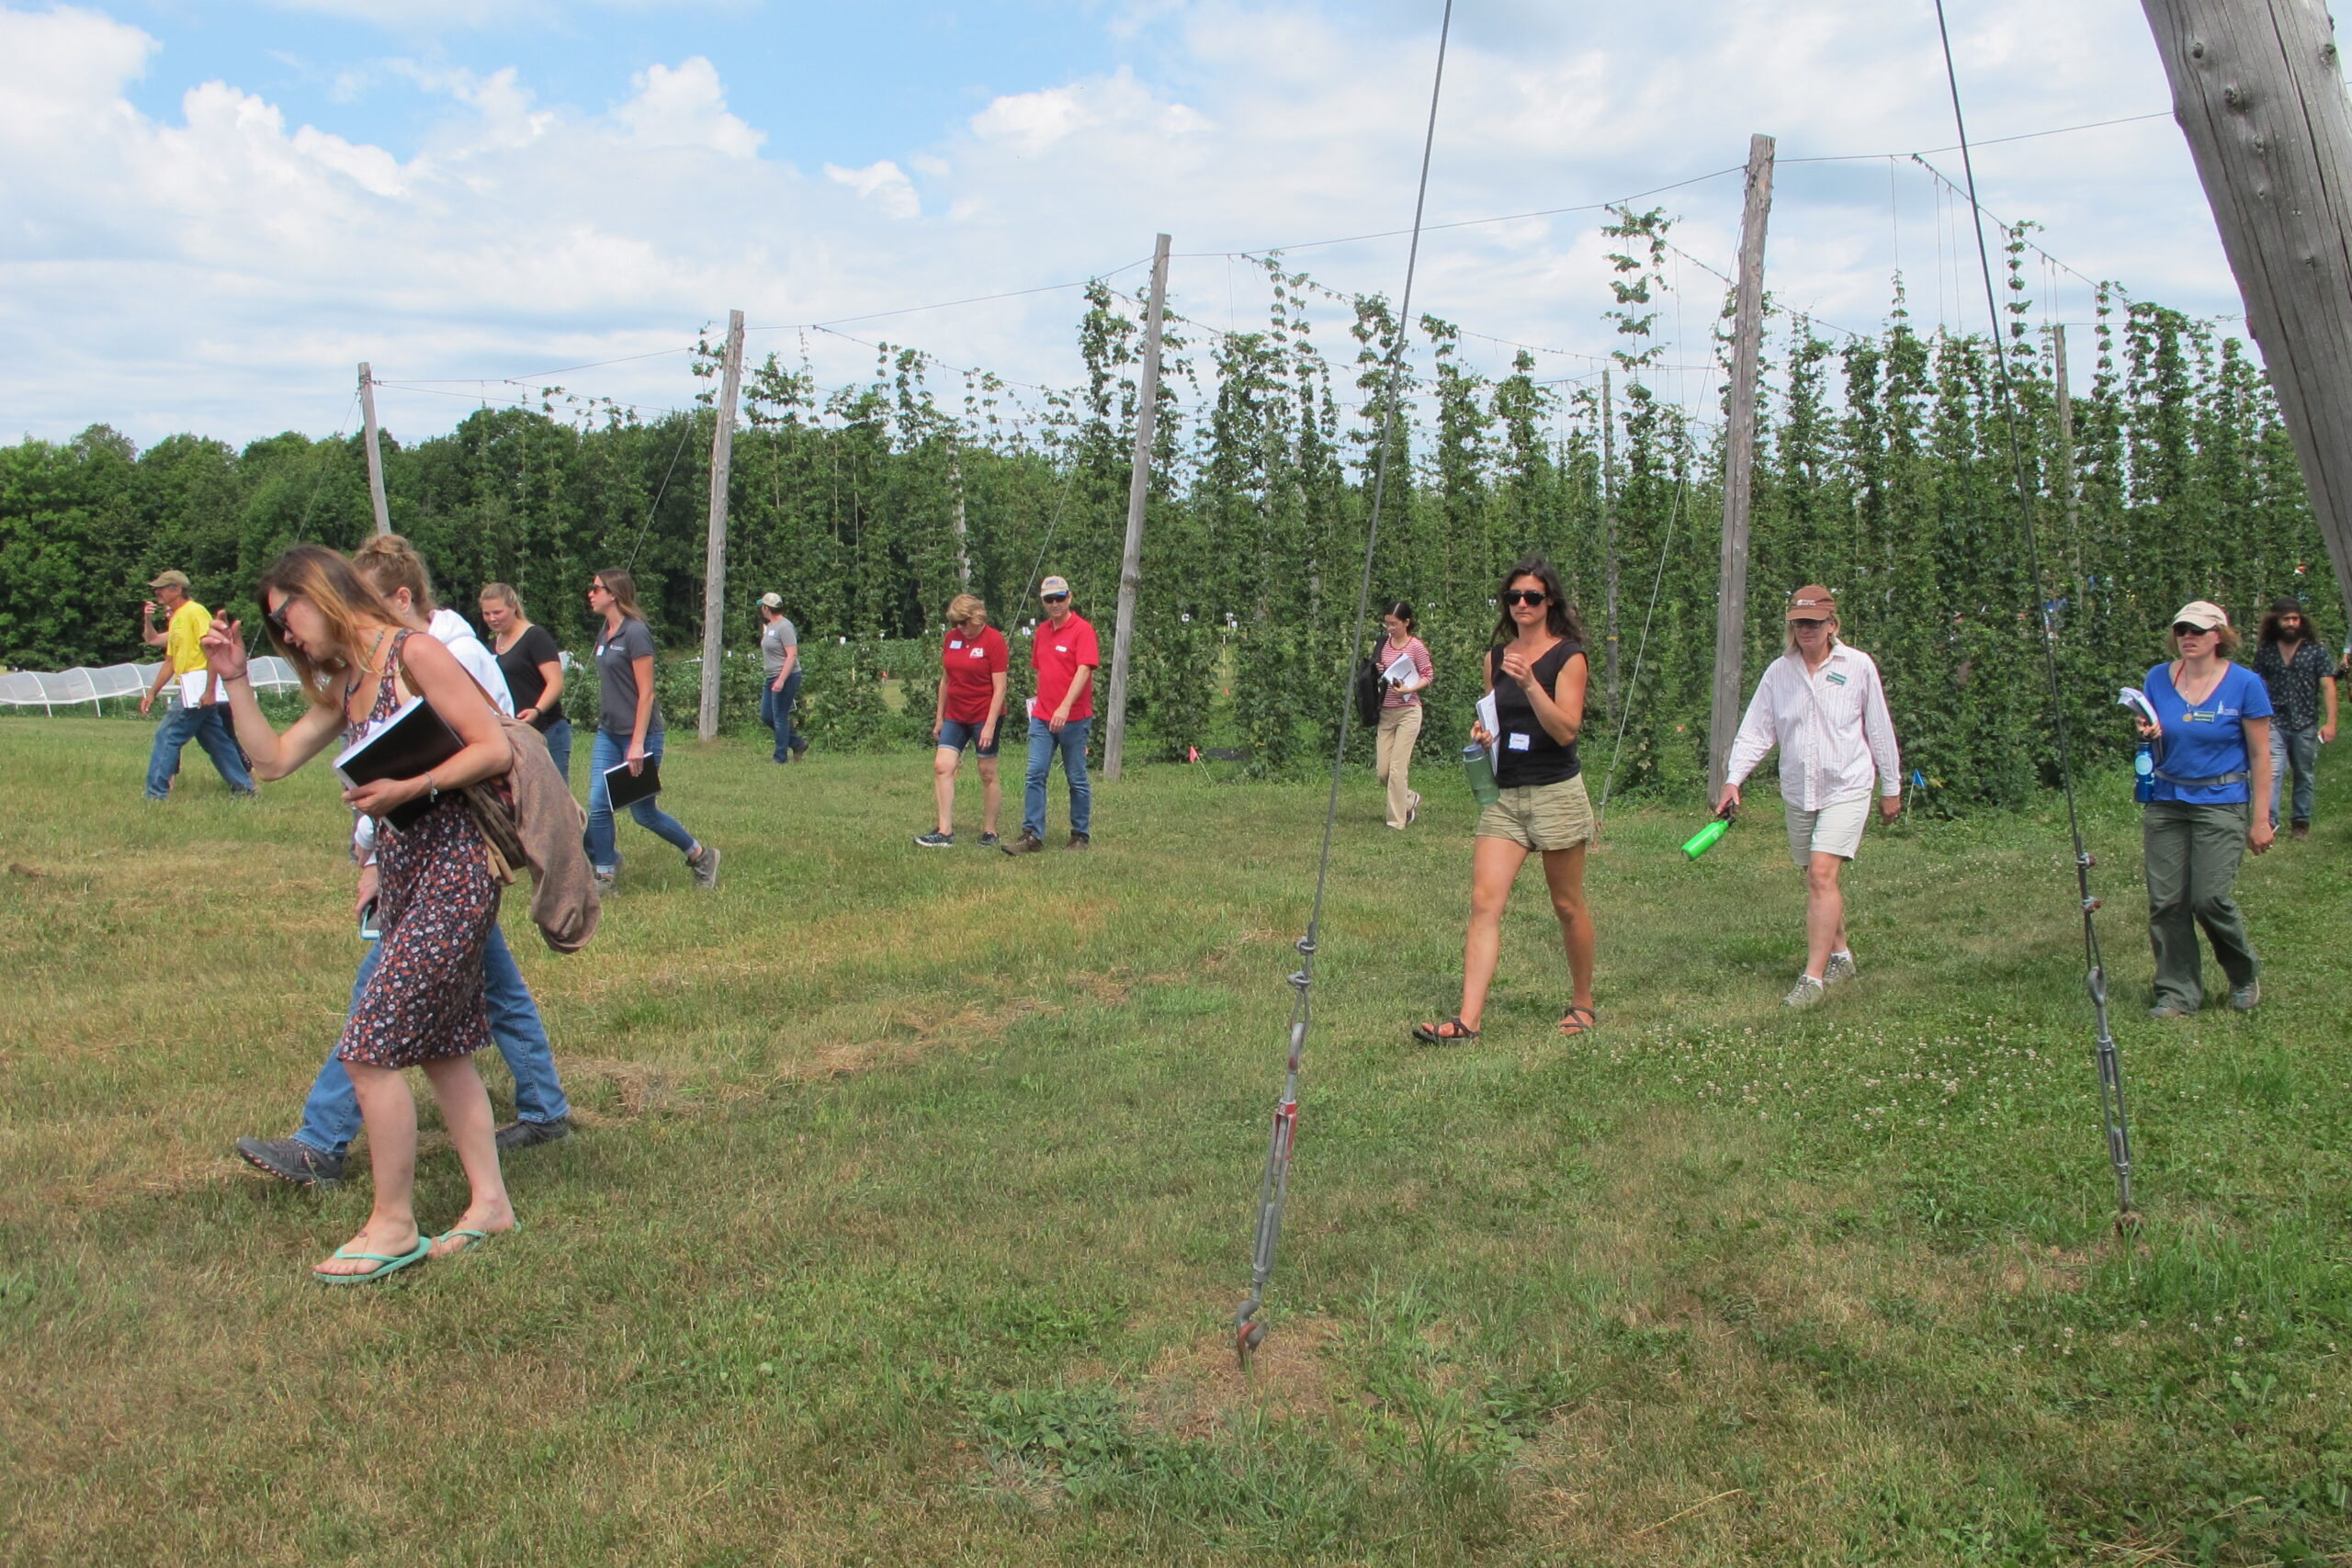
Back after a hiatus, the University of Vermont Extension Northwest Crops and Soils program is pleased to announce that our on-farm Annual Field Day is back for 2022! We hope you will join us outdoors and in-person on July 28th at the Borderview Research Farm located at 487 Line Rd, Alburgh, Vermont.
The field day will get underway at 10 a.m. sharp with a tour of the farm and many of its research plots and experiments involving perennial grasses, corn, soybeans, small grains, hemp, hops and other crops. Check out the equipment we use and discuss crop management tequniques. Hear updates and ask questions from UVM researchers on ongoing and innovative crop and soil research trials.
An exhibitor tent will also be available to visit – stop by at lunch or anytime for a break from the sun!
The cost is $25 per person and includes lunch. Certified Crop Adviser and water quality training education credits are available.
Go to go.uvm.edu/annualfieldday to register or contact Susan Brouillette (ext. 432) or Heather Darby (ext. 437) at (802) 524-6501. Deadline to register is July 27th, noon. If you require an accommodation related to a disability, please contact UVM Student Accessibility Services at access@uvm.edu or 802-656-7753 by July 7th.
While the adoption of cover crops across the northeast has exploded over the last 10 years and farmers have learned how to manage the termination of the winter cover crop, there are times when issues arise. At the start of the 2022 planting season we’ve run into some cool, unsettled weather leading to delayed plantings. The fields are also quite wet, limiting the farmer’s ability to get their cover crops sprayed out in a timely fashion.
If you spray too late in the spring (once the rye is over 18 inches high) and don’t immediately plant into it, no-tilling becomes a challenge due to dead plant material wrapping in the planter. The dead biomass will also shade the soil surface and significantly delay drying of the soil surface. If you don’t spray, the rye will get up to six feet tall and will become unmanageable without a roller crimper.
Roller crimping is the practice of rolling down the rye once it has fully matured. If done too early in the season or into a light cover crop (< 75 lbs./acre seeding rate) the rye will not snap and stay down, instead it will bounce back up and shade out the cash crop, slowing development. When roller crimping a mature cover crop (once the plant has reached anthesis), the use a roller crimper is the most practical way to plant into the standing rye. Roller crimping is part science and part art depending on how the farmer implements the practice.
There are two different types of roller crimpers – ones that mount on the tractor and ones that mount on the planter. In either case what is important is that the planter can remove enough material from the planter row to allow the planter to place the seed at the proper soil depth and still cover the seed trench. There are different types of row cleaners and closing wheels that will help facilitate the success, consistency, and completion of this process. A properly setup roller crimper/planter can make the daunting task of dealing with fields of huge cover crops much more manageable. If the farmer can wait until the cover crop is mature (which in our region is around the first week of June) the roller crimper will lay the cereal rye flat, and the planter can no-till the cash crop in with few issues. If issues arise usually there are adjustments that can be made to the planter to make the system work.
On the UVM Extension Northwest Crops and Soils Program, we utilize a Dawn Biologic planter mounted roller crimper. This machine is added to the front of the planter to flatten and crimp the cereal rye while “pulling” the rye to the middle between the rows so that the planter has less material to plant through. This system requires a steep learning curve to understand how the roller crimper on the front of the planter can change the geometry of the planting row units as the crimper “lifts” the planter as additional down pressure is applied to the crimper. There is a fine line and once it is achieved the crimper and planter work together to get the job done. When planning on roller crimping it is important to remove the large stones from fields as the operator will not be able to see them in the spring and they can damage components of the crimper and/or planter if they get hit.
This spring UVM Extension NWCS staff (Jeffrey Sanders) roller crimped several fields with very different results.
In the first video below, the farmer planted cover crop with a plan to roller crimp in the spring. Due to the long-term weather forecast and likelihood of the heavy clay soil staying wet if the crop matured and the rains kept coming (which they did) they decided to roll it early. The rye was headed out but not fully mature. You can see that the rye isn’t laying flat everywhere and over the next few days much of it “bounced” back up. The plant was still quite flexible, and the crimper could not crimp it hard enough without picking the planter up out of the ground which would compromise the cash crop.
In the second video below, we demonstrate roller crimping a fully mature standing cereal rye crop. The roller crimper is laying the rye flat on the ground and it will remain there for the summer, protecting the soil surface from the heat of the sun and pelting rains. The roller crimper is a viable option for late season management of cereal rye. It doesn’t remove the need for herbicide applications but will help suppress weeds throughout the summer and may provide a means to reduce chemical applications depending on the weed pressure history of the field.
Looking for more information on roller crimping and/or terminating cover crops? Check out the Roller Crimping Cover Crops in Vermont: Benefits and Risks fact sheet, or our Cover Crops and Reduced Tillage webpage for additional resources.

Summer annual grasses, such as sudangrass and millet, can provide supplemental forage during the hot summer months as the growth of cool season perennial grasses slows. These grasses can yield 3 to 5 tons of highly digestible dry matter per acre even under droughty conditions! Now is the time to be planting these heat loving crops, but before you do, make sure you’re seeding at an appropriate rate…
What seeding rate do I use?
In the northeast, most farmers use a multi-cut or multi-graze system for harvesting summer annuals. If seeding in early-mid June, two to three harvests can typically be taken. Seeding rates aligned with a multi-harvest system should be implemented to achieve the best yield and quality.
In addition, seed size and therefore seeds per pound can be highly variable between species and varieties. Hence, summer annual seeding rates should actually be based on plants per acre rather than just pounds of seed per acre. For a multi-cut system, King’s Agriseed recommends seeding for a target of 600,000-650,000 plants per acre for sorghum sudangrass and 650,000 to 700,000 plants per acre for sudangrass. Based on the seeds per pound, Table 1 shows the seeding rates in pounds per acre that would be needed to attain the target population.


You can see that this ranges from 20-60 pounds! Image 1 shows two varieties of sudangrass that demonstrate the large differences in size that can occur between varieties of the same species. In this case, the variety on the left had 17,650 seeds per pound while the variety on the right had 28,892 seeds per pound. This means that more seed would be needed of the variety on the left to attain the same population as the variety on the right. If they were both seeded at 40 pounds per acre instead, the variety on the left would be planted at 706,000 seeds per acre while the variety on the right would be planted at 1,155,680 plants per acre!
Making these adjustments can save you money by making sure you aren’t over planting costly seed, and that you aren’t shorting your stand which could result in decreased yields or increased weed pressure. For more information on summer annuals please visit the UVM Extension Northwest Crops and Soils Program’s website for our Research Results webpage, Livestock Forages webpage, the Guide to Using Annual Forages in the Northeast, and more. Happy planting!
Winter rye is a hearty cereal grain that is considered a “workhorse” and, although it is not the highest quality forage crop, it is often chosen for its reliability and versatility. It thrives on well-drained, loamy soil but it also performs adequately in heavy clay as well as droughty, sandy soils. It can grow in low-fertility soils; it prefers a soil pH of 5.0 to 7.0, but can tolerate soil pH ranges from 4.5 to 8.0.
Winter rye establishes and grows at cooler temperatures so it can be planted later than most other cover crops and still performs well. It is the most winter-hardy of all cereal grains, tolerating temperatures as low as -30°F once it is well established. It can germinate and grow (with limited vigor) at temperatures as low as 33°F.
Compared to other cereal grains, winter rye grows faster in the fall, providing quick cover to otherwise bare soils. It persists well, even during severe winters. Once spring arrives, it breaks dormancy before other cereal grains and quickly begins to produce biomass. Its quick growth in the spring can catch farmers off guard! If not managed properly, excessive amounts of this cover crop’s spring residue may actually delay cash crop planting or impede its growth and development. The decomposing winter rye may “tie up” nitrogen and delay its availability to the silage corn crop. Therefore, termination strategies should be carefully considered and planned.
In Franklin County winter rye cover cropped fields are almost ready to roller crimp! Many fields are still too damp due to recent rain events. When roller crimping, it is important the crop be at proper maturity (anthesis) so that it does not bounce back up after being rolled down. If you roller crimp too soon and it raises back up, it will likely shade out your cash crop seed, causing establishment/growth issues.
Looking for more information? Check out the resources below or inquire directly with cropsoil@uvm.edu or call our office at 802-524-6501.
This winter, the Northern Grain Growers Association and University of Vermont Extension Northwest Crops and Soils Program brought our annual Grain Growers Conference to you! A virtual program was offered over the course of three weeks with presentations and hands-on activities, highlighting specific grain crops in the Northeast. Didn’t catch the live events? Don’t worry! You can check out the recordings posted on the UVM NWCS YouTube channel (and linked directly below):
The State of Soil Health is an initiative to measure soil health and soil carbon on farms across the state of Vermont. This project is coordinated by UVM Extension and relied upon in-kind donations, data sharing and field support from partnering organizations and farmers.
The project has five primary objectives:

Collaborating organizations to the project include:
Direct funding for the State of Soil Health project has been provided by the Nature Conservancy of Vermont, and a gift from Ben & Jerry’s.
What’s the State of Soil Health in Vermont? Reports from the project will be shared here:
INTRODUCTION: From improving soil health to pollinator habitat to protecting water quality, cover crops can provide a multitude of benefits! One way cover crops can protect the field from erosion and reduce nutrients from reaching our waterways is by covering the soil with their leaves and stems. This is called surface cover by cover crop and it is commonly measured as a percentage. Two tools typically used to measure percent surface are Canopeo and normalized difference vegetative index (NDVI).
METHODS: In 2020 and 2021, 10 pictures were analyzed by Canopeo and one NDVI measurement (using either Landsat 8 or Sentinel 2 satellites) were taken on cover cropped fields in the northwestern area of Vermont. In 2020, 30 corn fields were interseeded with a mixture of annual ryegrass (76%), radish (5%), and clover (18%) planted at a rate of 26.5 lbs/acre. In 2020, the Canopeo measurements were taken between 22-Oct and 27-Oct and the NDVI measurements in 2020 were taken between 5-Oct through 17-Dec. In 2021, 15 corn fields were interseeded with a mixture of annual ryegrass (59.5%), clover (20.0%), vetch (11.9%), and radish (7.96%) at a rate of 26.5 lbs/acre and another 13 fields were planted with a mix of winter rye (49.0%), annual ryegrass (35.9%), clover (10.0%), and radish (3.98%) at a rate of 50 lbs/acre. In 2021, the Canopeo measurements were taken between 27-Oct and 9-Nov and the NDVI measurements in 2021 were taken between 11-Oct through 16-Oct.
RESULTS: In short, there was relatively little correlation between NDVI and Canopeo data in 2020 and in 2021. In 2020, 32% of the Canopeo measurements can be explained by the NDVI measurements (Figure 1). There was not enough data to determine if degree of correlation changed based on measurement dates. Overall, little growth is assumed to have occurred in November, 2020 as there were only 4 growing degree days, based on weather data from a Davis Instruments Vantage Pro2 with WeatherLink data logger. In 2020, the Canopeo mean measurement was 1.98% above the mean NDVI measurement, but this difference was not statistically significant (p>0.3835). In 2021, 1.7% of the Canopeo measurements can be explained by the NDVI measurements (Figure 2). In 2021, the NDVI mean measurement was 5.19% above the mean Canopeo measurements, but this difference was not statistically significant (p>0.2454). When correlations between Canopeo and NDVI are analyzed by cover crop mix, there were no significant correlations between NDVI and Canopeo measurements.
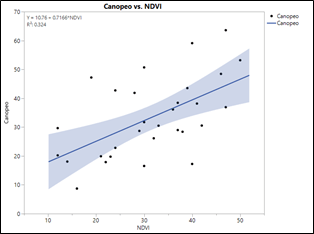
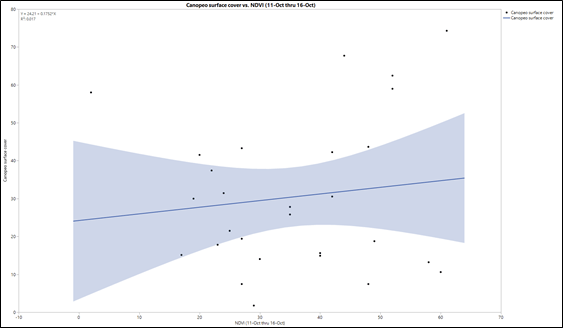
CONCLUSION: Due to high variability, there was little correlation between NDVI and Canopeo measurements. This indicates that these two methodologies cannot be used interchangeably. Overall, NDVI may be the preferable tool due to its ability of NDVI measurements to quickly reflect the surface cover of an entire field remotely versus capturing user determined data points on a smaller scale in the field. However, there are advantages and disadvantages to the tools. With both, there can be software malfunctions. For example, the Canopeo application may fail to initialize and not load properly while in the field and it may fail to store the percent cover analysis in the cloud. It is recommended to write-down the Canopeo analysis from the app onto paper after each picture is capture. Collecting Canopeo data takes longer and requires a field visit. NDVI measurements can be collected remotely with a computer for almost any date. However, there may be gaps in NDVI measurement on specific days or date ranges due to NDVI system malfunction. With Canopeo, there is more user control and assurance that the data is collected on the preferred day.
Learn more about cover crops and soil health practices on the UVM Extension NWCS Cover Crops and Reduced Tillage webpage.
Author: Lindsey Ruhl, Research Specialist, UVM Extension Northwest Crops and Soils Program.
The UVM Extension Northwest Crops and Soils Program (NWCS) has provided farmers with up-to-date information on soybean varieties that produce maximum yields in the far north over the past six years thanks to funding from the Eastern Soybean Board. Our 2021 Soybean Variety Trial report, along with past reports, can be found on our Research Results webpage. However, variety selection is just one piece of the puzzle.

To be successful in today’s challenging economic and environmental climate, farmers need region specific information that will not only lead to high yields, but also reduce environmental impacts. Soybeans are grown for human consumption, animal feed, and biodiesel, and can be a useful rotational crop in corn silage and grass production systems. Cereal or winter rye is commonly planted in this region as a cover crop. As cover cropping expands throughout Vermont, it is important to understand the potential benefits, consequences, and risks associated with growing cover crops in various cropping systems. In 2021, the NWCS Program initiated a trial to investigate the impact of cover crop termination method and cover crop biomass on soybean yield and soil health. The experimental design was a randomized complete block with split plots and four replicates. Main plots were cover crop termination methods including tillage and herbicide application applied before and at planting. Sub-plots were varying levels of cover crop biomass created by seeding winter rye (var. Hazlet) at rates ranging from 0 to 150 lbs per acre.

Spring soil coverage was positively correlated with seeding rate. While this was expected, interestingly, there was no impact of seeding rate on cover crop dry mater yield; no additional cover crop yield was gained by increasing seeding rates beyond 50 lbs ac-1. The cover crop termination method had a greater impact on cover crop biomass production and subsequent soybean harvest. The plant green treatment produced twice as much cover crop dry matter, compared to the other two treatments, due to the later termination date. However, soybean yield was negatively correlated with cover crop biomass. The plant green treatment had soybean yields that were 1.3X less than the tillage and herbicide treatments. Additionally, the planting green treatment had a significant impact on soil moisture. As noted, 2021 was an exceptionally dry growing season until harvest. The winter rye cover crop, like other crops, needs moisture to grow. Allowing the cover crop to grow longer means the need for more moisture. Unfortunately, the depleted soil moisture in this treatment was constant across the season because of below average precipitation. This likely contributed to the significant reduction in soybean yields.

It is crucial to continue to investigate cover cropping practices in soybeans in this region to gain a better understanding of successful cover cropping practices and their impacts on soybean performances, especially as we see an increase in adverse weather conditions. We would like to thank Eastern Soybean Region Board again for the funding for this trial. The Eastern Region Soybean Board aims to provide farmers with cutting-edge research they can use to better manage their crops. Visit their webpage to learn more about this research! There you will find links to the final reports of previous years projects done by Dr. Heather Darby at the University of Vermont.
Read the full 2021 Soybean Cover Crop Termination Trial report linked here. And stay tuned for research updates because the UVM Extension NWCS Program plans to repeat this trial this year!
UVM Extension will be partnering with Cornell University on a newly awarded Northeast SARE Research and Education grant titled “Regenerative Organic Dry Bean Production in the Northeast”. This project seeks to expand organic dry bean production as part of a regenerative cropping system in the Northeast through the creation of a farmer community of practice as well the generation and dissemination of research-based information on best agronomic practices.
Join us on Wednesday March 30th from 12-1pm for a dry bean-focused webinar! Dr. Heather Darby will kick off the meeting introducing this new dry bean project. Then you will hear from Dr. Matthew Ryan (Associate Professor of Sustainable Cropping Systems at Cornell University) and Dr. Sarah Pethybridge (plant pathologist based at Cornell AgriTech, Geneva, New York) on their current dry bean research. Click here to register for the Dynamic Dry Beans webinar!
This webinar is part of the 2022 Grain Growers Series brought to you by the Northern Grain Growers Association and the University of Vermont Extension Northwest Crops and Soils Program. Visit https://go.uvm.edu/conferences for more information.


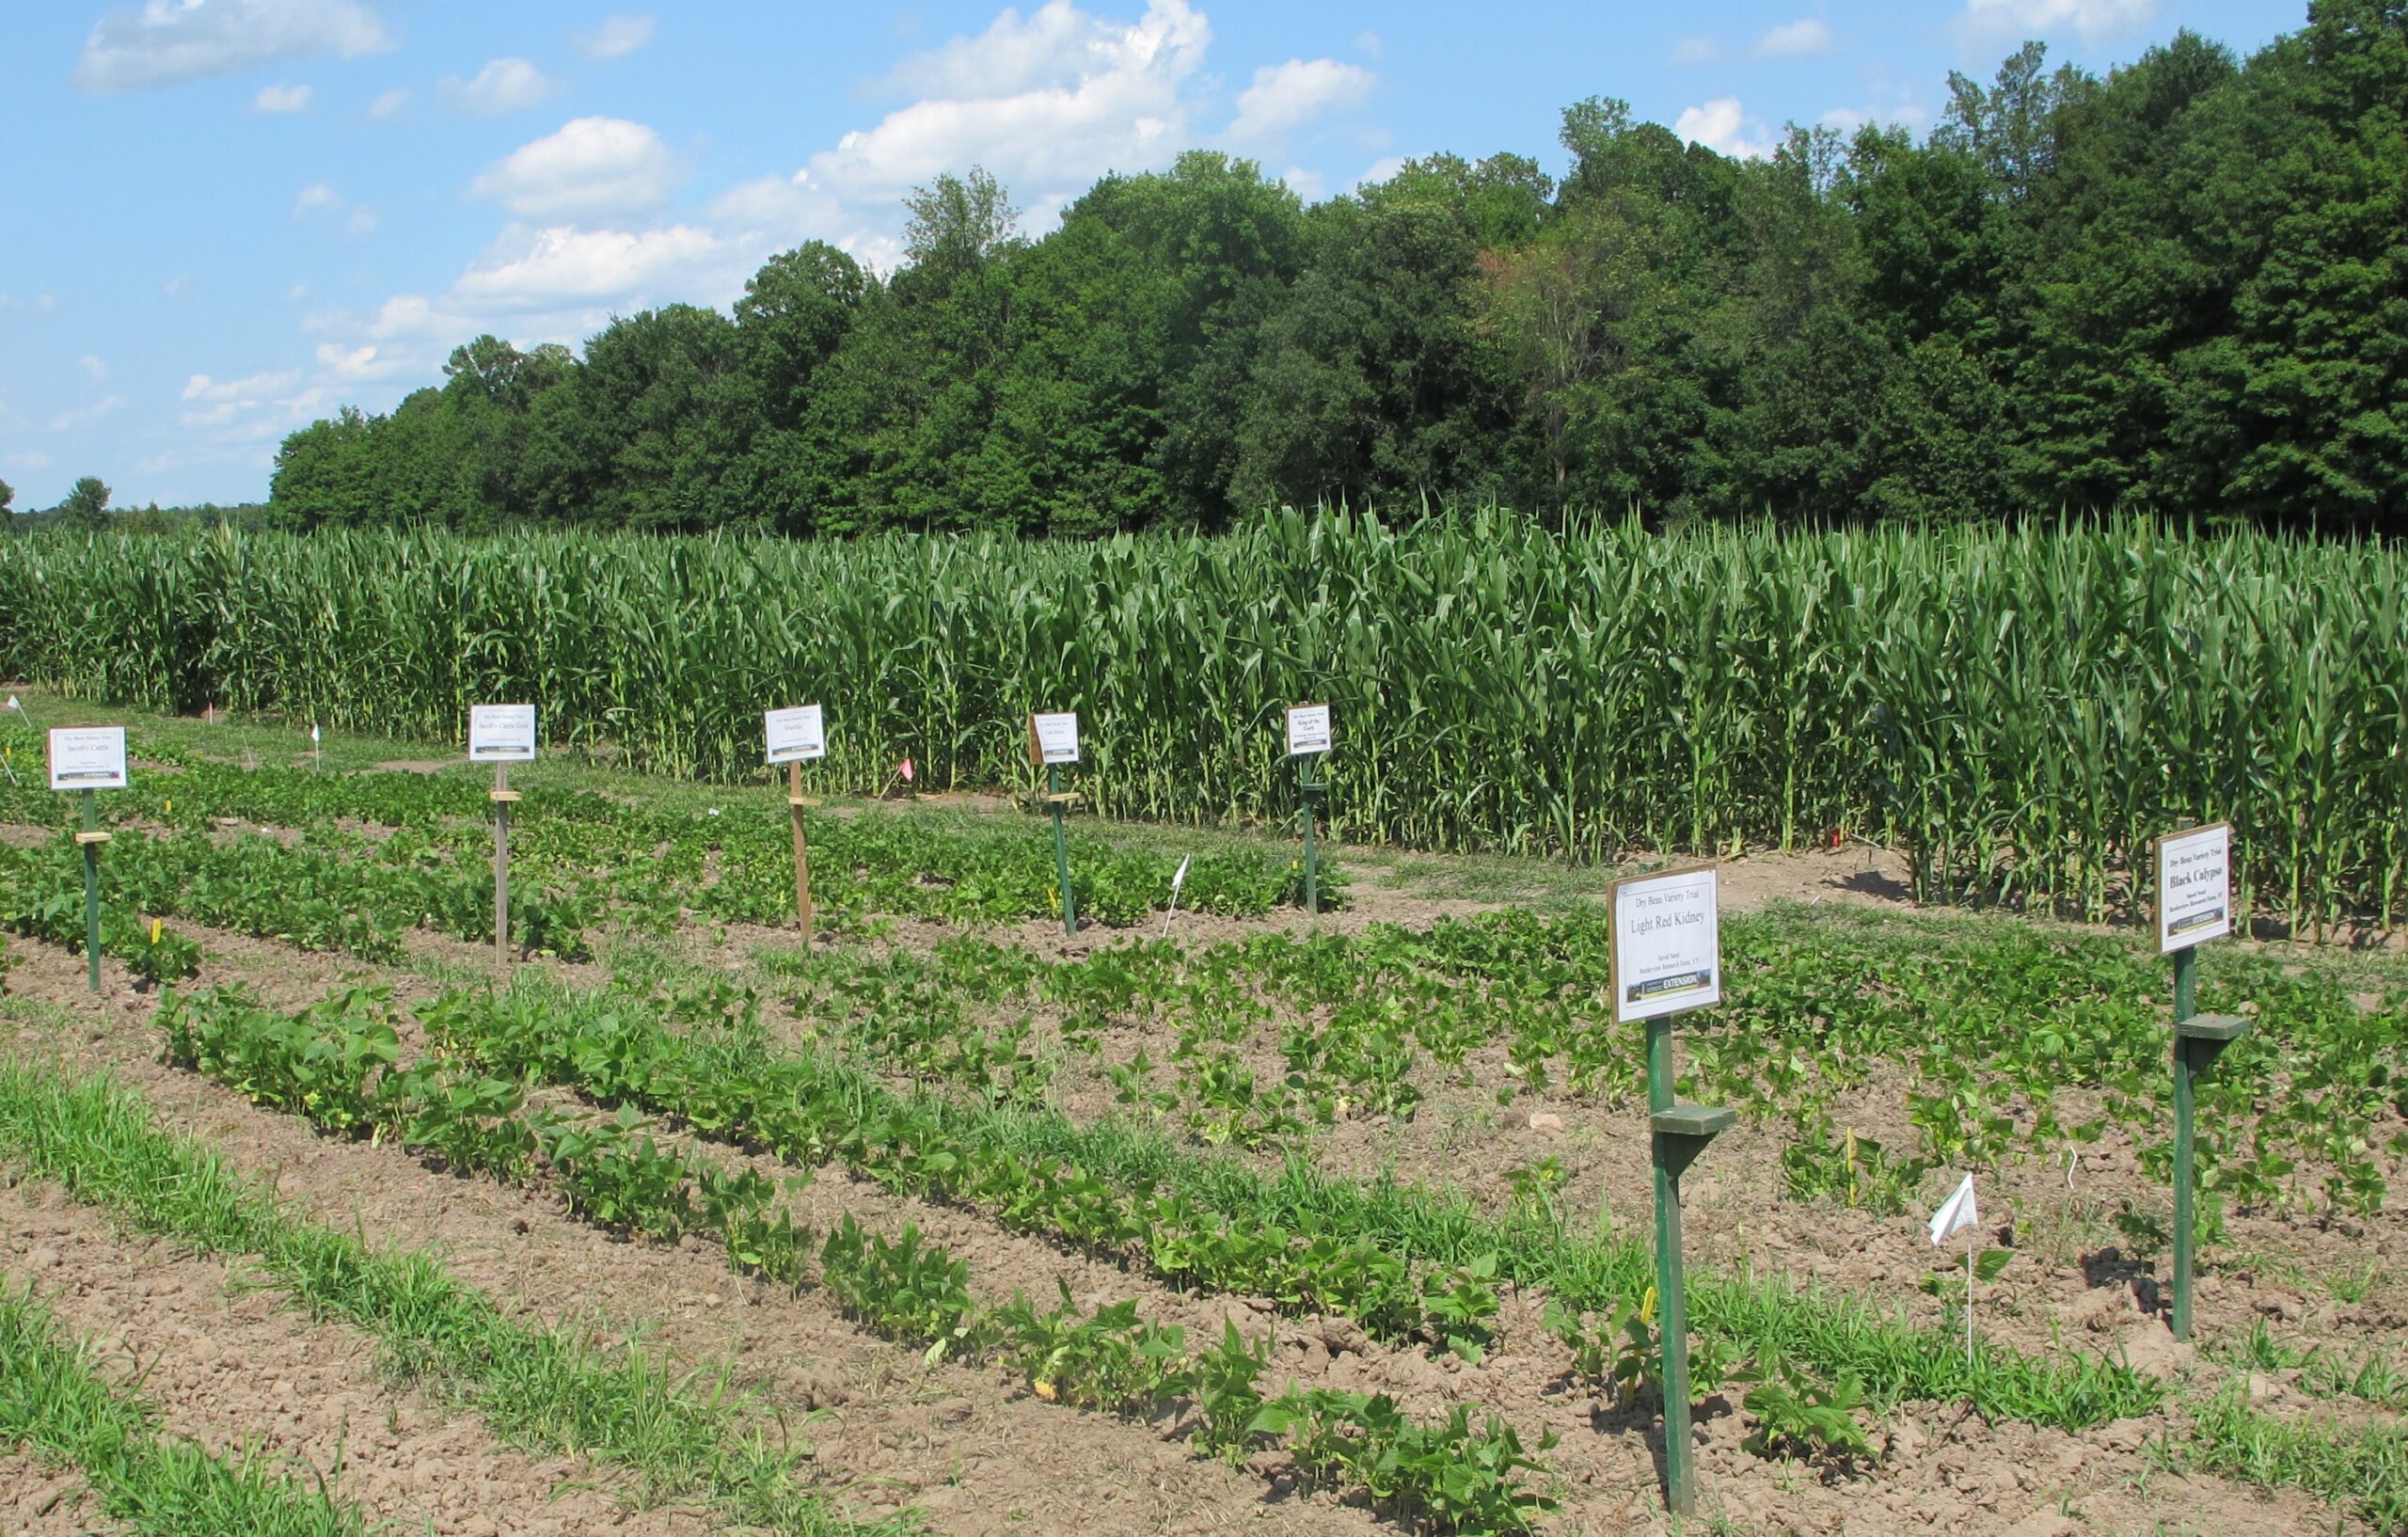
Dry beans (Phaseolus spp.) come in a wide variety of shapes, colors, and sizes (Figure 1). Varieties like Jacob’s cattle, European soldier, Black turtle, and Yellow-eyed beans are commonly grown in the Northeast. The edible field bean is considered a grain legume crop that is well-suited for our climate but requires good soil quality and diverse crop rotations. Beans are a staple food for much of the world due to their high protein content (generally 22% to 24%). They can serve as a great addition to a grain rotation and are a highly marketable crop. Dry beans are harvested once the shell and bean have matured and dried.
You can find more information on dry beans, including past research reports, dry bean production guides, and pest scouting information on our website.
You must be logged in to post a comment.