

iTransfer is a free app that can be used to safely transfer your data from an iOS device to UVM’s servers with a WiFi connection. It was recently updated, please see the workflow and design changes below.
As always, be careful when using “free” WiFi networks in coffee shops, etc. Connect to UVM resources via the AnyConnect VPN anytime you are off campus. There is always the potential for theft of your netid and password, along with your data.
Otherwise, if you can deal with ads and other on-screen pitches to make in-app purchases, iTransfer is worth the download. Here is how to use it:
- Download the app from the App Store on an iOS device or click the link here to download it to a computer. Install it.
- Tap the iTransfer icon after installation.
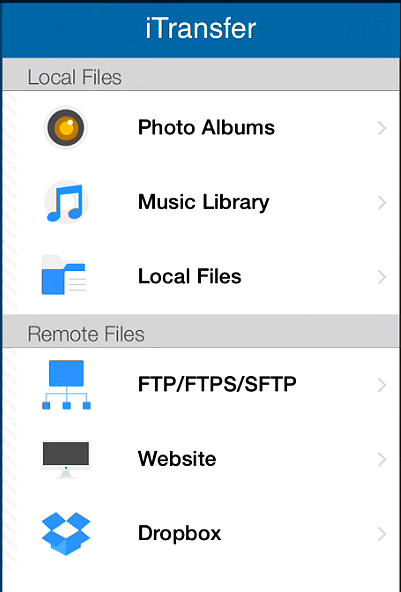
- Under “Remote Files” in the left-hand side bar, tap “FTP/FTPS/SFTP”.
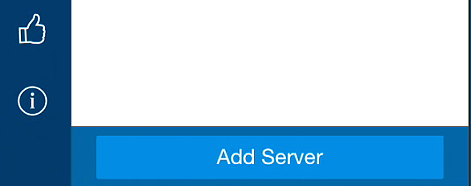
- Next tap “Add Server ” toward the bottom of the section.
- In the following screen, check the SFTP box (this is crucial, the Secure File Transfer Protocol, or SFTP, offers the safest way to transfer files via iTransfer).
- Server name: Zoo
- Host Name or IP Address: zoo.uvm.edu
- Path: /users/first letter of user’s netid/second letter of user’s netid/netid (In this case, Adam Deyo is the example here)
- Port: 22
- Username: Your netid
- Password: Your netid password
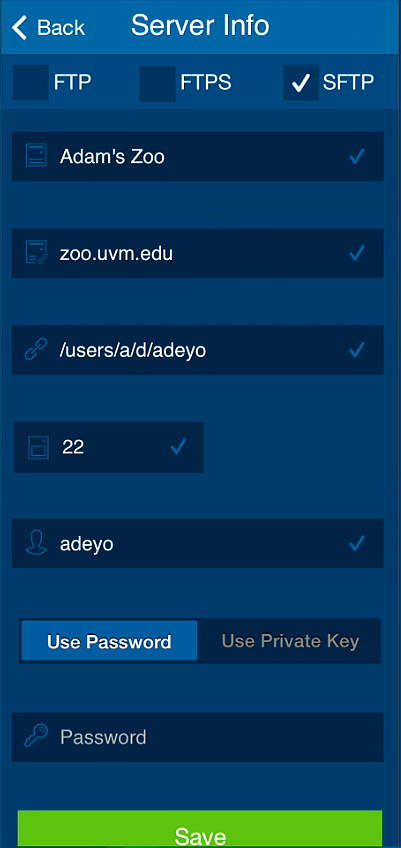
- Tap “Save”.
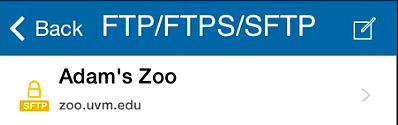
- You will see the name your created for the space and by tapping on it, a list of all files and folders in your Zoo home folder will appear!
Uploading
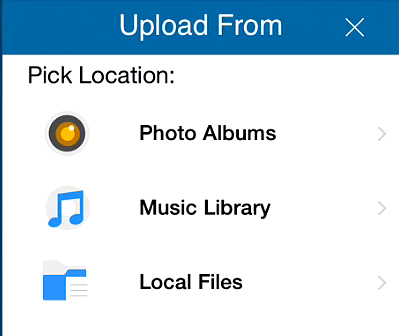
- To upload a file(s) to your Zoo server space, tap “Upload” below the list of files.
![]()
- Tap the Location (In this case I am uploading a photo from “Local Files” If you are uploading Pages documents or other files, you must chose the “Open In” iTransfer option in the app. A copy of the file will be placed in the “Local Files” folder in iTransfer)
- Tap in the circle next to the image or images you wish to upload. A Preview of the image will appear to the right of the list.
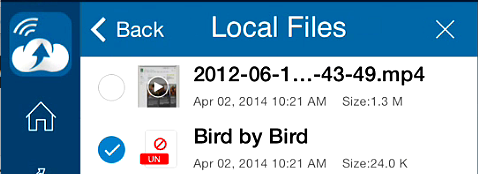
- Tap “Upload” at the bottom of the sectionafter selecting your files.
![]()
- The message below will appear.
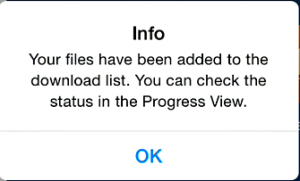
- After tapping OK, you can view the status of the file by tapping on the “Progress View” button to the left of your file list (circled here).
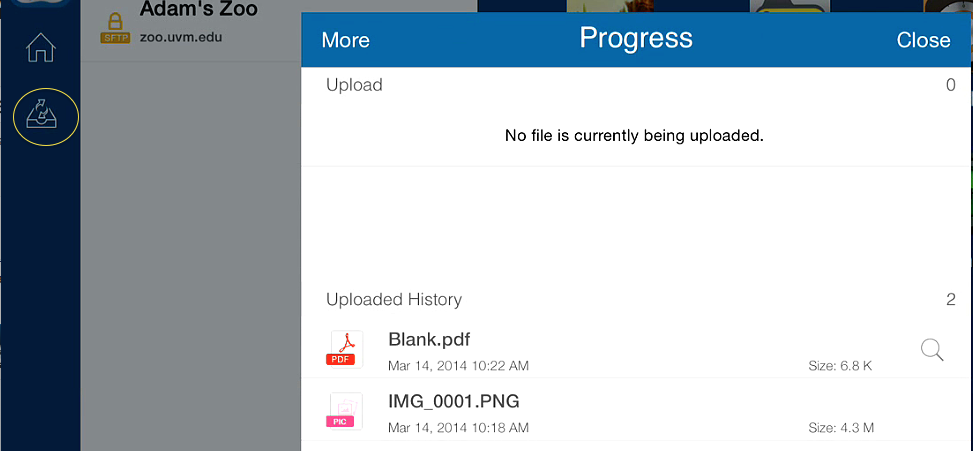
- If the file(s) uploaded successfully, they will be in the “Upload” list in the “Finished” section of the “Progress View”!
Downloading
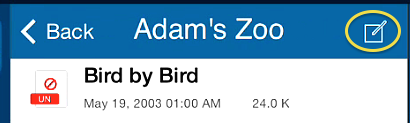
- The process is similar for Downloading files. Tap the icon circled in the image below.
- Tap the circle next to the file you would like to download.
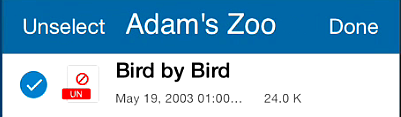
- Tap “Download” in the bottom of the section.
![]()
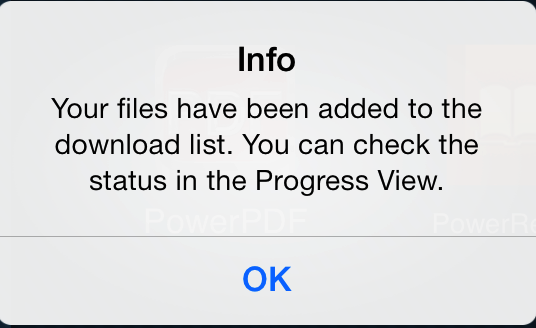
- You will receive this message, tap OK.
- Tap on the home icon and you will find the file in “Local Files”.

- Tap on the name of the file you wish to open.
- A Preview will appear in the right hand pane. Under it you have the option to “Open In” (circled below).
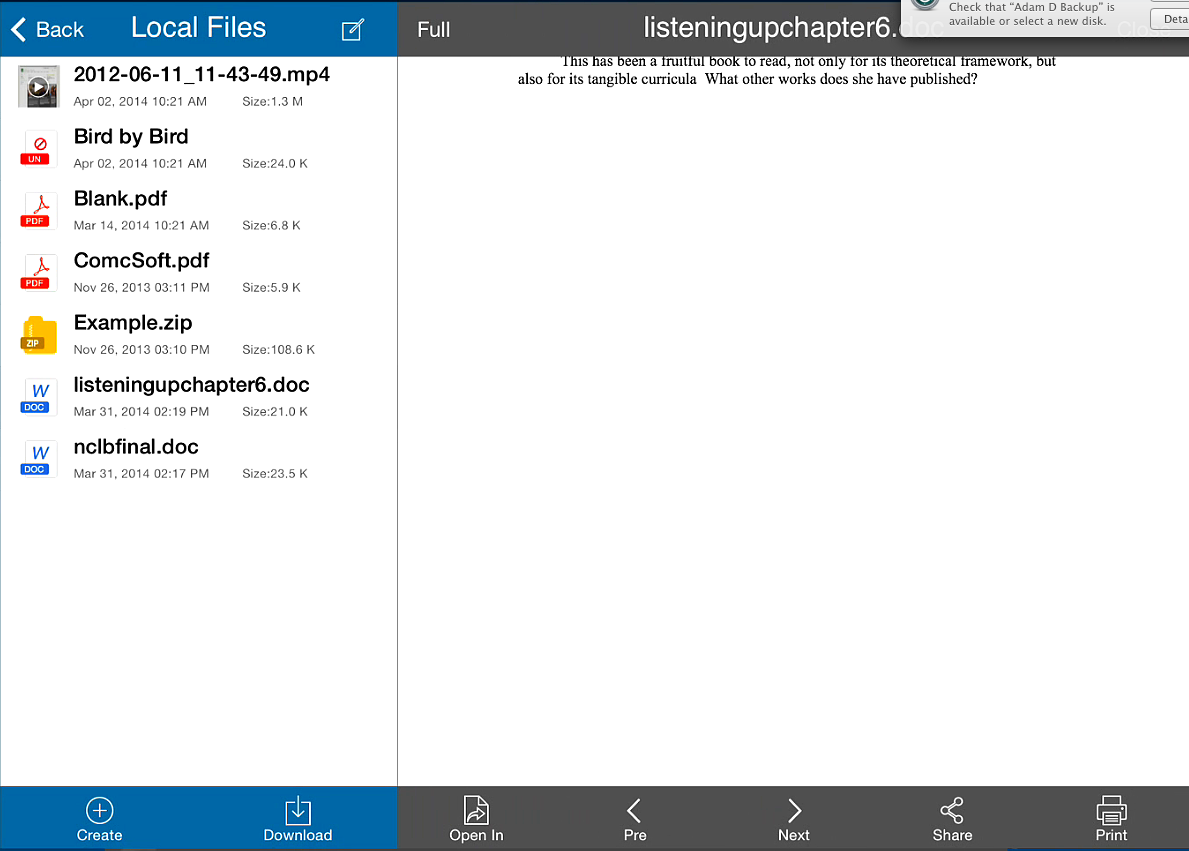
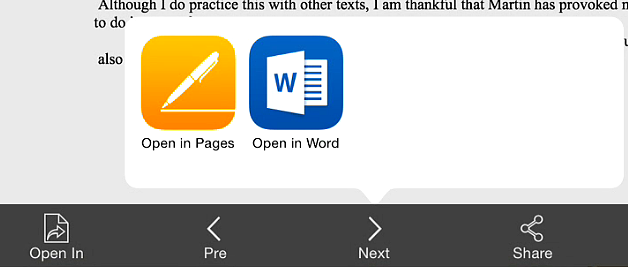
- Tap the app you would like to use to open the file and it will appear in that app!
Recent Comments