
 Here’s what I used for the first 3 years of making maple syrup. The design is a series of cinderblocks which can be taken apart and re-used the next year. Cinderblocks can suffer from thermal shock, so they may need to be replaced over time. Lining the firebox area with firebrick will help to protect the cinderblocks, but firebricks are expensive. What I have used instead, is metal ductwork material from Home Depot which is place along the inside of the firebox area to act as a bit of a heat shield – 2 of the 16 in. x 8 in. x 4 ft half section rectangular duct items will work.
To create an efficient firebox area I went to a local appliance store to see if they had old oven racks that I could have – they pointed out their recycle area and I got about 8 racks. These racks lie between the levels of the cinderblocks to create a place for the fire (in the middle) and a place to lay the pans (on top).
To keep the fire, sparks and ash from rising up around the sap pans I place a sheet of metal on top of the upper rack. I found out that a metal 6 ft. section of 7 in. diameter appliance stove pipe (from Home Depot) works – this comes in a curved sheet that needs to be folded round to make the stove pipe, but you need to flatten it out for the top. I would also cut off an 18 in. section to be used as a make-shift door to place in the front part of the firebox area.
You also need to pick up a series of 8 in. stove pipe sections to exit the back side of the firebox. You’ll need a short section to go through the wall, a 90 degree elbow section and a 6 foot main vertical section.
I placed the evaporator system inside an outdoor fire ring that was already on the property. I shoveled out the snow and poured out a layer of sand to create a level area for the blocks.
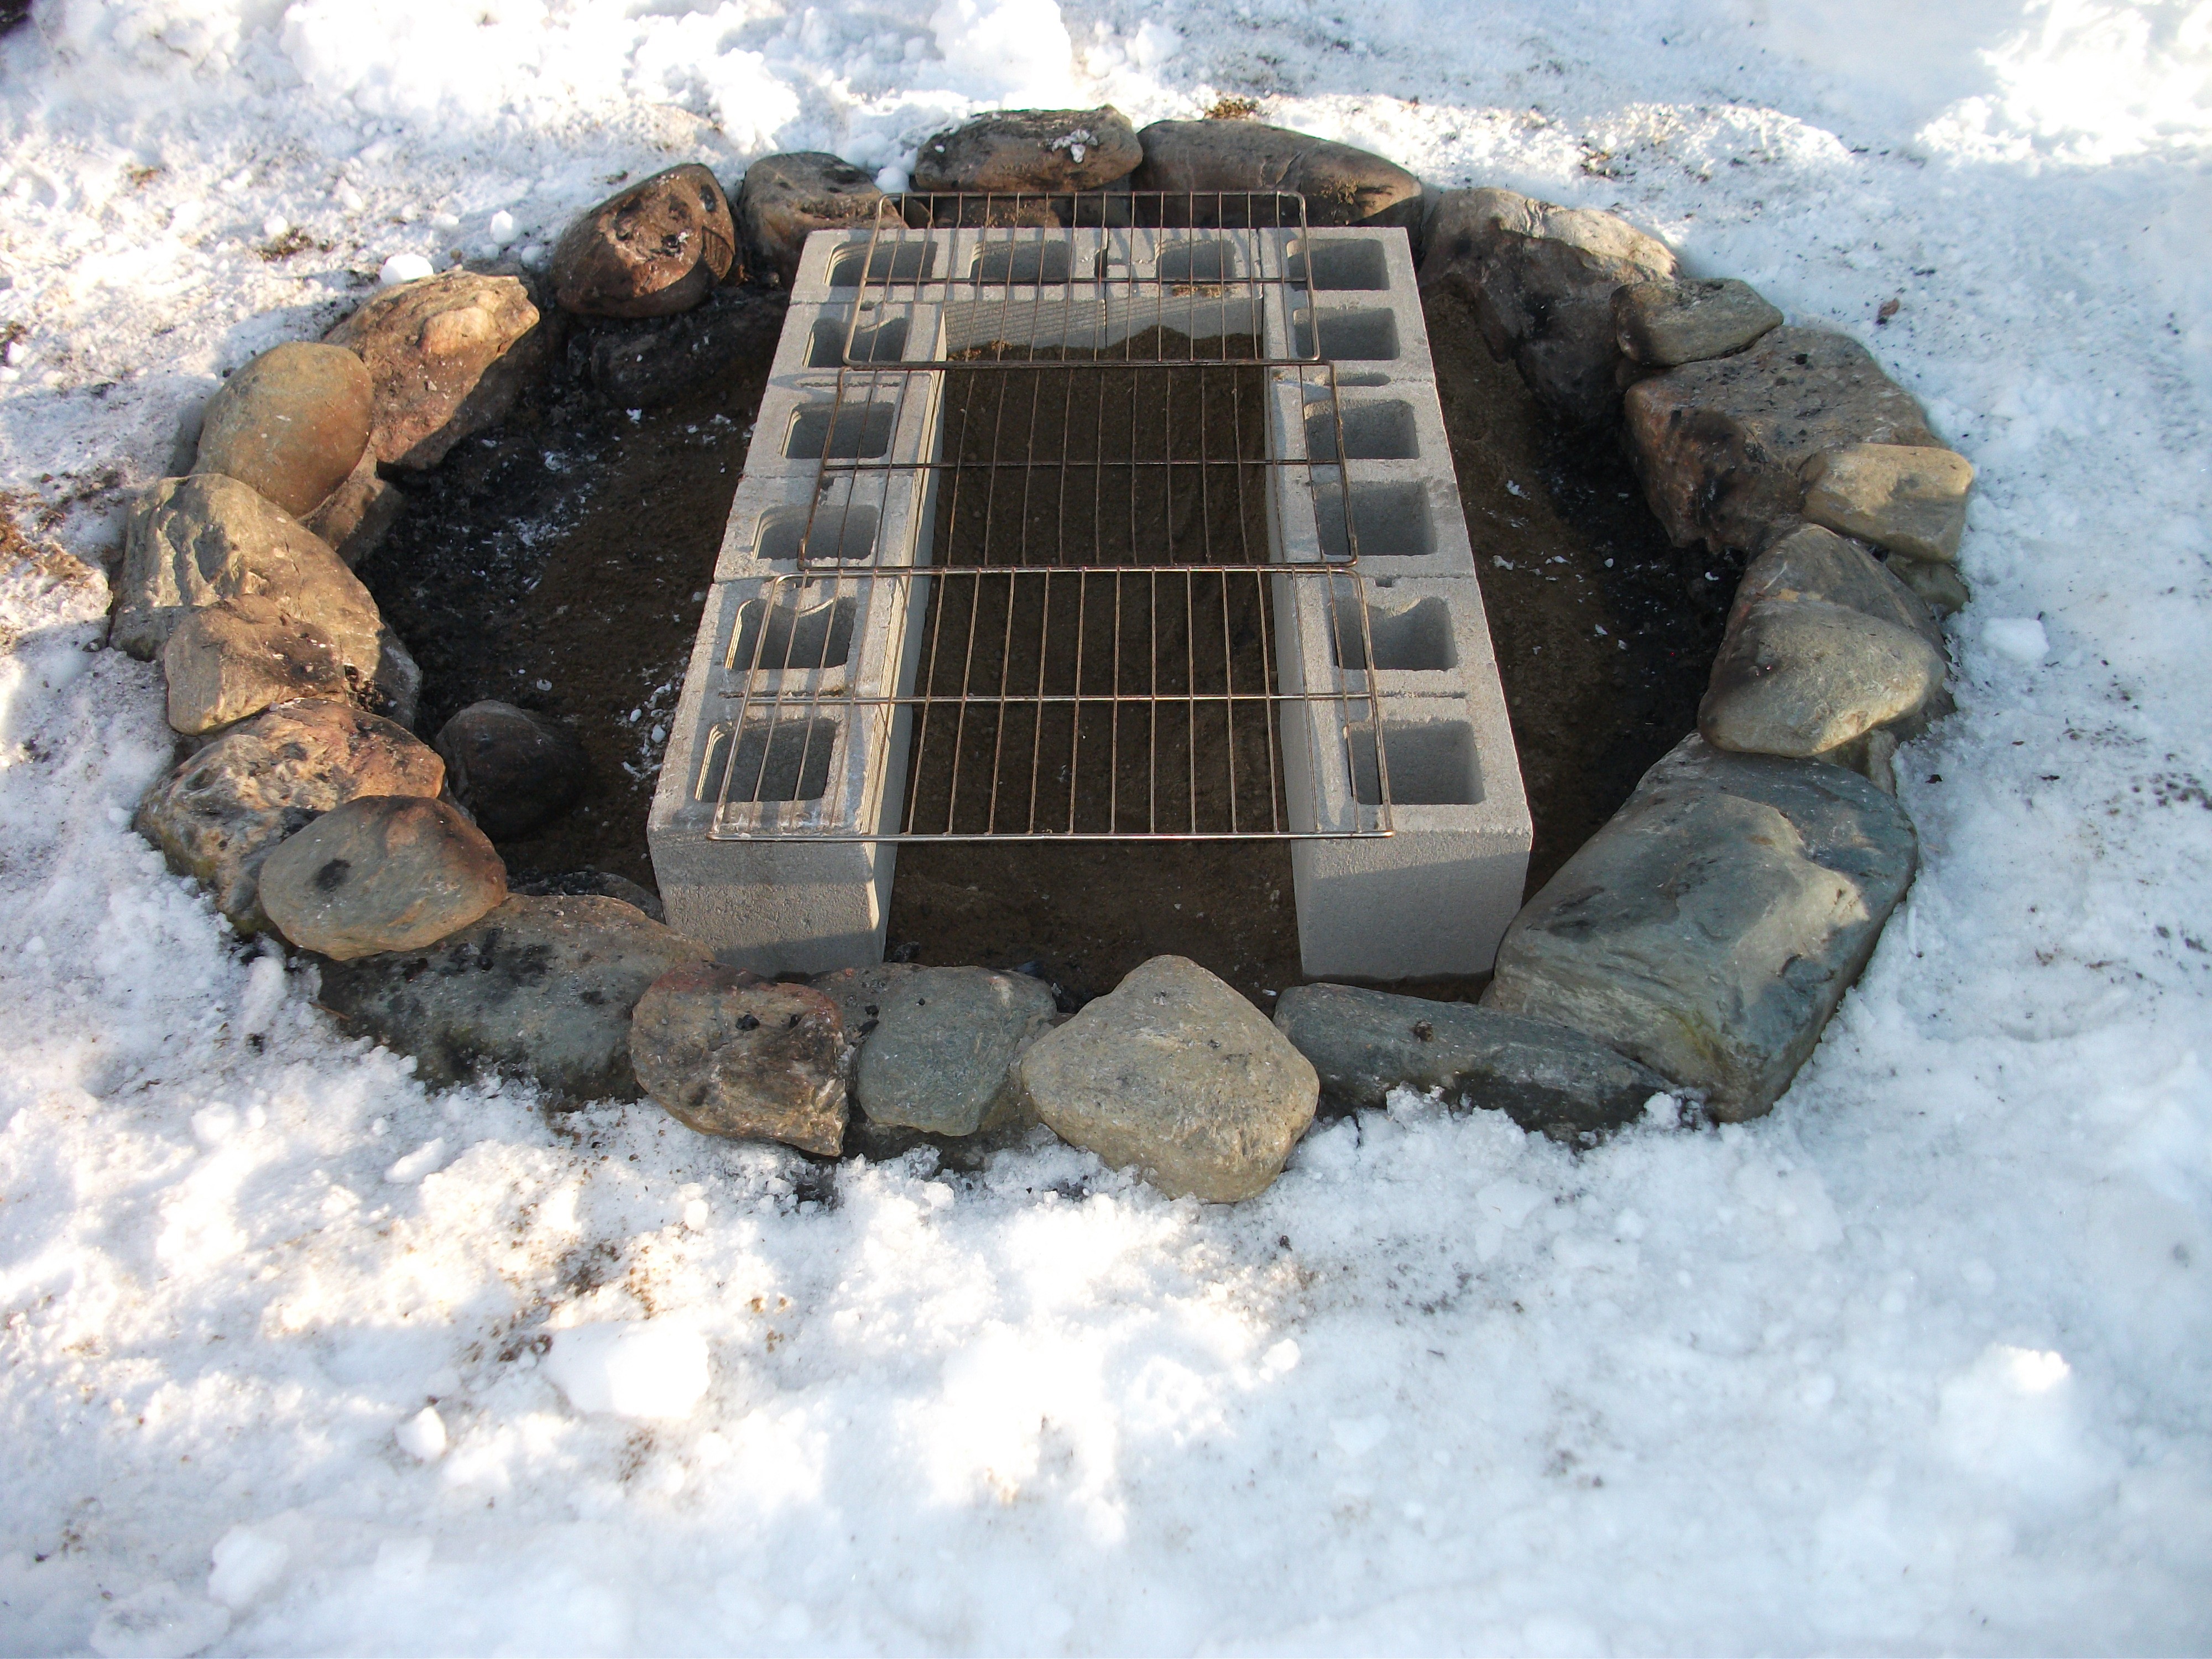
The first layer of cinderblocks is shown with the stove racks on top. You may need to hammer down some of the bent areas of the stove racks so that they lie flat. I would cover the blocks with a layer of sand to block out the fire from escaping between the layers of the blocks.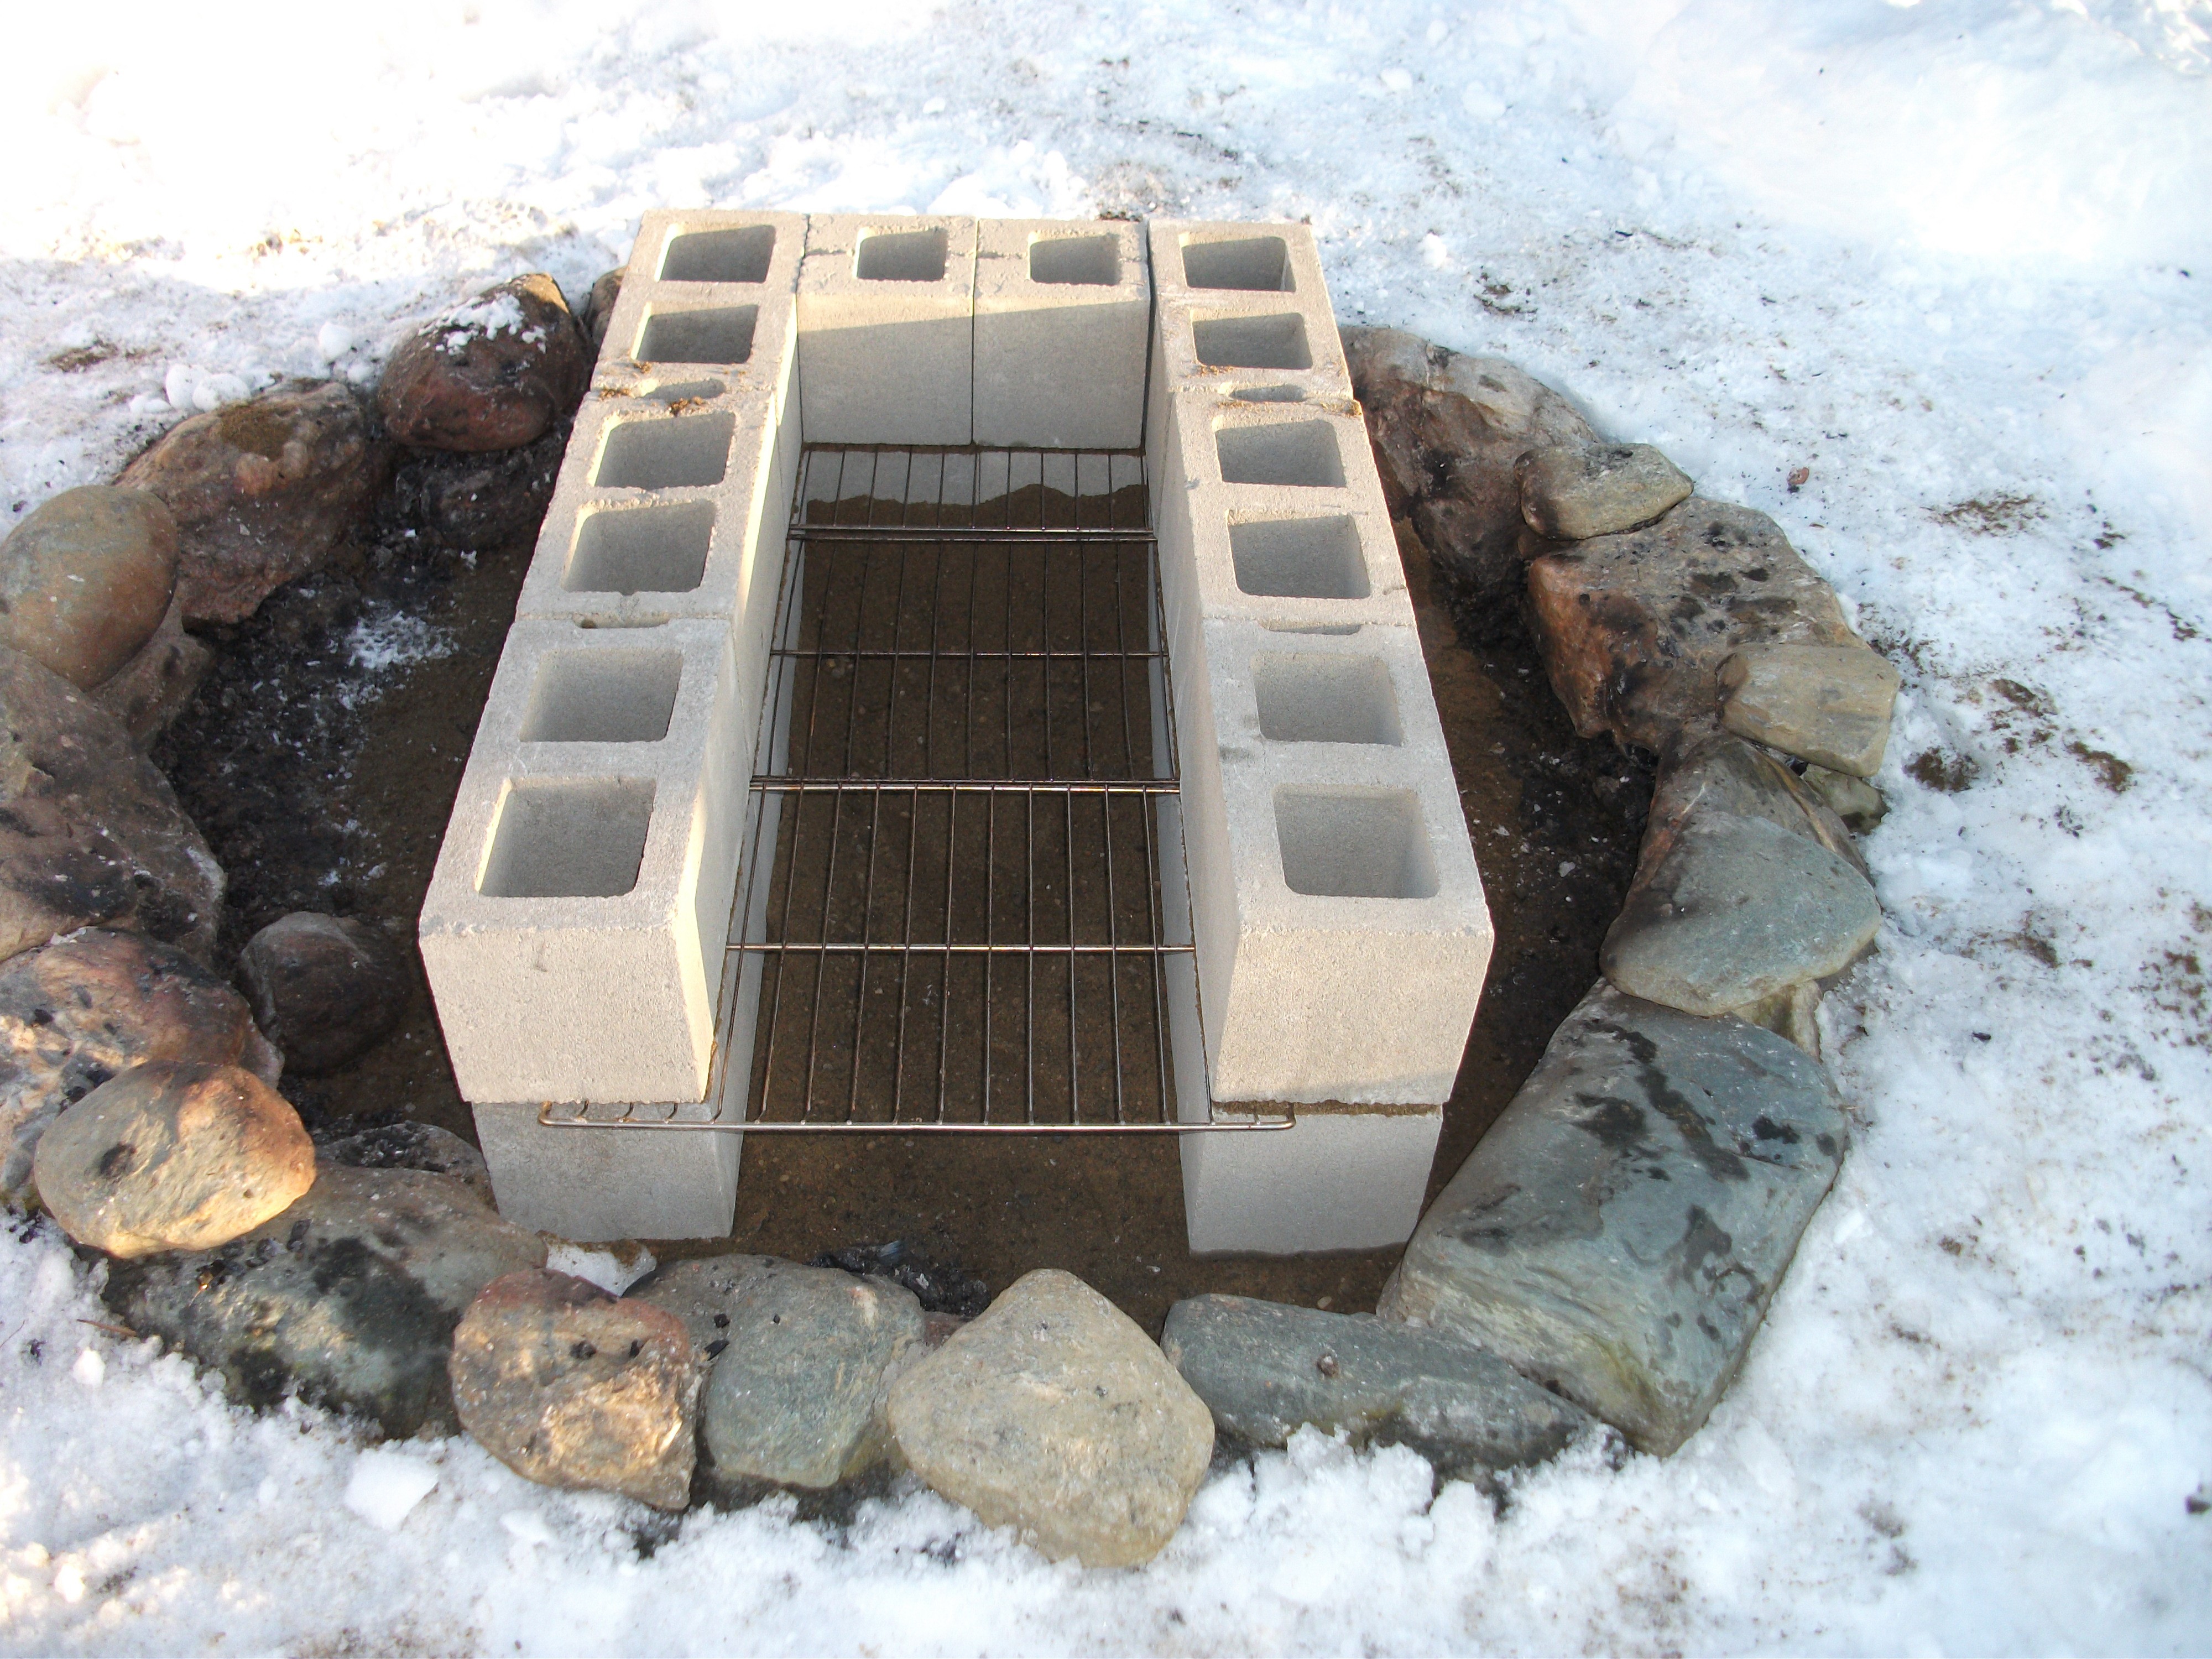
The next layer of blocks is placed on top of the oven racks. You then need to put on a third layer of blocks. Pick up both 8 in. and 16 in. blocks so that you can stagger the blocks for better stability.
The back end of the third layer of blocks (not shown) is where the horizontal piece of stove pipe is placed. This 8 in. section is used instead of an 8 in. block that would be there if the back wall was a solid wall. You’ll need to fill in around the stove pipe section with small stones to fill in the gaps left in the square space.
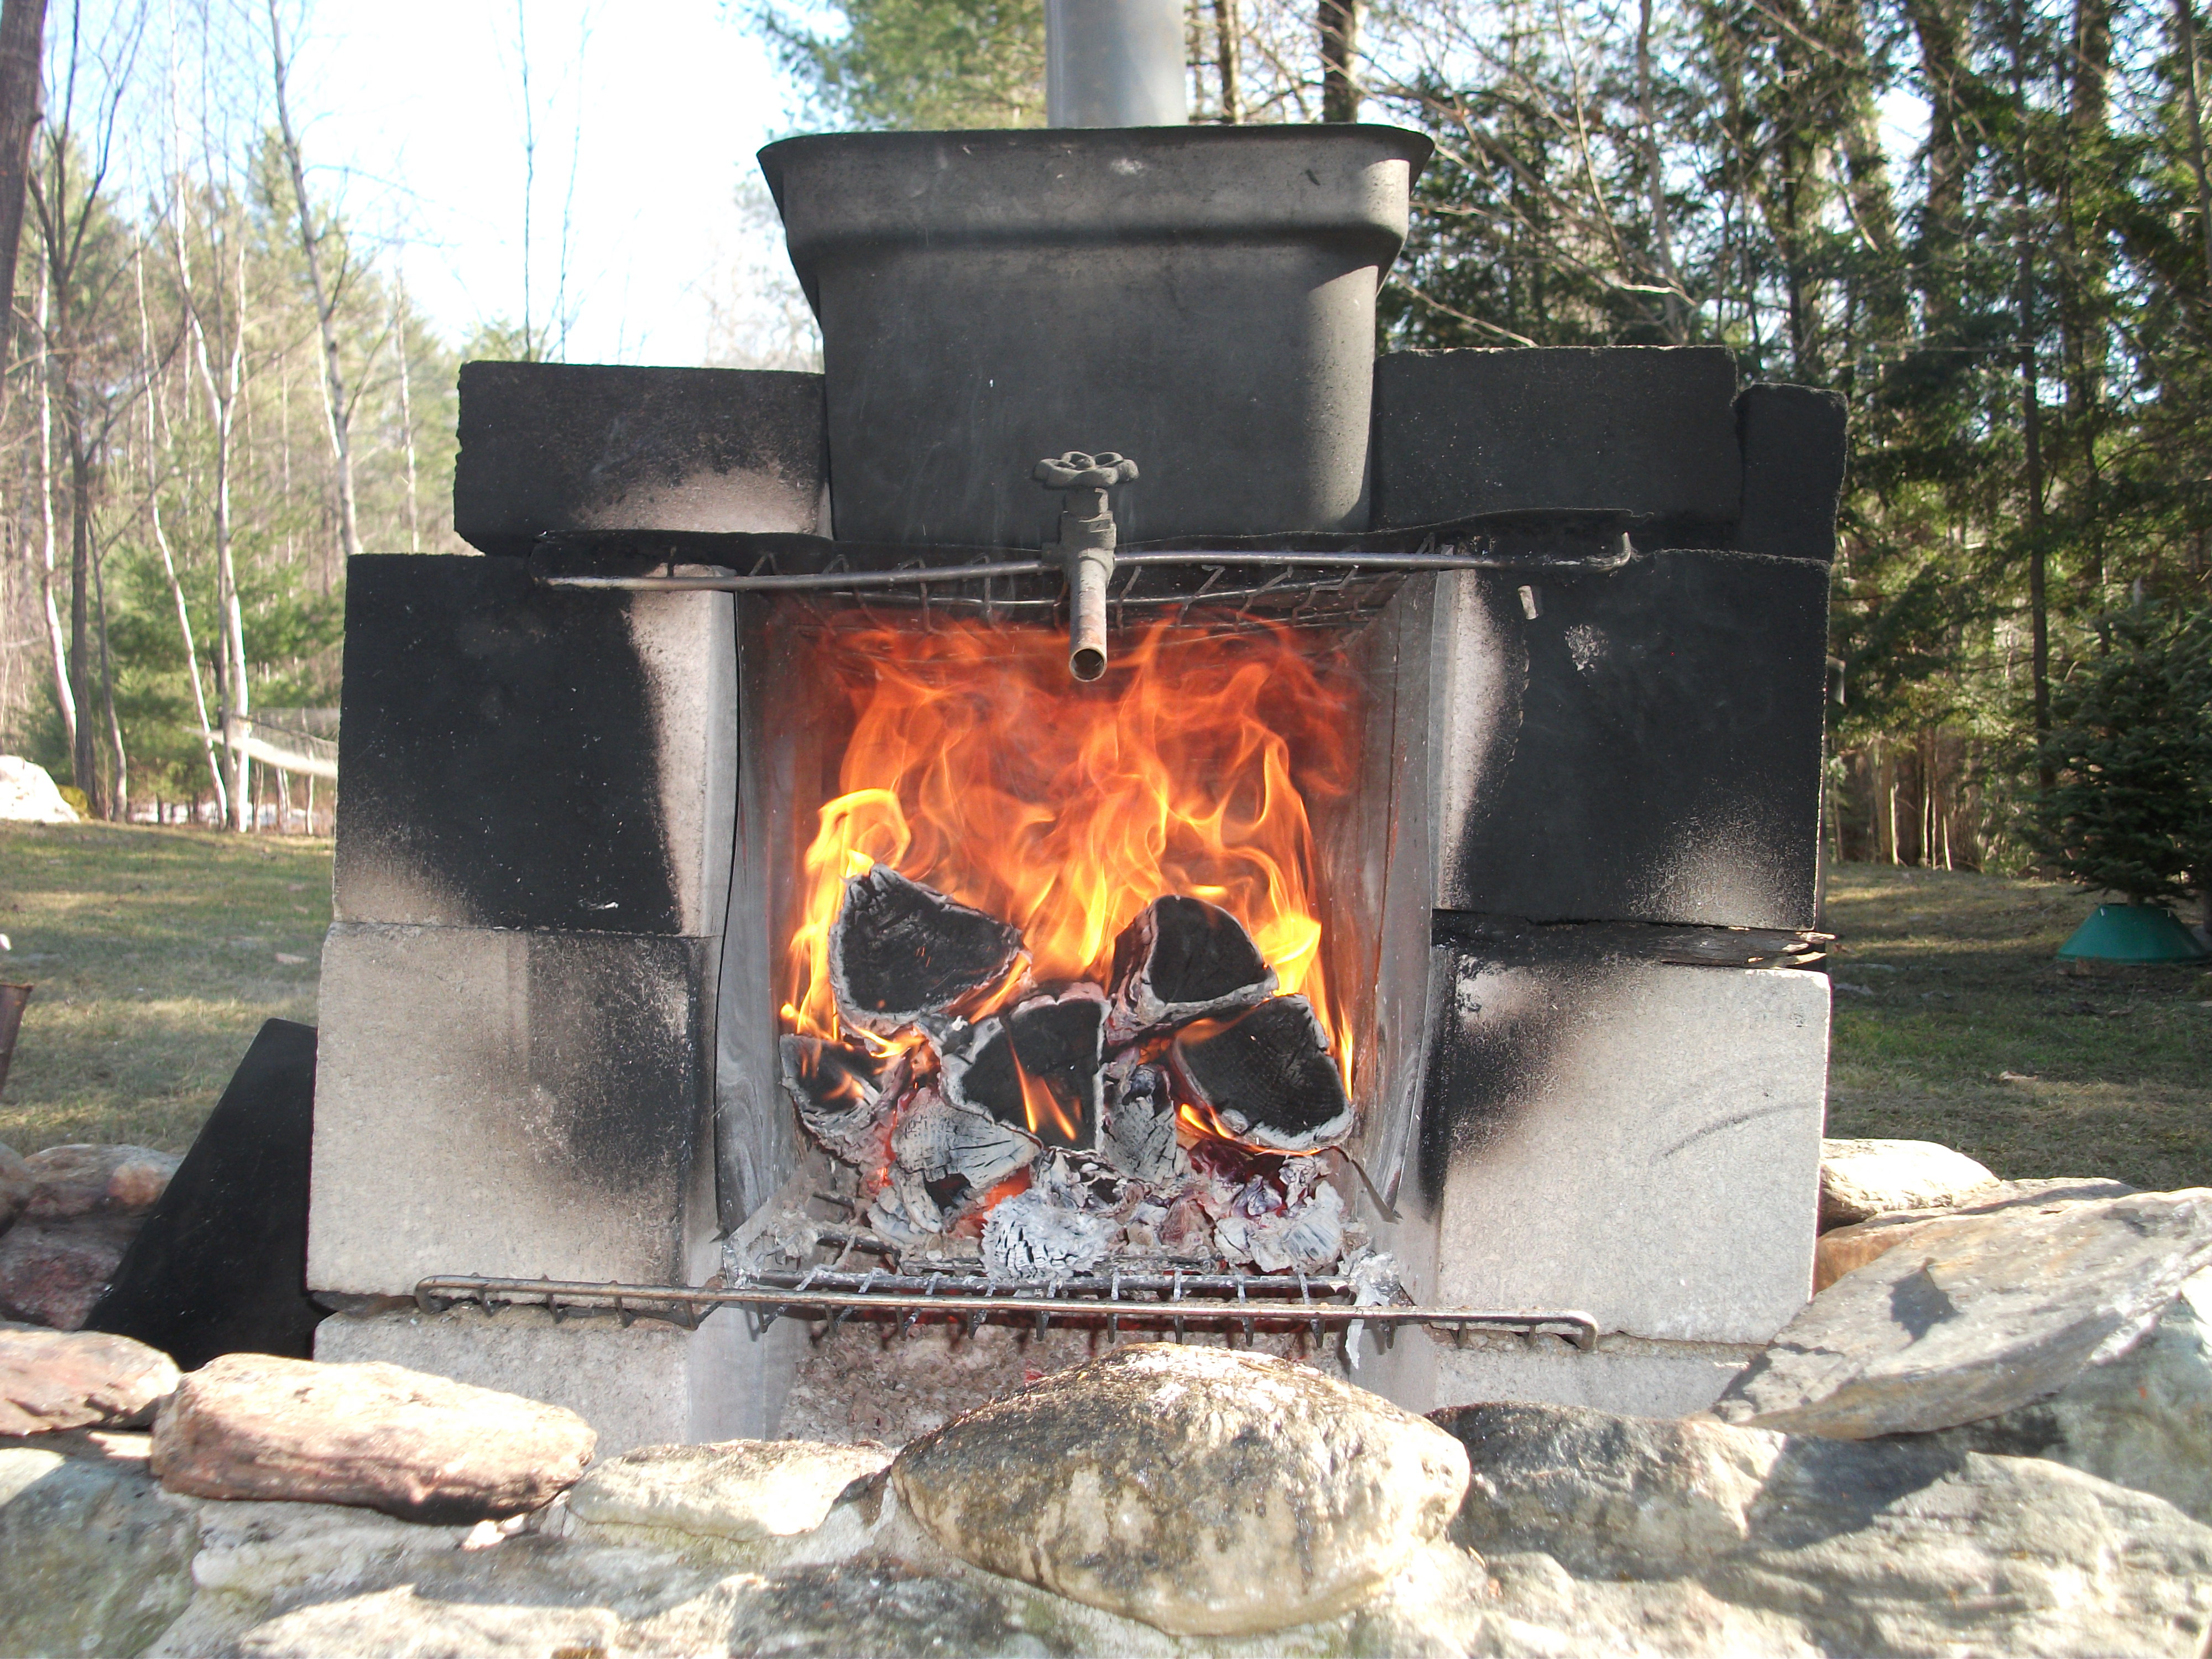 Put the 16 in. x 8 in. x 4 ft half section rectangular duct work pieces against the two side walls for some thermal protection. Then place oven racks on top of the third layer of blocks. Lay a sheet of metal (the flattened 7 in. stove pipe) on top of the oven racks. Then place a series of 4 in. x 8 in. x 16 in. blocks around the top perimeter.
Also, not shown, is the need to use an old cookie sheet or some other flat sheet of metal to create a slanted area from the back area of the firebox up to the opening of the chimney.
The sap pans set in the space on the top oven racks
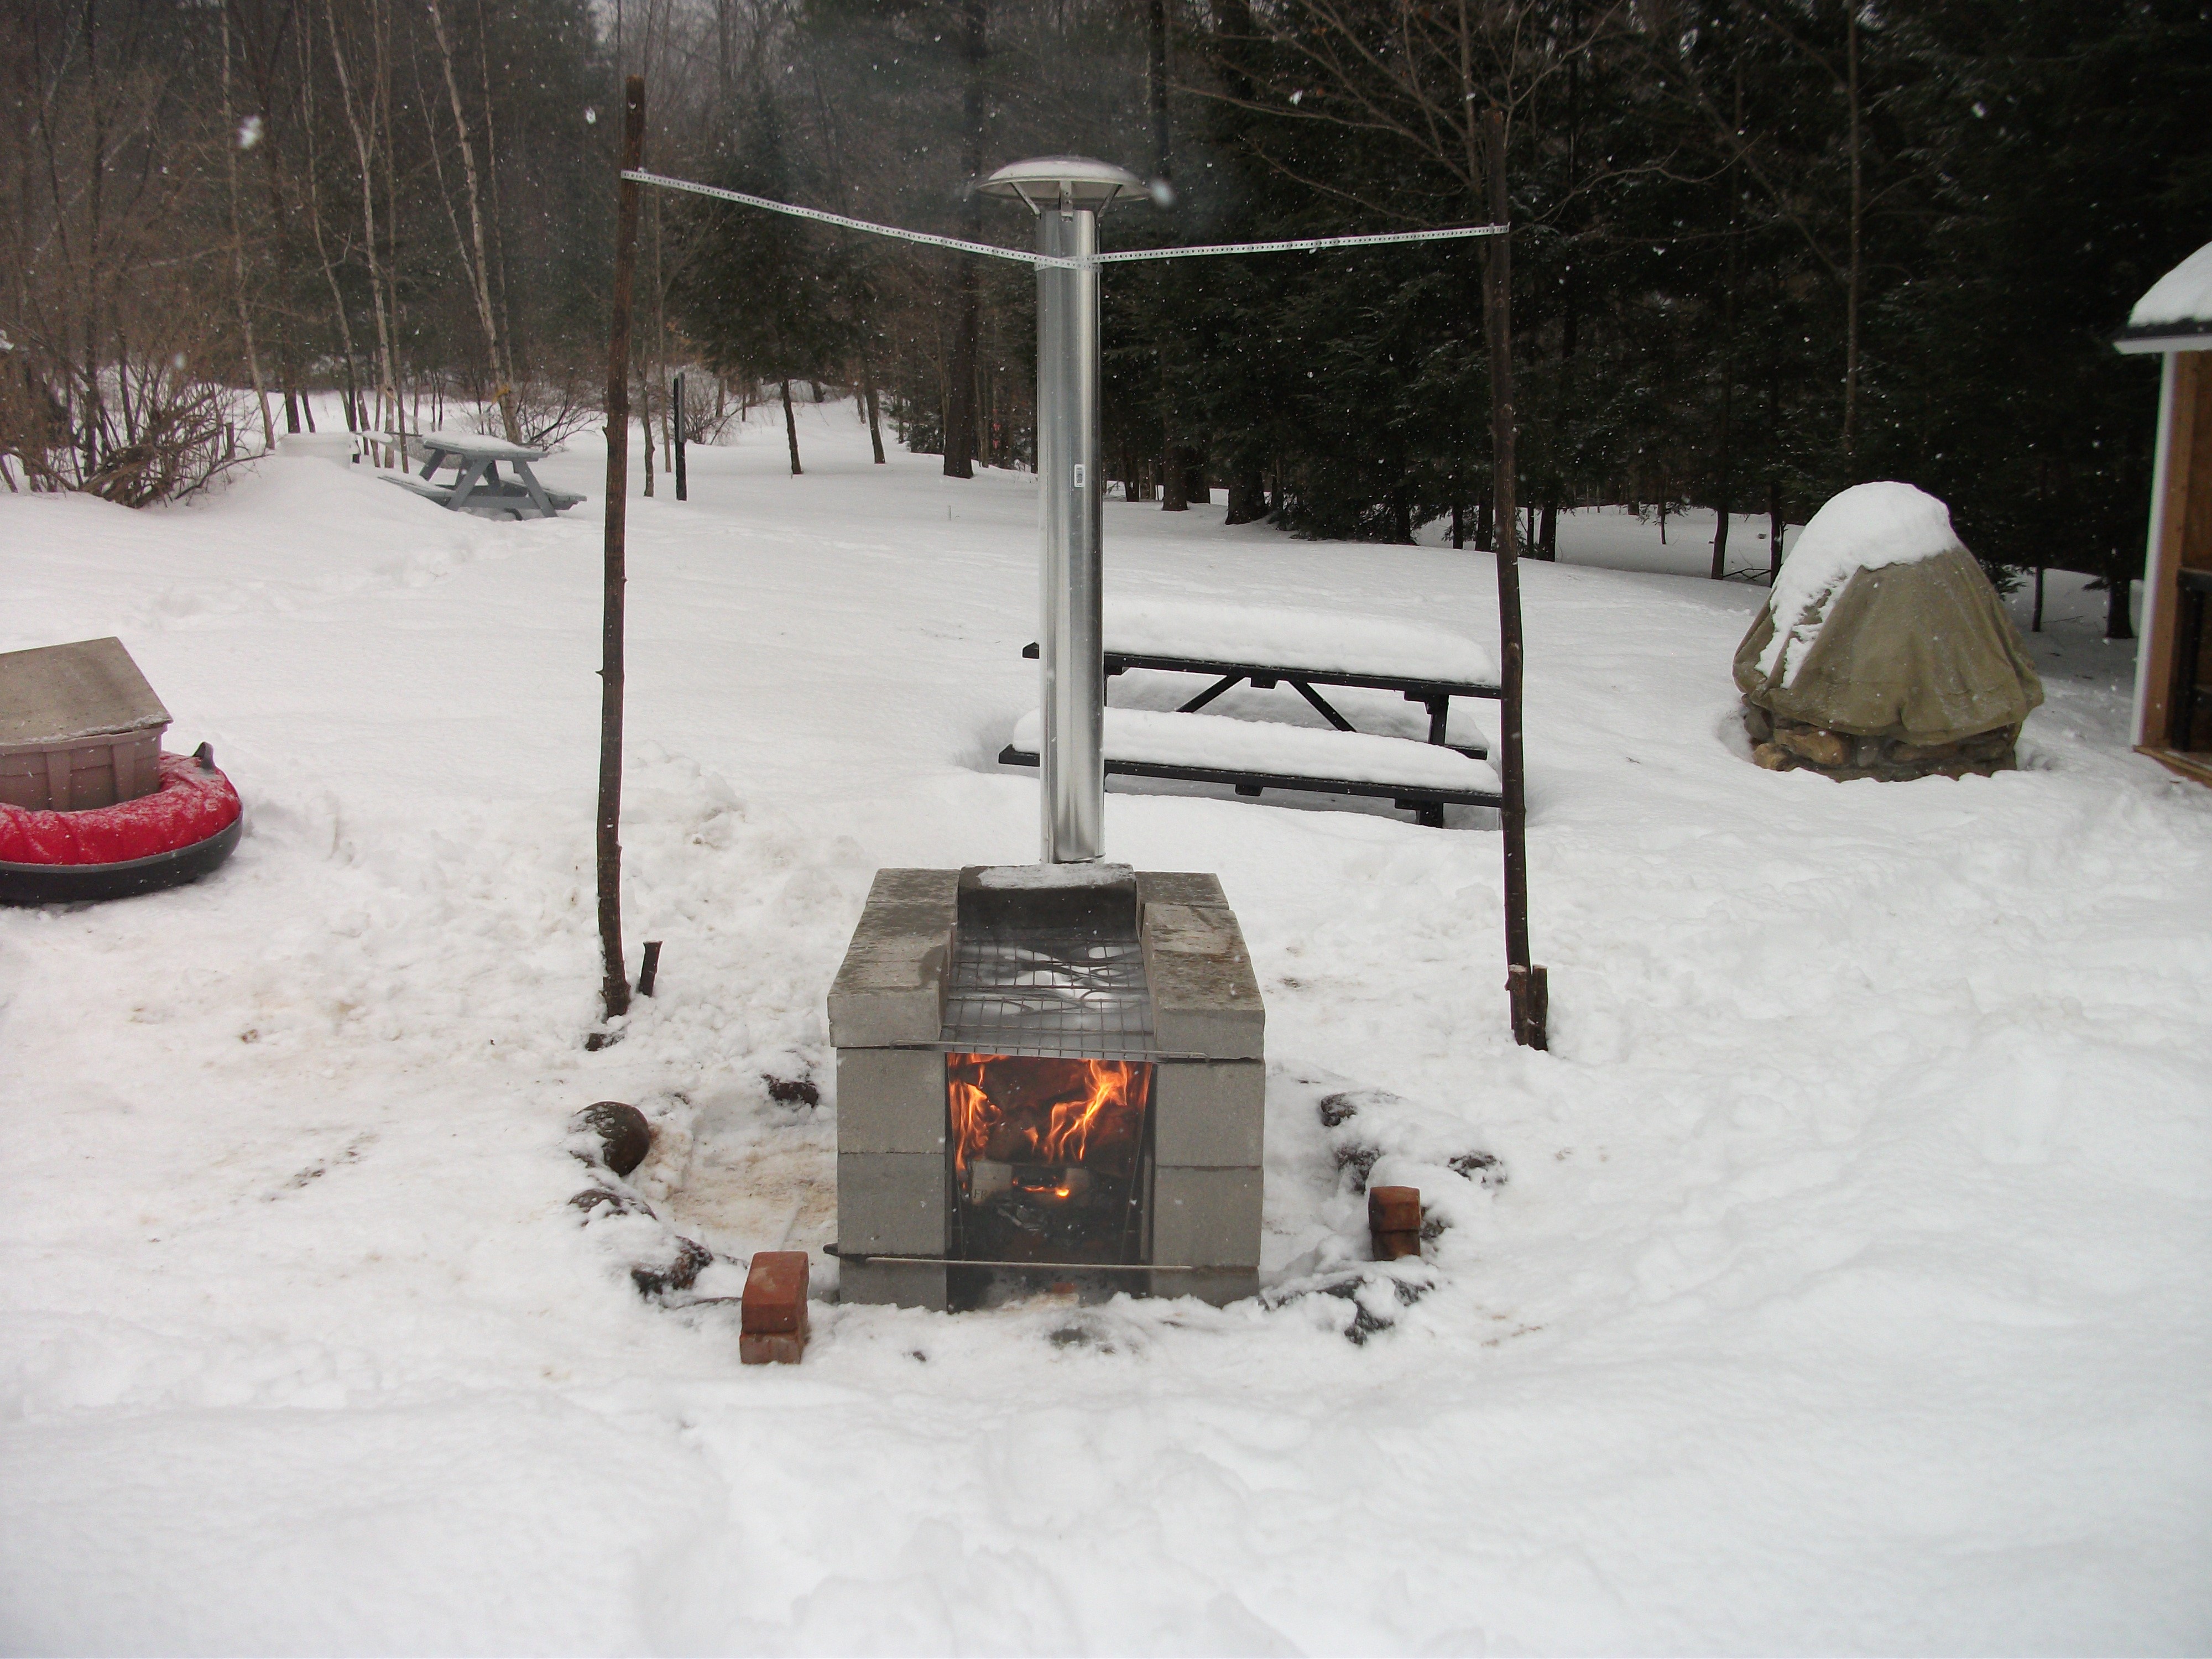 You’ll need something metal to tie around the top of the stove pipe to secure it from falling. I secured it to 2 vertical wooden poles which were place in a cement footing block (from Home Depot).
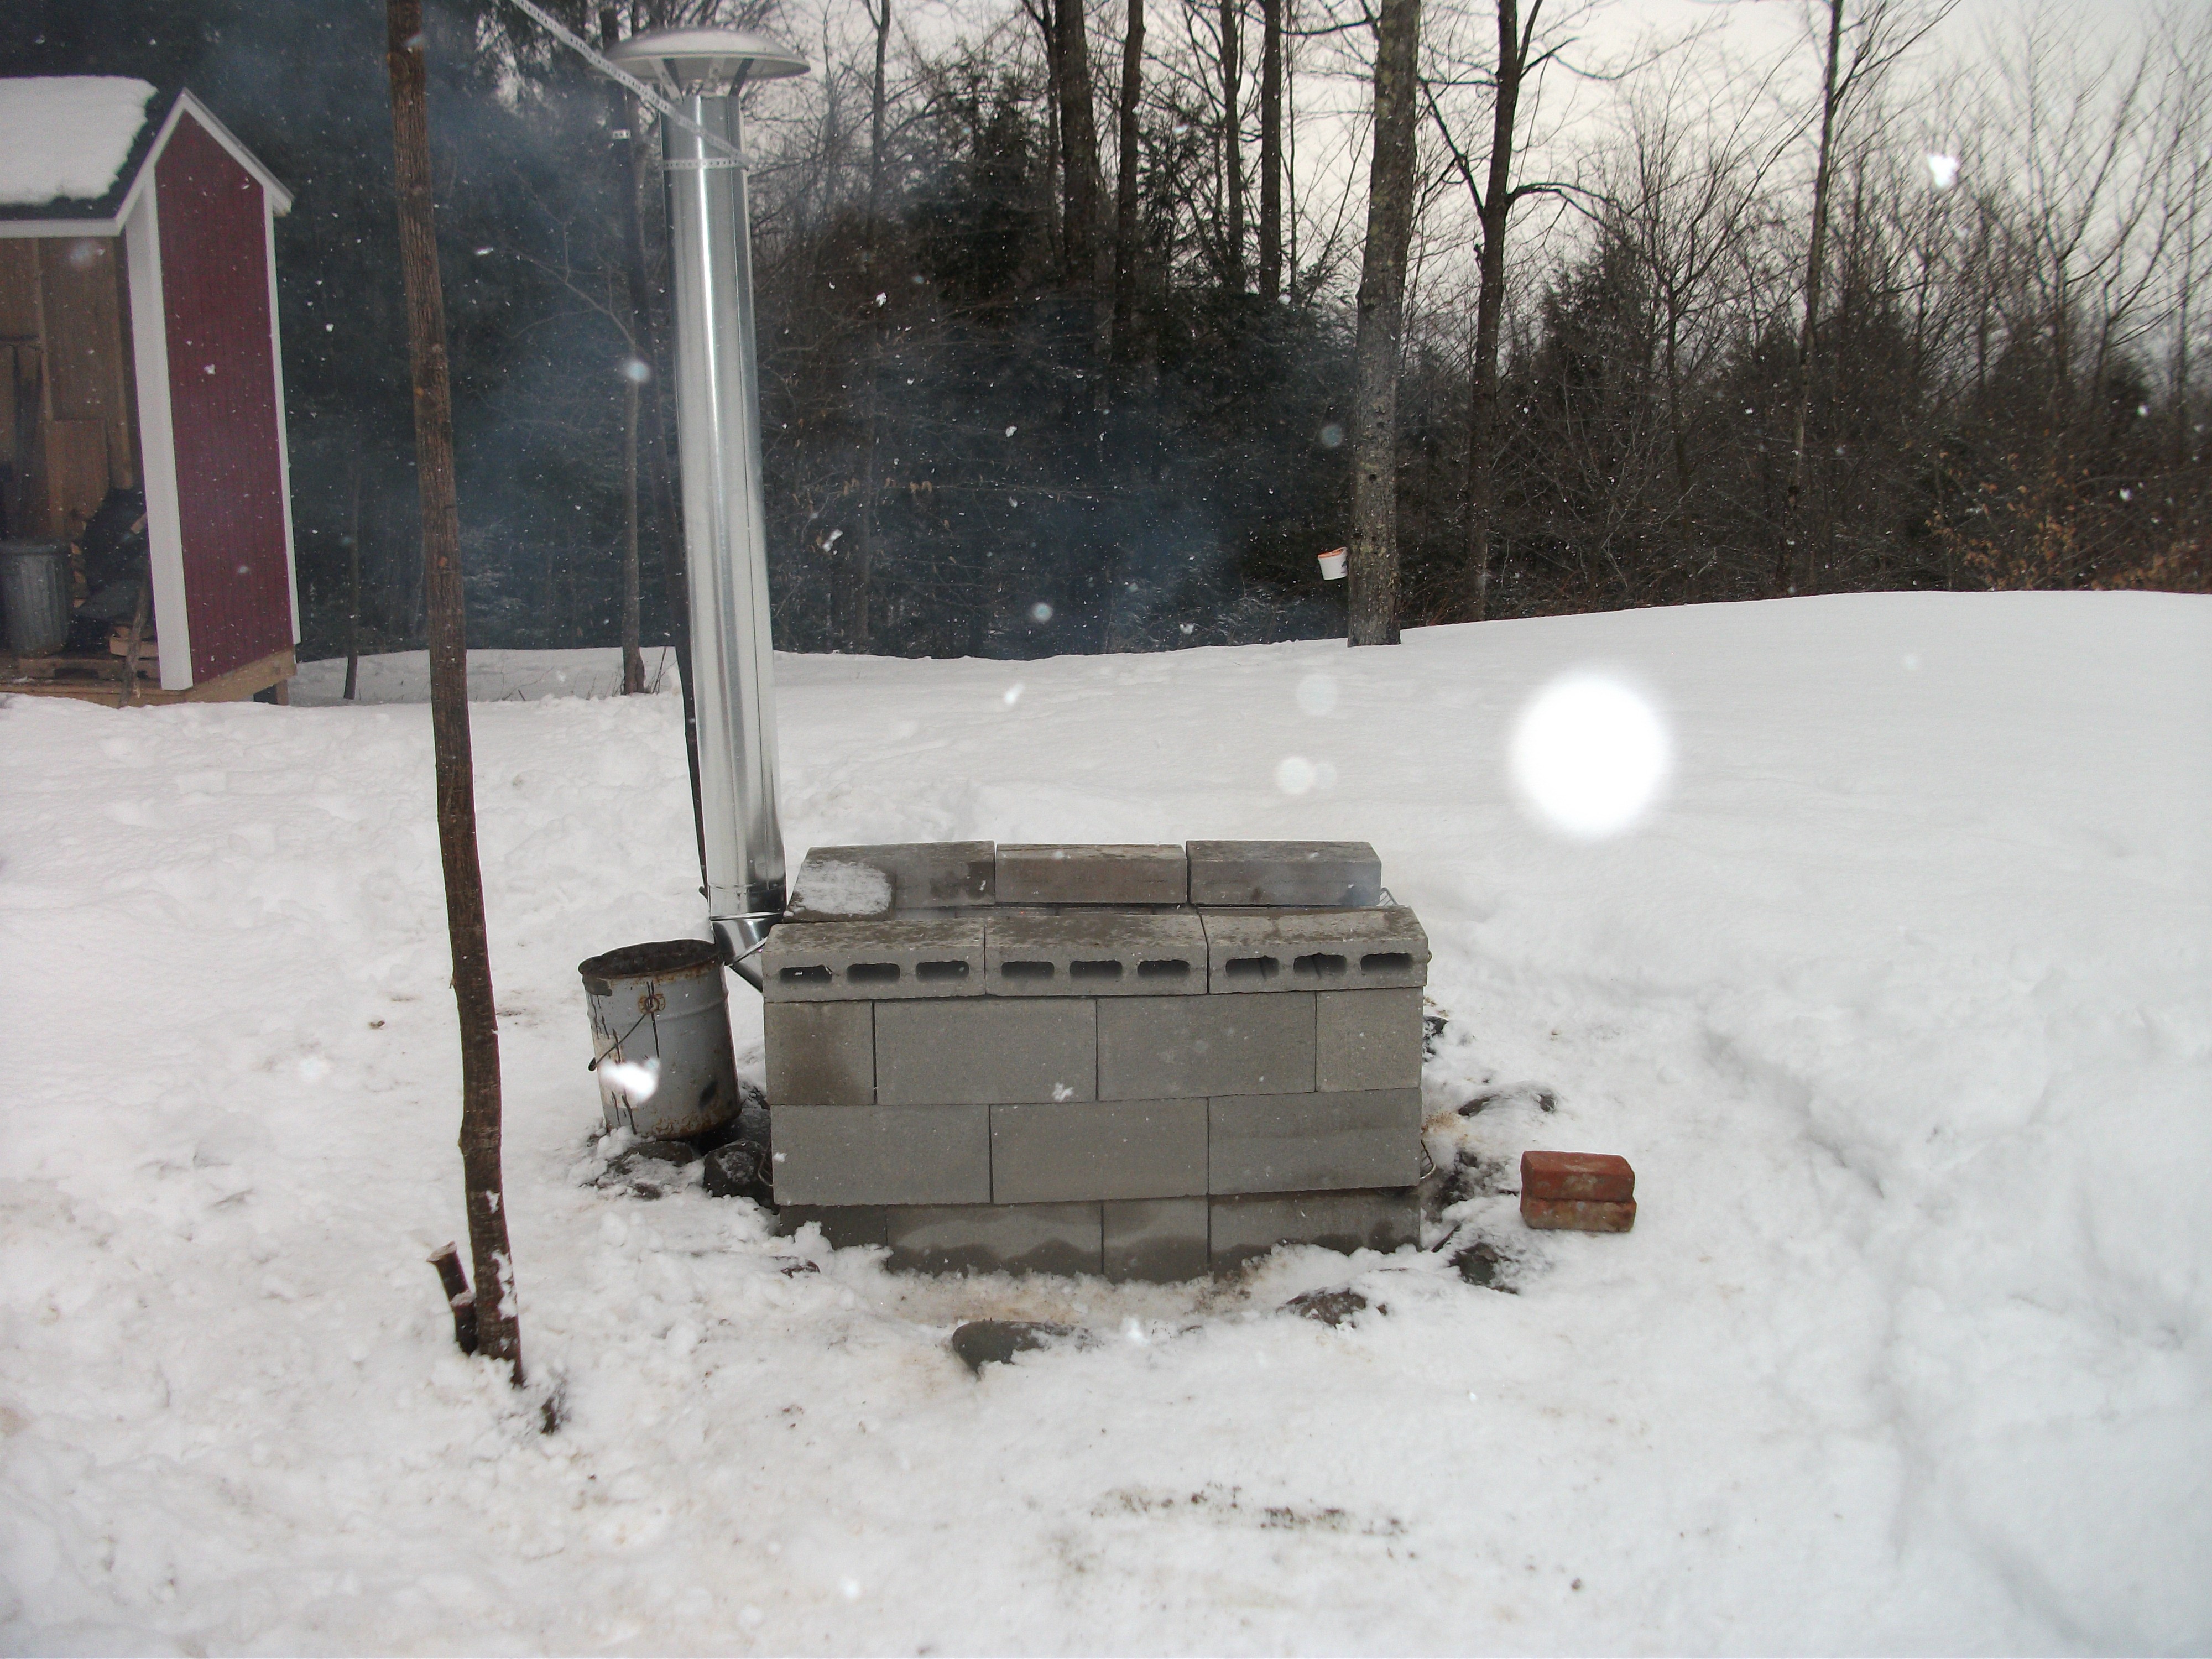 I also put a metal bucket at the elbow of the chimney. Shown here is a chimney made of ventilation ductwork sections. I replaced this material with stove pipe sections for the next year. The thinner metal did not tolerate the high temperature of the fire very well (it eventually broke down towards the end of the boiling season).
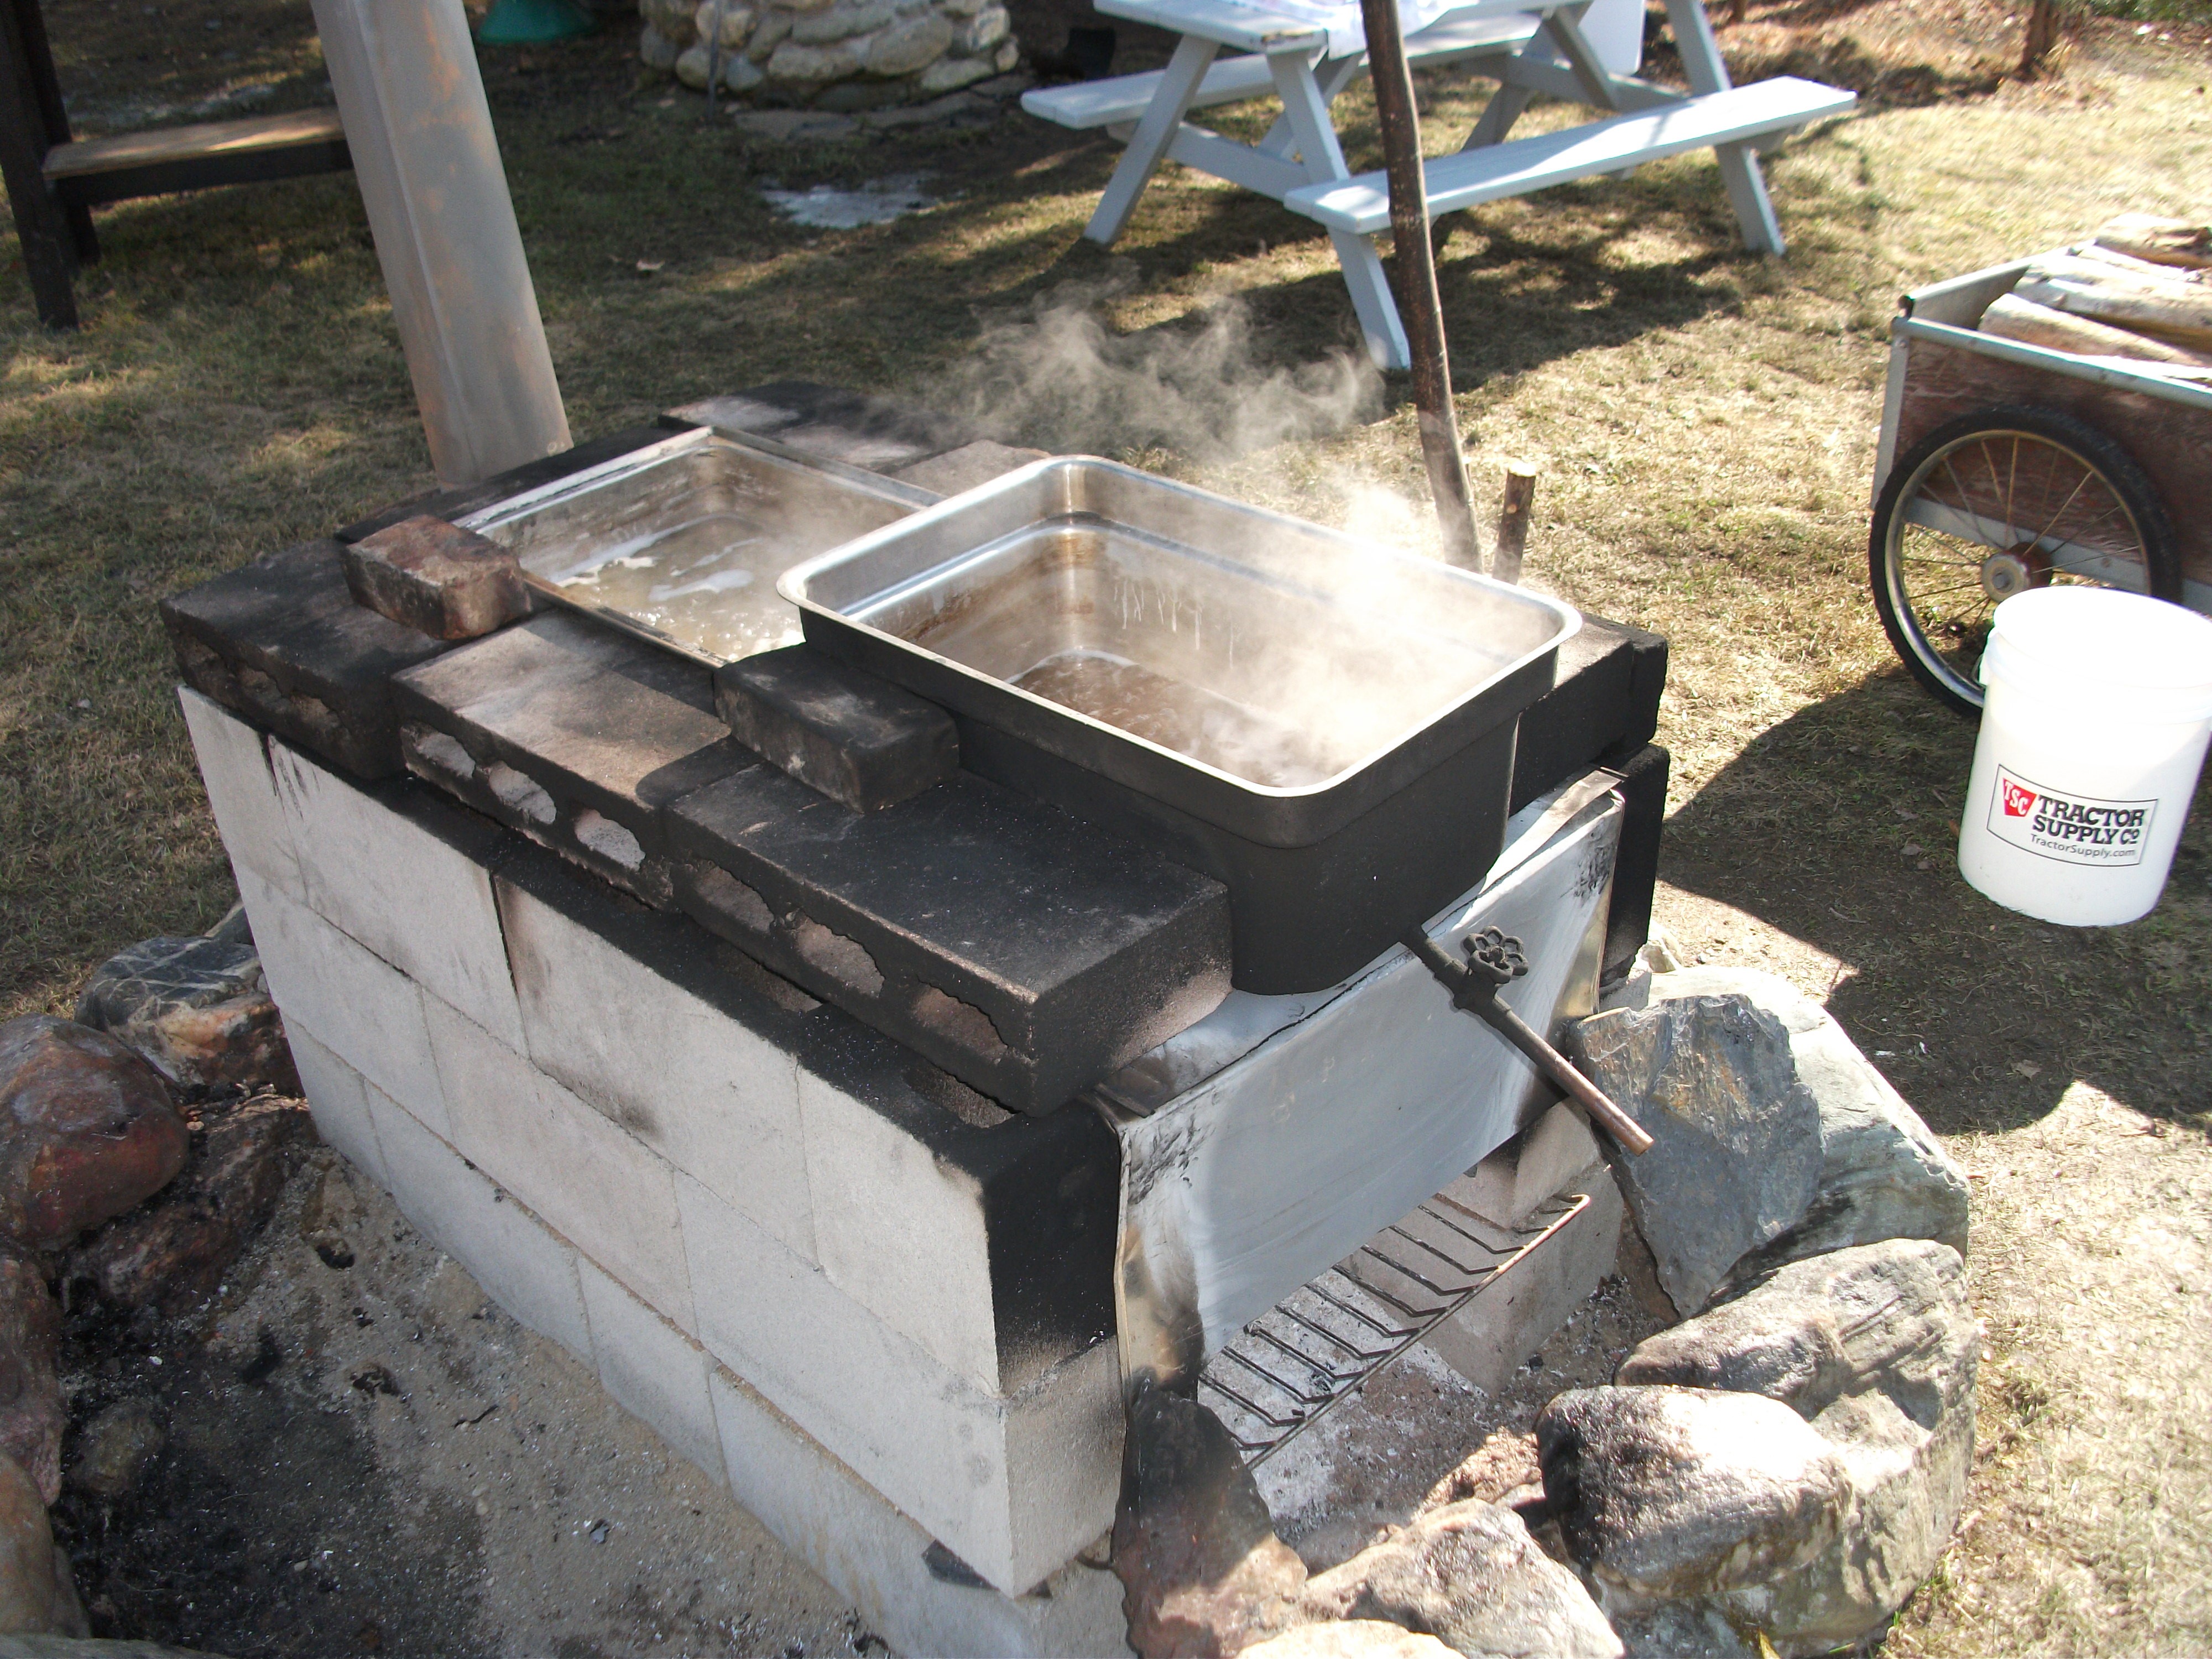 The sap pans are place together for boiling. I got a deep pan from a friend which had a drain pipe already installed. To help keep the pans hot during the boiling process I would place old bricks around the outside of the pans.
I would initially place sap in both pans. As the sap would condense I would transfer the sap from the back pain to the deep pan and put new sap in the back pan. An old 6 or 8 in. cheap frypan is great to transfer the sap.
I took an 18 in. section of the original 7 in. stove pipe piece to use as a firebox door. I bent a 4-5 in. area at the top of this piece of metal, which I would then shove under the deep (front) pan. I would remove this sheet to put in more wood, then replace it (fire gloves are needed!). The area under the lower oven racks is open, creating a nice draft for the fire.
When all of the sap was finished from the back pan, I would fill the back pan with water. When the deep pan was getting closer to being finished, I would drain the almost syrup into a deep pot to take indoors to finalize on the stove. I would filter the almost syrup through a couple layers of clean, white cotton (old T-shirts) clipped to the top of the deep pot. This helped to remove some of the sugar sand. I’d also put water back in the deep pan to warm up the water while the fire would die down (for clean up later).
This set-up worked quite well for me, for 3 seasons. Materials would need to be replaced over time. The blocks would shift a bit as the ground under the blocks would thaw out with the heat from the fire.
The main drawback was the fact that this type of evaporator system is not that efficient. However, wonderful maple syrup is made with this set-up, just like with more expensive evaporators. I got “addicted” to this annual event, so I eventually got a 2×4 evaporator from Leader and converted a garden shed to a small sugar shack. This new system is very efficient and a joy to use!


